bluename
How to Water Philodendron Selloum Without Root Rot (Pro Tips)
Let me save you the heartbreak right now. 90% of indoor plants die from overwatering. And Philodendron Selloum? It's one of the most forgiving plants I know — until you drown it. I killed my third Selloum before I figured this out. The fix is simple: water only when the top 2 inches of soil feel bone dry, use a pot with drainage holes, and never let it sit in standing water. That's the whole secret to watering Philodendron Selloum without root rot. Now let me walk you through exactly how I do it, with the mistakes I made so you don't repeat them.
I've been growing Philodendron Selloum (also called Thaumatophyllum bipinnatifidum) for over six years now. I've lost count of how many I've nursed back from the brink. What I'm about to share isn't textbook theory. It's trial and error, dirt under my fingernails, and a few sad, squishy roots along the way.
The Three Mistakes That Almost Made Me Quit
Mistake #1: Watering on a Schedule Instead of Checking the Soil
I used to water my Selloum every Monday. Like clockwork. I felt so responsible. Then the leaves started yellowing and drooping. The stem near the soil turned dark and mushy. Classic root rot from overwatering.
Here's what I learned the hard way. Your Selloum doesn't care what day it is. It cares about moisture. The top few inches of soil need to dry out completely between waterings. I now stick my finger into the soil up to my second knuckle. If it feels damp at all, I close the watering can. Simple as that.
Mistake #2: Brushing Off Light Requirements
I thought my bright living room window was perfect. But direct afternoon sun scorched the big split leaves, and the plant got stressed. Stressed plants drink differently. They became more vulnerable to root rot because I couldn't read the signs.
Philodendron Selloum thrives in bright, indirect light. Think of a spot near an east-facing window or a few feet back from a south or west window. I finally moved mine to a north-facing room with a grow light, and it bounced back within weeks.
Mistake #3: Using a Pretty Pot with No Drainage
I once bought a gorgeous ceramic pot with no holes. I added a layer of gravel at the bottom, thinking that would help. Big mistake. The water pooled below the roots with nowhere to go. The roots sat in moisture constantly. Rot followed within ten days.
Drainage holes are non-negotiable. If you love a decorative pot, use it as a cachepot. Keep the Selloum in a plastic nursery pot with holes, and slip that inside the pretty one. When you water, take the inner pot out, let it drain fully, then place it back.
My Proven Watering Method (Step by Step)
About two years ago, I finally developed a routine that worked. I've used it on every Selloum since. Follow these steps, and you'll avoid the soggy mess I created more times than I'd like to admit.
Step 1: Check Soil Moisture First, Always
Before I even pick up the watering can, I do two checks. First, the finger test — insert into the top two inches. Second, pick up the pot. A dry pot is noticeably lighter. I also use a cheap moisture meter for deeper pots. It takes five seconds and removes all guesswork.
Step 2: Water Deeply, Not Frequently
When I do water, I water until it runs out the drainage holes. This ensures the entire root ball gets saturated. Then I wait. I let every drop drain out. I never let the saucer sit with water in it for more than 15 minutes.
The key shift for me was understanding the soak-and-dry cycle. In nature, tropical downpours saturate the soil, then the ground dries significantly. Recreate that pattern. Drench thoroughly, then let the soil approach dryness before the next watering.
Step 3: Adjust for Seasons and Environment
My Selloum drinks way less in winter. Growth slows, evaporation drops. In summer, especially if the room gets warm, I check more often. I live in a dry climate, so my plant needs water about every 10-14 days in summer and every 3-4 weeks in winter. But you might be different. It depends on your humidity, temperature, and pot material.
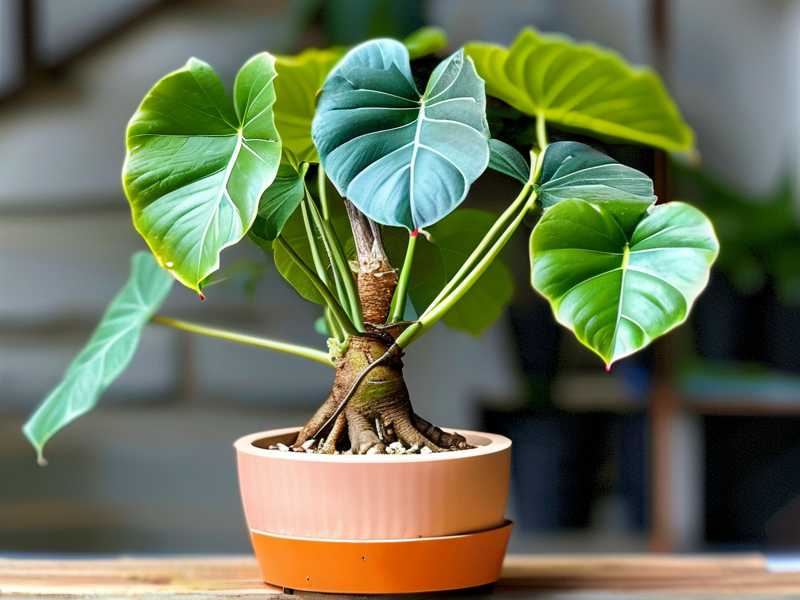
Terracotta pots dry out faster than plastic. My small terracotta pots need frequent checks. My large plastic pots stay moist longer. Get to know your own environment. Your plant will literally show you when it's thirsty.
My Two-Week Observation Log
I wanted to prove this method works, so I rearranged my watering approach and documented it. Day one, I watered my healthy Selloum deeply. The soil felt fully saturated, and water ran freely from the bottom.
Days three through six, I left it alone. The top inch was dry by day four, but my finger check showed dampness at two inches. I resisted the urge to water. This was hard for me at first. I used to think dry-looking topsoil meant the whole plant was thirsty. Now I know better, and I remind myself constantly.
Day seven, the soil felt dry to two inches deep. I watered again. Same thorough soak, same complete drainage. Days eight to eleven, the leaves looked robust and glossy, pointing upward. No yellowing, no droop. By day fourteen, the cycle continued, and new growth emerged at the center.
I kept a simple chart on my phone to track this. After two weeks, I found my plant actually grew. The old leaves maintained firm structure. The soil didn't smell sour. That musty smell is one of the first signs of root rot from overwatering, so its absence was reassuring.
Tools and Products That Saved My Selloum
I'm not sponsored by any brand here. These are just what legitimately works for me.
Choose the Right Pot
For me, a nursery pot inside a decorative cachepot works best. It feels simple and effective. Whatever you choose, make sure it's only slightly larger than the root ball. Too much extra soil holds too much moisture, which plants hate. The root system won't fill the space, leaving wet pockets that invite fungus and rot.
Pick a Chunky, Fast-Draining Soil Mix
Standard potting soil alone is too dense. It compacts and retains water for too long. I mix my own now: two parts high-quality potting mix, one part perlite, and one part orchid bark. This blend allows more air to reach the roots. Oxygen around the roots is critical in preventing root rot.
Consider a Moisture Meter
I used to think moisture meters were gimmicks. Then I bought a simple one, and it changed everything. It's basically a metal probe that measures moisture content at root level. I rely on it for my deeper pots, where my fingers can't reliably reach. Many people think the meter should read completely dry, but I target a consistent level at which the plant is hydrated yet not waterlogged. It offers peace of mind.
Water Quality Matters More Than You Think
Stop and think about what comes out of your tap. City water often contains fluoride and chlorine, and Selloum can be sensitive to chemical buildup. I now use filtered water or leave tap water in an open container for 24 hours so the chlorine evaporates. It's an easy adjustment that reduces plant stress and helps your Selloum handle normal moisture levels without getting overwhelmed. This is especially helpful if you’ve been experiencing leaf tip browning and are unsure why.
Signs of Root Rot You Must Not Ignore
Catch the issue early, and you can often save the plant. Catch it late, and you're likely shopping for a replacement. Here's what to watch for.
Yellowing Lower Leaves
The oldest leaves turn yellow and feel limp. Many people assume this means the plant needs more water. Adding more water will only worsen the rot. Check the soil. If it's wet, stop watering immediately.
Soft, Mushy Stems
If the base of the stem feels soft or looks dark brown, that's serious. It's an infection moving upward. This happened to a prized Selloum of mine. I had to remove all the mushy parts immediately.
Sour Smell from Soil
Healthy soil smells earthy. Rotting roots produce a sour, stagnant odor, like a swamp. Trust your nose. If something smells off, investigate the roots.
What to Do If You Already Have Root Rot
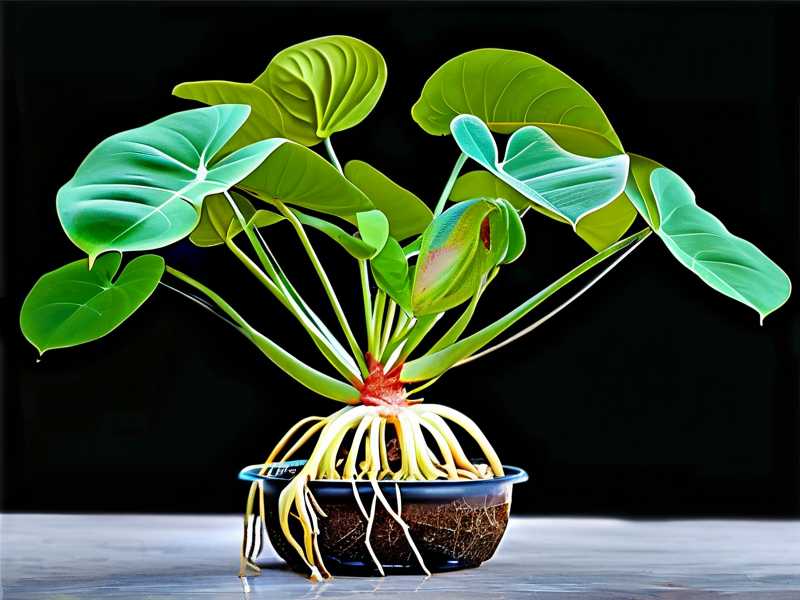
First, take a deep breath. This isn't necessarily fatal. I've saved plants from the brink multiple times. Carefully remove the plant from its pot and shake off the soil. Rinse the roots gently in lukewarm water. Now you'll see the damage. Healthy roots are firm and white or light tan. Rotten roots are brown, black, and slimy. Get out your sterilized scissors and make the cut — remove every damaged root. Be ruthless. Leaving dead tissue invites more fungus.
Next, treat the remaining roots. I soak in a diluted hydrogen peroxide solution (roughly one part peroxide to three parts water) for a few minutes as a precaution. Then repot in fresh, sterile mix. Wait a few days before watering to let new roots adjust. Give it bright, indirect light and good airflow. You'll know you've succeeded if new growth appears within a few weeks.
Crafting the Ideal Home Environment for Your Selloum
A watering schedule is only one part of the picture. The right conditions make watering forgiving. It also helps the plant bounce back if you make a mistake.
Light Levels That Actually Work
Selloum prefers bright, indirect light. Direct sun can burn the large, thin leaves. Too little light means it drinks less, which can lead to accidental overwatering if you're on a set schedule. I've found a spot two feet away from an east-facing window to be my sweet spot. This provides the right amount of energy for growth without stress.
Humidity and Temperature Sweet Spots
These tropical beauties appreciate higher humidity. In winter, my home's dry air is brutal, so I run a small humidifier nearby. If you don't have one, grouping plants together helps. A pebble tray with water beneath the pot also works. Keep temperatures between 65-80°F. Cool drafts or sudden temperature changes can shock the plant. If it’s stressed, its water uptake can be inconsistent, making rot more likely. Unless you are watering with cold water, aim for room-temperature water every time. Cold water can shock tropical roots.
My Real Experiments With Different Approaches
I don't expect you to follow my exact routine without questioning it, and I'm glad if you don't. I've tried other approaches, and I want to share what I found useful.
The Bottom-Watering Test
I tried bottom-watering for two months. I sat the pot in a tray of water and let it wick moisture upward. It worked beautifully for even moisture distribution. Honestly, I loved it. The downside is that salts from fertilizer accumulate at the top layer of soil.
Because of this, some experts actually recommend top-watering every month. This flushes out excess salts. What works best for me is a hybrid approach: bottom water when possible, and do a deep top-watering monthly. Both methods need the key rule to apply — never leave the pot sitting in water for an extended time. Once the topsoil feels moist, remove the pot from the tray.
Learning from Failures
I have had more than a few plants die due to insufficient airflow. My apartment gets stuffy. I moved my Selloum next to a drafty area, thinking the breeze was fine. Instead, it stressed the leaves and they curled. Curling leaves indicate stress and can slow water uptake, which then leads me to overwater. Now, I make sure there's gentle airflow, not a direct blast from a vent. A simple fan on low across the room works well.
Common FAQ on Watering Philodendron Selloum
How do I know the exact day to water again?
There is no single exact day. You must check the soil. When the top two inches feel dry, it's time to water. You can also lift the pot. It should feel light. These are signs your Selloum is thirsty. In my home, this averages every 10 days in summer. In winter, it might be closer to a month. It varies based on humidity, pot type, and temperature.
Can I use ice cubes to water my plant?
I would caution against it. Ice cubes can shock tropical roots. They also water unevenly. Some areas get too wet while others stay dry. Use room-temperature water evenly instead. This keeps soil moisture consistent and helps your Philodendron Selloum stay healthy.
Should I mist the leaves when watering?
Misting won't hurt, but it also doesn't provide lasting humidity. It can sometimes lead to bacterial leaf spots if water sits in the crevices too long. I've moved away from misting and use a humidifier for better results. It's more effective for the large leaves, especially during dry months. Plus, it helps maintain even moisture across leaf surfaces.
The Tried-and-True Summary from My Experience
Learning how to water Philodendron Selloum without root rot isn’t really about following a rigid schedule. It’s about watching your plant, feeling the soil, and adapting. I know it took me several go-arounds to get to this level of instinct, and you'll get there, too. You'll learn how your soil feels when it's ready for a drink, and how your pot's weight changes. This connection with your plant is what makes this hobby worthwhile.
Start with the finger test. Use a pot with real drainage holes. Choose a chunky soil mix. Give it enough bright, indirect light. When you follow those steps, you have already won 90% of the battle. Once you build a proper watering routine, the most common problem disappears. You won't need to rescue your plant from root rot because you'll stop the silent killer before it takes hold.
Just remember not to panic if you see one yellow leaf. But if you see multiple yellow leaves along with a musty soil smell, it's time to inspect the roots. The RHS has some fantastic resources on indoor plant care that I referenced when I started. And the AHS highlights the importance of proper drainage in container plants. They both emphasize avoiding overwatering, which is the leading cause of houseplant failure.
I truly hope your Selloum thrives. The split leaves are so rewarding when they're healthy and perky. Leave the guilt behind, trust the process, and always trust your finger before the clock. And don't be too hard on yourself if your first few attempts don't work out. We've all been there. I can't count how many times I drowned a plant I thought needed saving. Now I know better. You will, too.