 bluename
 Want more blooms on your Hoya polyneura? I'll show you exactly how to prune it step-by-step, based on my own trials and errors. And here's the short answer: prune right after flowering ends, cut just above a node, and don't be afraid to take 20-30% of the growth.
I have grown Hoyas for about six years now. My polyneura was a sad, leggy thing for the first year. I was scared to cut it. I thought I'd ruin it. Let me tell you, holding back was the biggest mistake.
The difference between a sparse plant and a full, blooming cascade is often just a few strategic snips. It sounds counterintuitive. Cutting growth to get more growth? But that's how these beauties work. When you prune, you force the plant to activate dormant nodes. Those nodes become new vines, and new vines mean more spots for flowers to form.
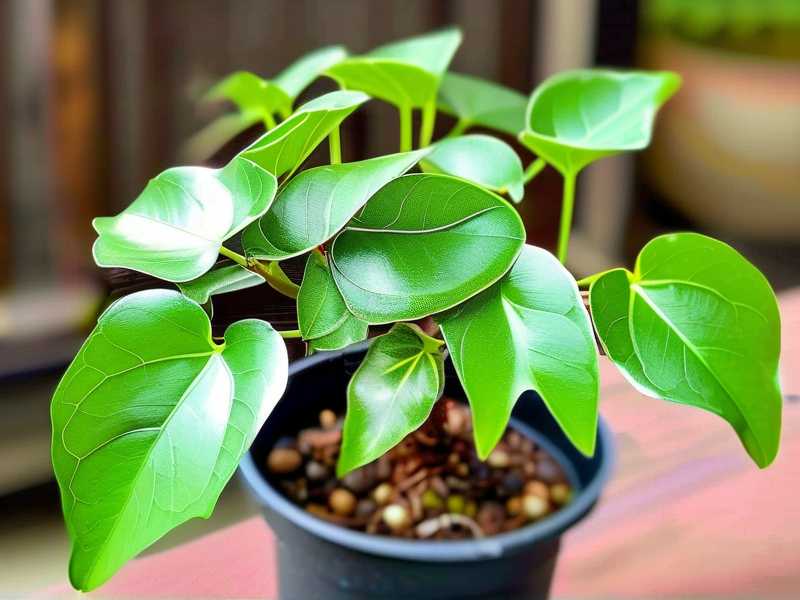
Here is what we'll cover, nice and simple:
- Why pruning is non-negotiable for flowers.
- The exact tools you need (and how to clean them).
- A step-by-step guide to making the cuts.
- The biggest mistakes I see people make (and what I did wrong).
- What to do with the cuttings (because you should propagate them).
- Aftercare to get those blooms popping.
- Common questions, answered.
Let's get your polyneura looking like the gorgeous, trailing, fishbone-leafed specimen it's meant to be. Enough sitting on the sidelines. Grab your scissors.
Why Pruning Actually Triggers More Flowers
I used to think leaves were the engine of the plant. Seems logical, right? But the growth hormone, auxin, is produced at the very tip of each vine. It travels down and tells all the other buds, "Stay put. I'm in charge here." That's called apical dominance.
The moment you snip that tip, the plant panics a bit. It releases those dormant buds lower down the stem. They start growing. This creates more vines. More vines mean more peduncles (that's the little spur where the flowers grow). More peduncles, well, that's the magic right there. Simple as that.
I remember reading advice from the RHS about tip pruning to encourage bushier growth. It works on so many plants, not just Hoyas. But with polyneura, it's essential. Without it, you get a long, bare stem with a few sad leaves at the end. With it, you get a full, bushy plant.
The Tools You Need (And Why Your Kitchen Scissors Are a Bad Idea)
Look, I used kitchen scissors on my first plant. They were clean, I thought. They were not. They crushed the stem instead of making a clean cut. That crushed tissue invited rot. I lost that vine.
Don't be like me.
What you actually need:
- Sharp pruning shears or bonsai scissors. They need to be sharp enough to cut through a stem in one clean snip. No sawing.
- Rubbing alcohol (70% isopropyl). This is non-negotiable.
- Cotton balls or a clean cloth.
Before you make any cut, clean the blades with the alcohol. This kills any potential fungus or bacteria. You wouldn't have surgery with a dirty knife. Don't do it to your plant. I clean mine again between the last plant I pruned and my hoyas. Prevention is easier than cure.
My Step-by-Step Pruning Guide
Okay, here's where the rubber meets the road. This is the exact method I use on my own polyneura. It's one of the most forgiving Hoyas for beginners, by the way. The stems are thin and easy to see the nodes.
Step 1: Identify the Nodes
This is the most important skill. Nodes are the little bumps on the stem where leaves have emerged, or where they used to be. They look like tiny joints. You want to leave a small section of stem, about 0.5 to 1 inch, BELOW your cut point. This is your safety margin. If the cut backfires, the node still has a chance to survive.
Step 2: Find the Right Spot
Two options here.
Option A: Pruning for Branching (The Encouragement Cut) This is your primary tool for getting a fuller plant. Find a node where you want new growth to emerge. You might want to pick one that is halfway up a long, bare vine. Then, simply cut the stem above that node. The plant will usually push new growth from that node. Often, it will push two new vines, one from each side of the leaf scar.
Option B: Pruning Back Leggy Growth (The Cleanup Rejuvenation) If you have a vine that's gone completely bald for a foot, you can chop it back hard. Find a node low on the plant, near the base, and cut just above it. You might lose that full vine, but the plant will use that energy to start new, healthy growth from the base or lower down. It's a leap of faith, but it works.
Step 3: The Clean Cut
Make a single, sharp cut at about a 45-degree angle. Why 45 degrees? It discourages water from pooling on the cut surface. You don't want water sitting there, especially in a humid environment. Rot is the enemy.
Step 4: Watch and Wait
Here's the part that tests your patience. New growth doesn't appear overnight. It might take 2-3 weeks. I recently cut my own plant back on the 1st, and I'm just seeing tiny green spears now. This is where people get impatient and think they killed it. Just wait. It's working.
My 2-Week Observation After Pruning
I want to show you what I did, so you know what to expect. I did a moderately hard prune on my Hoya polyneura two weeks ago. It was out of control, one vine was about 6 feet long with just a cluster of leaves at the end.
Week 1: The Waiting Game Initially, nothing visually happened. I admit it. I kept checking every day. The cuts healed cleanly, they looked like little white dots. No rot, which was a relief. The plant seemed focused on surviving the cut, not pushing new growth yet. I kept it in its usual bright, but indirect light. I did not water it any more than usual. That’s crucial. New growth is tender, but pushing roots with water is a different story.
Week 2: The First Signs of Life Just last weekend, I noticed tiny bumps appearing at the nodes below my cuts. They're green and barely noticeable at first. Today, one of them is clearly a tiny leaf, unfurling. It's a rush, honestly. It’s proof the plant isn't dead and responds to the cut. I counted, and I have at least four new growth points from a vine that previously had one. That's the entire point. You orchestrate the shape.
The 3 Deadly Mistakes for Newbies
People mess this up all the time. I did. Let's not waste your time and plant's life.
Mistake #1: Overwatering
This is the #1 killer. Most people don't understand how these plants store water in their leaves. They have plump, thick leaves for a reason. That means they like to dry out.
My advice: Let the potting mix go almost completely dry between waterings. Stick your finger in the soil, an inch or two down. If it's damp, leave it. If it's bone dry, you can water.
90% of indoor plants die from overwatering. The leaves will get mushy, turn yellow, and the whole plant is susceptible to root rot. After pruning, your plant is already stressed. Watering too much is like kicking it while it's down. You drown the roots, and the new growth just shrivels up.
Mistake #2: Wrong Light
In direct sun, the thin, white-ish veins on the polyneura can scorch. In the dark, it forgets to grow. It's a Goldilocks situation.
My advice: Give it bright, indirect sunlight. A few feet back from a south or west-facing window is perfect. True story: I had mine in a northern window for a year. It grew, but so slowly I thought it was sick. When I moved it to a shelf near a west window, the growth difference in a month was visible. Light is the fuel for the flowers.
Mistake #3: The Wrong Pot
Using a gigantic pot is a trap. The soil stays wet for too long because there aren't enough roots to drink the water. It basically creates a swamp at the bottom of the pot. Same problem - root rot.
My advice: Hoyas like to be root-bound. They actually bloom better when their roots are packed in a snug pot. I keep my polyneura in a 4-inch pot, and it's happy. Gerrit, from my local nursery, told me, "It's about the foot, not the room." Meaning, the smaller pot keeps the roots tight and dry, which is what triggers them to focus on blooming rather than growing roots. I try to repot only every 2-3 years, and even then, I move it up only 1-2 inches in pot size.
What to Do With Your Cuttings (Propagation)
Don't you dare throw those cuttings away! That’s free plants. Every piece you cut is potentially a new Hoya polyneura. I've built my entire collection from a single mother plant this way.
The Water Method: This is what I use. It's simple to observe.
- Take your cutting and let it callus over for a few hours. This means the cut end will dry out slightly. It helps prevent rot.
- Place the stem in a jar of filtered water. Just the bottom node needs to be submerged.
- Put it in a bright, warm spot. Out of direct sun.
- Leave it. Don't change the water every day! I top it up as needed. After about 3-4 weeks, you should see little white roots. They look like little fuzzy worms.
The Moss Method: This is a favorite among many serious growers.
- Moisten some sphagnum moss.
- Wrap it around the cut end and the node.
- Put it in a clear plastic bag or a propagation box to keep the humidity up.
- It takes about the same time to root.
As soon as those roots are about 2 inches long, you can pot them up in a small pot with a well-draining mix. Keep the soil lightly moist for the first week or two. Then, treat them like a normal polyneura.
The Best Fertilizer Routine for Flowering
Pruning gives you the framework. Fertilizer gives you the energy.
I am not a chemist. I don't have a lab. I use the simplest, most reliable method I know.
I use a balanced, water-soluble fertilizer. Something like a 10-10-10, or even a bit higher in phosphorus (the middle number) to encourage blooms. During the growing season, which is spring and summer, I feed my polyneura every other watering. The moss method is great, but it holds moisture and can cause rot if you're not careful.
I learned this from a grower who worked at a big nursery. She said to always remember: "What you water, you feed." If they are in a period of rapid growth (like right after pruning), they need food.
I stopped feeding mine in October and start again in March. This gives it a rest. The temperature in my house drops a bit in winter, and the light gets weaker. The plant just holds steady until spring. This rest period is often crucial for flower induction.
Aftercare: Giving Your Pruned Plant the Best Chance
You did the surgery. Now you have to manage the patient. It is not complicated.
Light: Keep it in that bright spot. Remember, sunlight is the energy source. Plants need energy to push out new leaves. No energy, no flowers.
Water: The mix needs to be moist but not soaking wet. This is the hard part for people used to normal plants. But a polyneura can literally survive a drought. When in doubt, wait another day.
Humidity: This is where you might see a difference. Polyneura comes from a tropical environment. I live in a dry area. I found that my plant puts out more growth when I give it more humidity. I don't run a full humidifier. I just have a tray with pebbles and water under the pot. It gives a little localized moisture boost. It's enough.
Watch for Pests: Pruning opens up the plant, which is great. But it also creates wounds. Keep an eye out for mealybugs or spider mites in the nooks and crannies. I check new growth with a flashlight every week.
Common Questions About Pruning Hoya Polyneura (FAQ)
Should I prune my Hoya polyneura before it blooms?
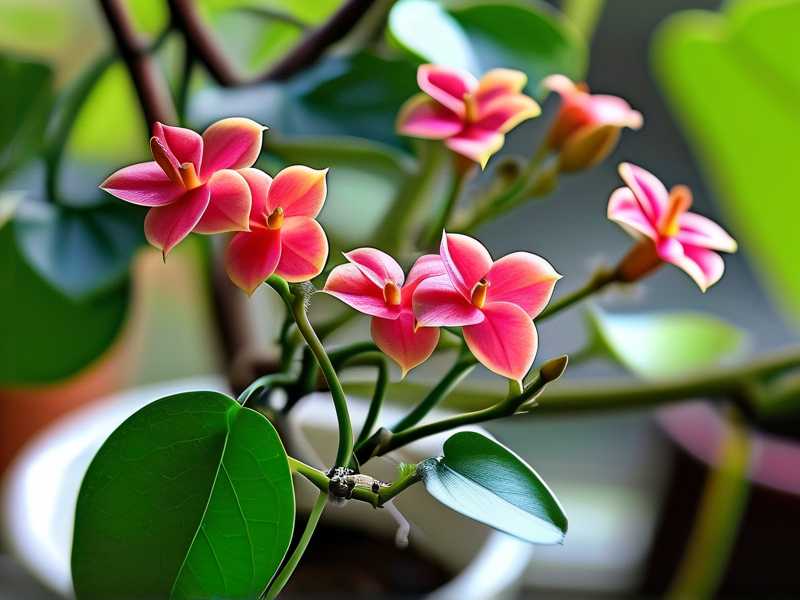
No way. You should prune after the flowers have faded. This is the golden rule. If a bloom is on the way, you do not want to snip it off. Pruning after blooming encourages new branches right at the point where the old flower was. Next year, you'll get an even bigger crop of flowers.
While we are at it, what about the peduncle?
I used to cut the flower umbel off and leave the little stub. TheRHS explicitly says to leave it be. You should not cut off the peduncle (the short brown spike). New flowers can grow from the same peduncle next season. Let it stay on the plant. Don't touch it, just let it be.
My pruning cuts turned black. What should I do?
Usually, black spots indicate rot. This happens if the cut was made in a place where water pools, or if the plant is in too humid an environment. Don't panic. Cut the black part off, going back a little further into clean, healthy tissue. Then, let it dry for a day or two before you put it back in its normal spot. Ensure the soil is not holding too much moisture and that the wound gets some airflow.
So, there you have it. Pruning is not a chore. Once you get the basics, it's how you shape your plant into a blooming machine. Don't be afraid to be a little bold. I promise it recovers. The only hard part is waiting for the new growth to appear. When you see those tiny green tips, you'll understand the entire process. It is simply the best feeling.
Just remember to be patient. The plant isn't lazy. It's just working on your time, not its own.





