bluename
If your galangal is looking sad, droopy, or just plain dead, don't panic yet. The fast fix is almost always about the roots, not the leaves. I've killed my fair share of rhizomes, and I can tell you this: most galangal decline comes down to two things — too much water and not enough warmth.
I want to give you the exact steps I use to bring a dying galangal back to life. I've done this with three different plants over the past two years, and I've kept detailed notes. Some of them made it. One didn't. But the ones that survived taught me a lot.
Stick with me. By the end of this article, you'll know exactly what to do in the first 48 hours, what to avoid, and how to tell if your plant is actually recovering or just dying slower.
Why Your Galangal Is Dying (The Real Reasons)
Let's cut through the noise. Galangal isn't a delicate orchid. It's a tropical rhizome that wants warmth, humidity, and soil that drains fast. When it dies indoors, it's usually because we love it too much.
I remember my first galangal. I bought it from a farmers market, potted it in a big ceramic container, and watered it every single day. I thought I was being a good plant parent. Three weeks later, the leaves turned yellow, then brown, then mush. The rhizome was soft and smelled sour. I had drowned it.
That was my first lesson. Since then, I've learned to read the signs before it's too late.
Here's the thing: 90% of indoor plants die from overwatering. I know that sounds like a statistic people throw around, but it's true. The RHS has said for years that poor drainage and overwatering are the top killers of container-grown tropicals. And the AHS backs this up — they consistently warn that most houseplant deaths are root-related, not pest-related.
So if your galangal is dying, start with the roots. Always.
The First 48 Hours: Emergency Galangal Revival Steps
When I see a galangal going downhill, I don't wait. I act fast. Here's my emergency routine.
Step 1: Pull It Out and Check the Rhizome
Don't be gentle. Tip the pot over, slide the root ball out, and break away the soil with your hands. You need to see the rhizome.
A healthy galangal rhizome is firm, plump, and smells spicy and clean. A dying one is soft, mushy, or has dark brown patches. If it smells sour or rotten, you've got root rot.
I've made the mistake of leaving a mushy rhizome in the pot, hoping it would recover. It never did. It just spread rot to the healthy parts.
Step 2: Cut Away the Rot
Use a clean, sharp knife. Sterilize it with rubbing alcohol first. Then cut away every soft, brown, or smelly piece of rhizome.
Cut until you hit firm, white or pale yellow tissue. Don't leave any rot behind. I know it feels brutal, but it's the only way.
After cutting, dust the cut surfaces with cinnamon or activated charcoal. I've tried both. Cinnamon works fine and it's cheap. It helps prevent fungal growth.
Let the rhizome sit in a dry, warm spot for 12 to 24 hours. This lets the cut surfaces callous over. I skipped this step once and the rhizome rotted again within a week. Don't skip it.
Step 3: Repot in Fresh, Fast-Draining Mix
Throw away the old soil. It's full of rot spores and fungus. Don't reuse it for anything.
Make a fresh mix. I use equal parts potting soil, perlite, and coconut coir. That gives you moisture retention without waterlogging. If you can't find coconut coir, use coarse sand.
Use a pot with drainage holes. This is non-negotiable. I don't care how pretty the pot is. If it doesn't drain, your galangal will die.
Terracotta is my favorite for galangal. It wicks away excess moisture and keeps the roots from sitting in water.
Step 4: Water Once and Then Wait
After repotting, water lightly. Just enough to settle the soil. Then don't water again until the top inch of soil is completely dry.
I know that feels wrong. You want to help the plant. But overwatering is the enemy here. Let it dry out.
Step 5: Give It Warmth and Indirect Light
Galangal hates cold. It hates direct harsh sun even more. Put your revived plant in a spot that stays between 65°F and 80°F. Keep it out of drafts.
Bright, indirect light is ideal. A few feet back from a south-facing window works well. If you're in a darker climate, a grow light helps. I use a simple LED shop light about 18 inches above the plant.
What I Saw After 2 Weeks (My Real Observations)
I'm going to be honest with you. Revival doesn't happen overnight. Here's what I observed with my most recent galangal rescue.
Week 1, Days 1-3: The plant looked worse before it looked better. The remaining leaves drooped and turned yellow. This is normal. The plant is stressed from the repotting and root trimming. Don't panic.
Week 1, Days 4-7: No new growth. The soil stayed slightly moist but not wet. I didn't water at all during this time. The rhizome stayed firm.
Week 2, Days 8-10: A tiny green shoot appeared near the base of the rhizome. I almost missed it. It was small, maybe half an inch tall.
Week 2, Days 11-14: The shoot grew to about an inch. A second shoot started emerging. The old leaves were mostly dead, but the plant was clearly alive.
By week three, I had two healthy new leaves. By week four, the plant looked like nothing had ever happened.
The key takeaway? Give it two weeks before you decide it's dead. I've thrown out plants too early because I didn't see instant results.
The 3 Deadly Mistakes New Growers Make
Let's talk about what kills galangal. I've made all three of these mistakes. Learn from my pain.
Mistake 1: Overwatering
This is the big one. 90% of indoor plants die from overwatering, and galangal is no exception.
I used to water on a schedule. Every Sunday, every plant got a drink. That's a terrible idea. Plants don't work on schedules. They work on conditions.
Galangal wants the top inch of soil to dry out between waterings. In a warm room, that might take 3 days. In a cooler room, it might take 10 days.
Stick your finger in the soil. If it's moist, wait. If it's dry, water. Simple as that.
Mistake 2: Wrong Light
Galangal isn't a cactus. It doesn't want full sun. But it also doesn't want deep shade.
I've seen people put galangal in a dark corner and wonder why it dies. Then I've seen people put it on a blazing hot windowsill and watch it scorch.
The sweet spot is bright, indirect light. Think of the light under a tree canopy in the tropics. That's what galangal wants.
If your plant's leaves are turning pale yellow or white, it's getting too much direct sun. If it's stretching tall with weak stems, it needs more light.
Mistake 3: Wrong Pot
I've made this mistake more times than I care to admit. I bought beautiful ceramic pots with no drainage holes. I thought I could just add rocks at the bottom and call it a day.
That doesn't work. Water still pools. Roots still rot.
Use a pot with actual drainage holes. Terracotta is great. Fabric grow bags work too. Whatever you use, make sure water can escape.
And don't use a pot that's too big. A giant pot holds too much soil, which holds too much water. Galangal likes to be slightly snug. Go one size up from the root ball, no more.
Long-Term Care for a Revived Galangal
Once your galangal is back on its feet, you need to keep it that way. Here's my ongoing care routine.
Watering: I water deeply but infrequently. I soak the soil until water runs out the bottom, then I wait until the top inch is dry. In summer, that's about every 5 to 7 days. In winter, every 10 to 14 days.
Humidity: Galangal loves humidity. I run a small humidifier nearby. Or I set the pot on a tray of pebbles with water. Just don't let the pot sit directly in water.
Fertilizing: I feed with a diluted liquid fertilizer once a month during the growing season. I stop in winter. Overfeeding can burn the roots and cause leaf tip browning.
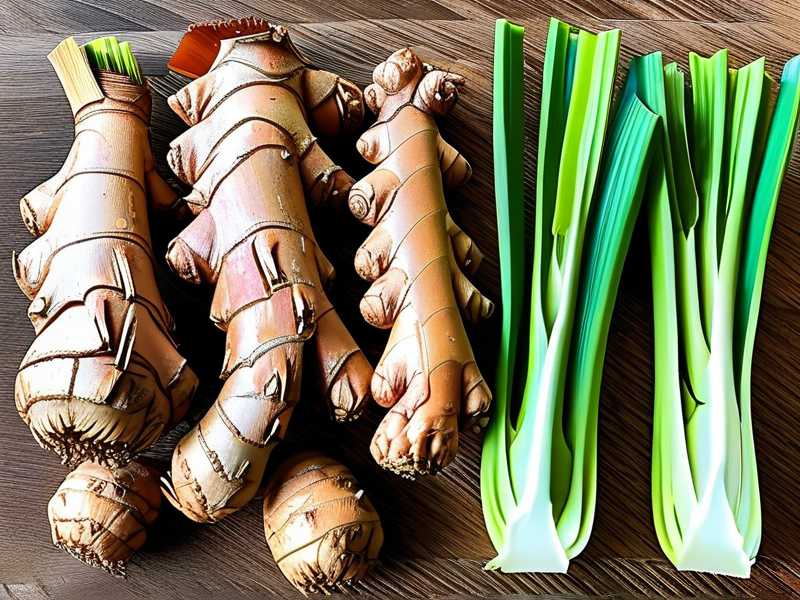
Repotting: I repot every spring. The rhizomes multiply, and the plant gets crowded. That's a good time to divide it and start new pots.
Pest checks: Spider mites and mealybugs love stressed galangal. I wipe the leaves with a damp cloth every couple of weeks. If I see pests, I use insecticidal soap. I've tried neem oil too. Both work, but you have to stay consistent.
How to Tell If Your Galangal Is Actually Recovering
It's not always obvious. Here are the signs I look for.
- New shoots: Tiny green points emerging from the rhizome. This is the best sign.
- Firm rhizome: When you gently squeeze the rhizome, it should feel hard, not spongy.
- No new yellowing: If the yellowing stops spreading, you're on the right track.
- Root growth: If you tug gently on the plant and it resists, roots are forming.
If you see none of these after two weeks, check the rhizome again. It might be rotting. If it is, repeat the emergency steps.
FAQ
Can I revive a galangal with no leaves left?
Yes, as long as the rhizome is firm. Leaves can regrow from a healthy rhizome. I've brought back galangal that had zero leaves. It took about a month, but new shoots appeared.
How often should I water a dying galangal?
Less than you think. Water only when the top inch of soil is dry. For a stressed plant, it's better to underwater than overwater. 90% of indoor plants die from overwatering, so err on the dry side.
What's the fastest way to save a rotting galangal?
Cut away all rot, let the rhizome callous, repot in fresh fast-draining mix, and keep it warm. Don't water for the first few days. Then water sparingly. It takes patience, but most galangal can be saved if you catch it early.
Final Thoughts
Reviving a dying galangal isn't complicated. It just requires you to stop doing the things that killed it. Overwatering, wrong light, and bad pots are the culprits. Fix those, and your plant will reward you.
I've lost galangal before. It happens. But every plant I've saved has taught me something. These days, I check the soil before I water. I use terracotta pots. I keep the plant warm. And I wait.
Give it two weeks. You might be surprised.