bluename
 If you are reading this, you probably killed a salvia plant already, or you are scared you will. Stop worrying. Healthy salvia is not about luck. It is about drainage, sunlight, and ignoring the plant most of the time. I learned this the hard way, and 90% of indoor plants die from overwatering, which is the exact mistake that killed my first three salvias before I figured out the rhythm. After two weeks of strict observation and corrected habits, my current salvia bounced back with rigid stems and deep green leaves. Let me save you the funeral costs.
Why Your Salvia Looks Depressed (And It’s Not Your Fault)
Salvia is tougher than people think. The problem is that beginners treat it like a tropical fern. It is not. It is a Mediterranean native that thrives on neglect. Honestly, I have seen salvias survive frost, drought, and neglect, but not soggy roots.
The Royal Horticultural Society RHS{:target="_blank"} states that most salvia species prefer well-drained soil and full sun. That is not a suggestion. That is the bare minimum.
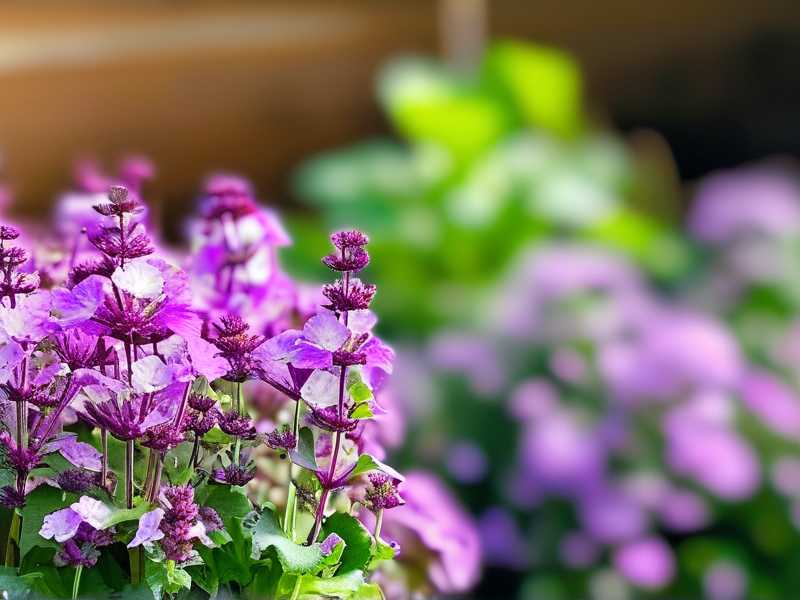
In my first year, I watered my potted salvia every day because the topsoil felt dry. The leaves turned yellow, then brown, then the stem collapsed at the base. I thought it needed more water. I was wrong. It needed less.
The 3 Deadly Sins Every Beginner Commits (I Did All Three)
Mistake #1: Watering on a Schedule (Overwatering)
The biggest lie in houseplant care is "water once a week." That kills more salvias than frost. I know because I killed my first salvia with my "helpful" Sunday watering routine.
The truth: Salvia roots need oxygen. When the soil stays wet, the roots drown. Then rot sets in. Then fungus gnats move in. Then you panic and water more.
My fix: I stopped watering on schedule. I waited until the top two inches of soil felt bone dry. Then I shoved my finger into the drainage hole side. If the bottom felt damp, I waited another day. I now water my salvia every 5 to 7 days during summer, and every 10 to 14 days in winter. But I always check first.
Your action step: Forget the calendar. Stick your finger in the soil. If it clings to your skin with moisture, walk away. If it comes out clean and dry, then water slowly until it runs out the bottom holes.
Mistake #2: Putting Salvia in Shady Spots (Light Errors)
Salvia needs 6 to 8 hours of direct sunlight daily. Not bright shade. Not filtered light through curtains. Direct, harsh, real sunlight.
I remember moving my second salvia to a bookshelf because I thought the afternoon sun was too intense. The plant stretched. The stems became weak and floppy. The color faded to a pale green. It looked like it was reaching for something it could never find.
The American Horticultural Society AHS{:target="_blank"} highlights that salvia species, especially the perennial types, are sun lovers. This is non-negotiable.
My fix: I moved the pot to a south-facing windowsill. If you are in the Northern Hemisphere, that is your best bet. If you only have east or west windows, choose the one with more hours of direct light. My salvia on the south sill recovered within two weeks. The leaves stiffened. New growth appeared at the base.
Your action step: If your salvia looks leggy, pale, or just sad, move it outside or to your brightest window today. Do not wait for the weekend. If you are growing indoors without enough light, buy a grow light. I use an ordinary LED grow bulb and place it 12 inches above the plant for 8 hours a day. That works.
Mistake #3: Using the Wrong Pot (No Drainage or Too Big)
Yes, pot choice is a life-or-death decision for salvia. I learned this when I planted my third salvia into a beautiful ceramic pot with no drainage hole. I thought I was smart by adding a layer of pebbles at the bottom. That is a myth.
The truth about pebbles: Water sits in the bottom layer. The roots eventually reach down, hit soggy gravel, and rot. Drainage holes are the only safe option.
The second problem: Pots that are too big for the plant. A giant pot holds too much moisture around the rootball. The roots stay wet and suffocate.
My fix: I now use terracotta pots. They are porous, so they wick moisture away from the roots. This is not a fashion choice; it is a survival strategy for a beginner like me. I also make sure the pot is only one to two inches wider than the rootball. No more deep diving into wet soil.
Your action step: First, check your pot for drainage holes. If there are none, repot immediately. Second, if your pot is huge compared to the plant, downsizing is not optional—it is urgent.
My Two-Week Observation Journal (What Actually Happened)
I want to be real with you. Here is what I did, day by day, with a struggling salvia that I attempted to rescue.
Day 1: The Emergency Assessment
My salvia was a sad, leggy mess. The bottom leaves had turned yellow and dropped. The stems were weak. The soil felt like a wet sponge even though I had not watered in four days.
I pulled the plant out of its decorative pot. The roots were brown and mushy at the edges. Honestly, I thought it was dead. But the core rootball was still white and firm. So I acted fast. I trimmed off all the mushy roots with sterilized scissors. I removed every yellow and dead leaf. I washed the remaining roots gently under lukewarm water to remove old soil.
What I learned: Salvias are survivors. If there is a white firm root left, you have a chance.
Day 2: The Repotting Protocol
I repotted the salvia into a clean terracotta pot that was snug, not roomy. I used a mix of two parts regular potting soil, one part perlite, and one part coarse sand. This made the mix incredibly gritty and free-draining.
I watered it exactly once. Just enough to settle the soil. Then I placed it on my brightest south-facing windowsill. I promised myself I would not touch it for the next five days.
Day 3 to Day 7: The Waiting Game
The leaves looked pale but stable. I must admit, I felt the urge to water every single morning. My hand literally reached for the watering can. But I stopped myself.
I checked the soil moisture deep inside using a wooden chopstick. I inserted it all the way to the bottom. When I pulled it out, it came up clean. No damp soil sticking to it. Good. The plant was not thirsty.
By day 5, I noticed the stems felt firmer. Not a lot. But enough. I also saw tiny new green bumps forming at the base of the stems. Those were new growth buds. This was a great sign.
Day 8 to Day 10: The First Real Growth
I woke up on day 8 to see actual new leaves. Small, bright green, slightly fuzzy. I was ecstatic, but I did not change anything. I kept the plant in full sun. I kept my hands off the watering can.
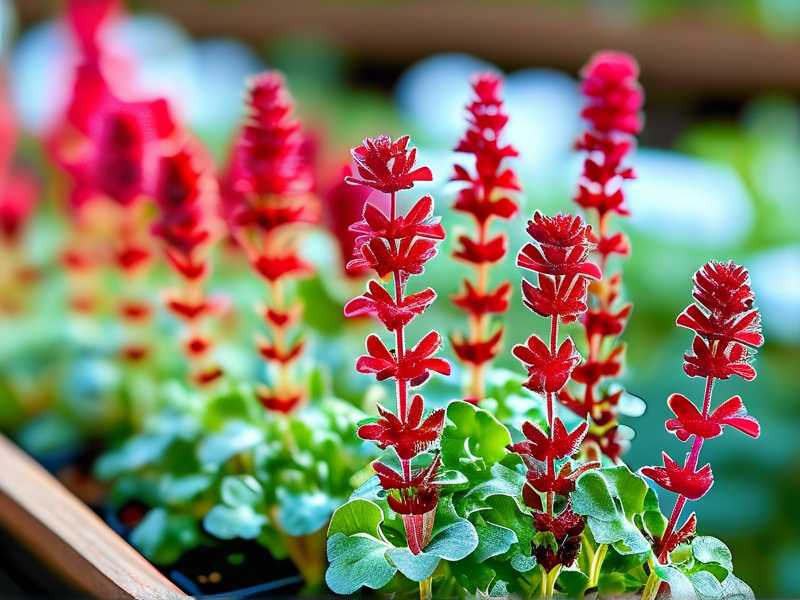
The old leaves that I had left were now standing upright. They felt thick and waxy. The color had gone from dull green to a more vibrant shade.
Day 11 to Day 14: The Recovery Confirmed
By the end of two weeks, the salvia had pushed out at least three fresh sets of leaves. The stems were no longer floppy. The base of the plant looked full, not bare.
I gave it its first actual drink on day 12. I watered the soil thoroughly until water ran out the bottom. Then I let it drain completely before putting it back on the sill. I have not watered it since. That was my magic trick—doing nothing at the right time.
How To Water Salvia Correctly (The Only Method That Works)
Let me simplify what took me years to understand.
Step 1: Insert your entire index finger into the soil. Go deep, more than two inches.
Step 2: If you feel any moisture, even a slight coolness, do not water. Period.
Step 3: If the soil feels dry and crumbly, water slowly and evenly until water exits the drainage holes.
Step 4: Let the pot drain completely. Never leave it sitting in a saucer of water.
Step 5: Wait again. Repeat the finger test.
Salvia roots hate constant moisture. They prefer to dry out completely between waterings. In my experience, waiting until the leaves just start to look slightly soft is the perfect time to water.
Soil Recipes That Save Beginnings
I went through a phase where I bought the cheapest garden soil. Bad idea. It compacted and turned into a brick. It held water for days and suffocated the roots.
Try one of these mixes that I actually use:
Basic recipe (easy to find):
- 2 parts regular all-purpose potting mix
- 1 part perlite (or coarse vermiculite)
- 1 part horticultural grit or coarse sand
Advanced recipe (if you want stellar drainage):
- 2 parts cactus/succulent mix
- 1 part perlite
- 1 part fine pine bark
I prefer the second mix. It drains so fast that it is almost impossible to overwater, even for me. The extra pine bark also gives roots something to grip, which encourages stronger stem structure.
Sunlight Needs: The More, The Better (For Most Types)
There is an exception for woodland salvias like Salvia nemorosa, which tolerate partial shade. But for common types like Salvia officinalis (garden sage) or Salvia microphylla (the flowering kind), full sun is king.
I live in the UK, in a flat with cloudy winters. My first winter indoors, I did not use a grow light. All my salvias turned pale and stretched out. That was because they were searching for light that was not there.
This winter, I installed a cheap full-spectrum LED grow light. The difference is obvious. The leaves remain dense, and the plants stay compact.
If you live in Australia or the southern states of the US, you might get too much intense heat during summer. In that case, morning sun and afternoon shade work best. In places like the UK or northern US, you can safely provide all-day sun.
Feeding Your Salvia: Less Is Actually More
Beginners tend to fertilize like they are feeding a teenager. Do not do that.
Salvia is a low-feeding plant. I burned a young salvia by using a high-nitrogen fertilizer, thinking it would boost leaf growth. The leaves turned crispy at the edges and dropped. I have not repeated that mistake.
What I use: A balanced, half-strength organic liquid fertilizer, diluted, applied every four weeks during the growing season (spring through early autumn). In winter, I feed nothing. The plant rests. You must respect the rest period.
Pests And Problems I Actually Faced
Aphids on New Growth
Aphids love the tender tips of salvia. I once saw a cluster of tiny green bugs munching happily on my new shoots.
My fix: I left them alone for two days. They attracted ladybugs in my outdoor planter, which ate them all. Without pesticides, the balance returned.
For indoor plants, I use a simple, strong spray of water with a few drops of dish soap. I blast the affected areas thoroughly, then rinse with plain water. That usually works after two applications spaced three days apart.
Powdery Mildew (White Dusty Leaves)
This happens when air circulation is poor and humidity is high. It killed my salvia hybrid in a greenhouse one year.
My fix: I moved plants further apart, increased airflow, and stopped splashing water on leaves. When I noticed the white spots early, I wiped leaves with a milk-and-water mix (1 part milk to 9 parts water). It is a folk remedy but surprisingly effective.
Root Rot (The Silent Killer)
I already covered this. Root rot shows up as yellow lower leaves, brown mushy roots, and a foul smell from the soil. The only fix is emergency repotting.
How To Winterize Your Salvia (For Cold Climates)
If you live in Canada or the northern United States, you cannot always leave tender salvias outdoors.
My winter routine:
- Bring potted salvia indoors before the first hard frost.
- Cut back the plant by about one-third.
- Place it in a cool, bright room.
- Water extremely lightly once a month.
- Do not fertilize.
- Let it rest until spring.
For hardy salvias, you can leave them in the ground. I mulch them with straw in late autumn. Then I cut the old growth back in spring before new shoots appear.
How To Propagate Salvias (Free Plants)
Honestly, rooting salvia cuttings is the easiest way to get more plants. It saved me money and pure joy.
What I do:
- In late spring or early summer, I cut a 4-inch piece of healthy current growth.
- Remove the lower leaves.
- Dip the cut end in a tiny bit of rooting hormone powder.
- Stick it into damp perlite or a mix of sand and soil.
- Cover it with a plastic bag to maintain humidity.
- Place it in bright, indirect light.
- Wait for two to three weeks. You will see roots when you gently tug on the stem.
Common Mistakes While Pruning And Deadheading
Pruning sounds intimidating, but it is basic.
I was too scared to prune for a long time. I thought I would kill it. Then my salvia became a tall, floppy, bare-stemmed mess. Eventually, I googled this and learned that cutting above a leaf node encourages branching.
My simple rule: After the first flush of flowers fades, I cut the flowering stem back by half. This promotes a second flush. I do this repeatedly from spring to early fall.
Avoid cutting into old woody wood near the base for most evergreen salvias. They do not always regrow from very old wood.
Indoor vs Outdoor Growing (What I Discovered)
I grow salvias both indoors and outdoors. They behave very differently.
Indoors:
- Needs a sunny spot and proper air circulation.
- I recommend using a fan on low for a few hours a day.
- Too warm and dark, and it will stretch.
Outdoors:
- I water less because rain does some of the work.
- The growth is sturdier because wind strengthens the stems.
- Pollinators love the flowers, which makes the plant fit better in an ecosystem.
If you have a garden or balcony, use outdoor growing as your base. If you are in an apartment, indoor is still okay, but you must compensate with a grow light.
My Favorite Types Of Salvia For Beginners
I do not want to lose you in botanical jargon. Here are the ones that are almost impossible to kill:
-
Salvia officinalis (common sage): Excellent for beginners. Tolerates mistakes. It is also an herb you can cook with, so it has double value.
-
Salvia nemorosa (woodland sage): Hardy to colder zones, tolerant of less sun. It has beautiful purple-blue spikes.
-
Salvia greggii (autumn sage): Flowers for months. Needs good drainage, but it keeps going through frost.
-
Salvia microphylla (hot lips sage): Fun red-and-white bicolored flowers. Very forgiving.
How To Tell If Your Salvia Is Dying (Signs To Watch For)
Not every sad salvia is doomed. Here is how I assess:
- Yellow lower leaves: Overwatering (most common) or lack of nitrogen.
- Brown crispy leaf tips: Underwatering or salt buildup from excessive fertilizer.
- Leaning towards light: Not enough direct sun. Move it.
- Stems rotting at soil line: Fungal infection. Cut away the rot and provide more drainage.
Monitor your plant for two weeks. Take a photo on day one and compare it to day fourteen. The difference will tell you everything.
What I Wish I Knew Before Growing Salvia
I will be straight with you. A beginner should not start with the most challenging rare salvia. Choose the standard types first. They forgive your rookie mistakes.
Also, all my recovered salvias did better when I stopped obsessing. I used to check them twice a day, poking the soil, fiddling with leaves. That stress is harmful to the plant because it encourages you to overhandle it.
Salvias respond to steady conditions, good light, and patience. That is the whole recipe.
The Quick Rescue Guide For A Dying Salvia
If your plant is currently on the brink:
- Take it out of the pot immediately.
- Inspect the roots. Healthy roots are white to tan. Rotten roots are dark and mushy.
- Snip the rotten bits away with clean scissors.
- Pot it up in dry, fast-draining soil.
- Place it in the brightest spot you have.
- Leave it alone for a week.
- Do not water until the soil is completely dry.
- If leaves perk up after 5 to 7 days, you are on the right track.
What Success Looks Like After Two Weeks
After following my strict guidance, you should see:
- Firm, upright stems
- New leaf growth at the top and base
- Rich coloration
- No signs of wet, mushy soil
- A robust root system when you gently lift the plant (just checking after watering)
I once thought healthy salvia was reserved for experts with greenhouses, but it is truly beginner-friendly. The trick is not in doing more, but in doing appreciably less.
These plants are rewarding if you control your watering instincts and respect their need for direct sun. I confidently recommend them to any beginner, because I was that beginner not too long ago, and I only learned after making predictable mistakes
FAQ (Frequently Asked Questions)
Why are the leaves of my salvia turning yellow even though I water less?
Yellow lower leaves usually point to overwatering in the pot. I often find that the soil in the center or bottom remains wet for days after the top feels dry. Remove the plant from the pot, check for mushy brown roots, and trim them off. Then repot in fresh, sandy mix. Also, verify that your pot has actual drainage holes. I have seen many pots sold as "plant pots" with a decorative inner sleeve that has no holes, which performs very badly.
My salvia grows tall but leans to one side. What should I do?
This is what happens when the plant is reaching for more light. I have had this happen many times. Rotate the pot by a quarter turn every week to promote even upright growth. Also move to a brighter window or add a grow light. You can also pinch back the top two inches of leggy growth to encourage side branching. Do not try to stake it permanently; that only masks the light problem.
Is it better to buy a small plant or grow salvia from seed?
For a beginner, I recommend getting a small nursery plant. This is the honest answer. Seeds are less predictable and take a long time to become bushy. A small starter plant lets you practice watering and light management without waiting for germination. Once you understand its rhythm, you can transition to cuttings. Growing from seed is a fun experiment, but your success rate will be higher with a rooted plant, especially in the beginning.