bluename
 If you’ve landed here, chances are you’re worried about root rot in your Philodendron Xanadu. Here’s the blunt truth: stop watering on a schedule, wait until the top two inches of soil are bone dry, then water deeply from the top until it drains freely, and never let the pot sit in a saucer of water. That single habit will save more Xanadus than any fancy fertilizer or potting mix ever will. I know because I’ve drowned more than a few of these gorgeous, ruffled-leaf beauties myself.
Look, I get it. We all want our plants to thrive. But I’ll be honest with you—90% of indoor plants die from overwatering, and the Philodendron Xanadu is a classic victim. I remember the exact day I killed my first one. I was so proud, watering it every Monday like clockwork. The leaves turned a sickly yellow, and the stems got mushy at the base. I pulled it out of the pot and nearly gagged—the roots were black, slimy, and smelled like a swamp. That was Lesson One, and it was brutal.
Since then, I’ve spent years experimenting with different watering techniques, soil blends, and pots. I’ve probably repotted my current Xanadu three times in two years. But here’s the good news: once you understand how this specific plant drinks water, root rot becomes a non-issue. In this guide, I’m sharing everything I wish someone had told me—my exact steps, what happens over two weeks, and the three stupid mistakes that killed my early plants.
The Three Fatal Mistakes Every Beginner Makes
Before we get to the pro tips, let’s talk about the elephant in the room. The reason most Xanadu owners end up crying over a pot of mush boils down to three core errors. I made all of them. You don’t have to.
Mistake #1: Watering on a Fixed Schedule
This is the biggest killer, hands down. I used to set a reminder on my phone—“Water Xanadu every Sunday.” Sounds responsible, right? Wrong. The problem is, your plant doesn’t care what day it is. It cares about moisture level. In winter, my Xanadu might need water every 14 days. In summer, every 5 days. If I’d stuck to my Sunday routine in winter, the roots would sit in damp soil for two weeks straight. That’s a death sentence.
The fix is simple, and I’ll explain it in more detail below, but the core idea is: always check the soil before you water. Always. I do this even now, years later. I stick my finger in the pot, and if there’s any moisture at all below the top two inches, I walk away. No exceptions.
Mistake #2: Giving It Direct Sunlight (or None at All)
You’d be surprised how often this gets linked to overwatering. Here’s what happens: people put the Xanadu in a dark corner because they hear it’s “low light.” Then they water it, but the plant isn’t photosynthesizing fast enough to drink the water. The soil stays wet, and boom—root rot.
Conversely, I once put one in a south-facing window with direct afternoon sun. The leaves scorched, and the plant got stressed. Stressed plants use less water, which again leads to soggy roots. The sweet spot is bright, indirect light. Think of a spot where you can read a book comfortably without glare. That’s your target.
Mistake #3: Using the Wrong Pot (No Drainage is Game Over)
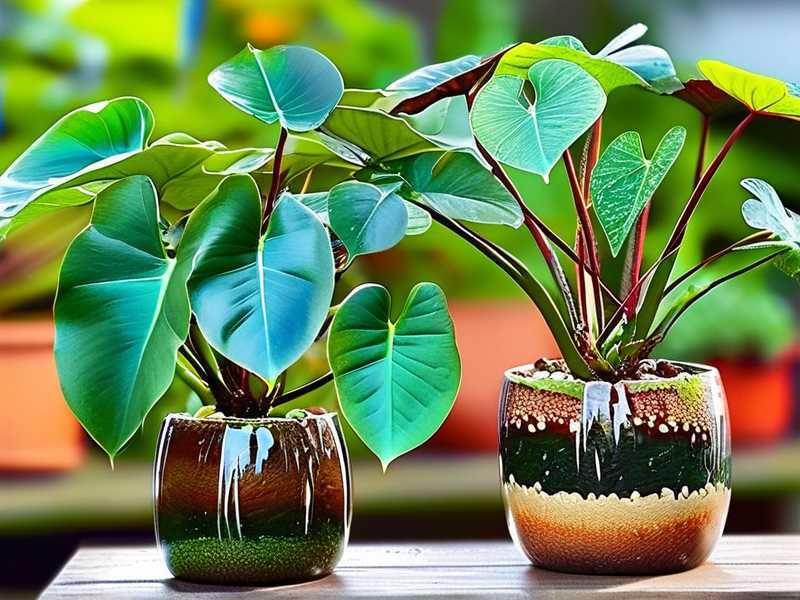
I’ll admit this with shame: I once planted a Xanadu in a beautiful ceramic pot with no drainage hole because it “looked nice” in my living room. I put a layer of pebbles at the bottom, thinking that would help. It didn’t. The water pooled below the soil line, and the roots rotted in about six weeks. Save yourself the pain. You need a pot with drainage holes, period. And honestly, I prefer a plastic or glazed ceramic inner pot that I can lift out. That way, I can water it thoroughly, let it drain completely, and then place it back into a decorative cachepot. No standing water, ever.
My Personal 14-Day Observation Log
Alright, we’ve covered the basics. Now let me show you exactly what I do, week by week. I recently repotted a struggling Xanadu that had early signs of root rot. Here’s my log over two weeks to show you how the watering method works in real time.
Day 0–2: The Rescue Repot
When I pulled my plant out, the roots were a mix of healthy white and rotten brown. I washed them gently under lukewarm water, cut away all the mushy parts with sterilized scissors, and dipped the healthy roots in a 1:1 mix of water and 3% hydrogen peroxide. That disinfects the roots without harming them.
Then I placed it in a chunky, well-aerated mix. If you buy regular potting soil, it’s often too moisture-retentive. I blend my own now: 40% coco coir, 30% perlite, 20% orchid bark, and 10% worm castings. This mix drains fast, but still holds enough moisture for the roots to sip on. After potting, I did not water it for two days. This lets any tiny root breaks callus over, preventing bacteria from entering.
Day 3–5: The First Watering
On the third morning, I checked the soil by sticking my index finger deep into the pot—about two knuckles deep. It felt dry, almost crumbly. That was my cue.
Here’s the technical part you won’t find in many articles: I took the whole pot to my kitchen sink. I poured water slowly, in a circular motion, over the entire soil surface. I kept pouring until I saw water streaming out the bottom drain holes. For a 10-inch pot, that took about 1.5 liters of water. Then I let it drain for a full 15 minutes. This is crucial. If you let it drip for only 2 minutes, there’s still excess water sitting in the bottom of the pot, which can lead to rot in the lowest root zone.
After 15 minutes, I felt the bottom of the pot. It wasn’t dripping anymore. I placed it back on its saucer. No residual water in the saucer.
Day 6–10: The Waiting Game
This is where people mess up. They see the top inch of soil dry out by Day 5 and panic, thinking the plant needs water. I promise you, it doesn’t. During this phase, I watered exactly zero times. The top layer was dry, but the deeper soil—where the roots live—was still slightly moist. This is normal if you have a chunky mix.
What I noticed during this window: the leaves began to perk up. The new leaf that was unfurling during the repot opened fully, and the color was deeper, almost emerald. I didn’t mist the leaves because that does nothing for humidity—it only invites fungal issues on the foliage. The roots need moisture, not the leaves.
Day 11–14: The Second Check
By Day 12, I started checking for the correct signal. I lifted the pot. It felt noticeably lighter than Day 4, right after watering. That’s a good trick—feel the weight after you water, and then feel it every day. When it gets feather-light, that’s your signal. I also stuck two fingers halfway into the soil—dry. I lifted the plant out of the cachepot (since I use an inner plastic pot with holes) and saw no condensed moisture on the side of the pot.
I watered again on Day 13, same sink method. The plant looked happier than it had in weeks. New aerial roots appeared at the base, which is a sign the plant feels secure in its moisture cycle. The cycle here is about 10–12 days between waterings in my environment, which is 70°F with 45% humidity. If your home is warmer or the plant gets more light, it might be every 7 days. But you must let it dry, not your calendar.
How to Read Your Plant Like a Pro
Over the years, I’ve learned that the Xanadu talks to you. You just have to listen. Every method I use comes down to tactile and visual cues.
First, look at the leaves. If they are firm and slightly glossy, the plant is well-hydrated. If you notice the leaves starting to look a little dull, or if the tips begin to curl downward like a claw, that can be an early sign of either overwatering or underwatering. Here’s the differentiator: overwatered leaves often turn yellow and feel soft, mushy, or blistered. Underwatered leaves turn crispy at the edges, but the soil is bone dry all the way through.
Second, use a wooden chopstick. This is my not-so-secret weapon. Insert a plain, dry wooden chopstick into the soil all the way to the bottom of the pot. Leave it for 30 seconds, then pull it out. If the chopstick comes out clean and dry, you need to water. If it comes out with damp soil stuck to it and feels cold, your plant is fine. This trick bypasses the “dry top layer” problem perfectly, especially in deep pots where the bottom might still be soggy.
Thirdly—and this is the one that took me the longest to master—the lift test. I water my Xanadu in the sink, so I always know the heavy weight. A fully saturated 8-inch pot weighs about 5–6 pounds. When it’s ready for watering, it weighs 3–4 pounds. The difference is so noticeable that you can tell just by holding it for a few seconds. I try to lift it every two days just to gauge the trend.
The Perfect Watering Setup (It’s Not Just About Water)
Let me be frank: the act of watering is only 50% of the game. The setup determines the outcome. If you’re watering correctly but your soil retains water like a sponge, you’ll still get root rot. So let’s look at the exact setup I use in my home, which I believe is failsafe.
The Pot That Saves You From Yourself
I touched on this earlier, but let’s dig deeper. I use a clear, plastic nursery pot with tons of drainage holes sitting inside a decorative ceramic pot. Why clear plastic? Because it lets me see the roots. If I see white roots—great. If I see green algae on the inside of the clear pot, that tells me the soil is staying too wet for too long. Algae thrives in moist, light conditions. If you see that, you are overwatering, even if you think you aren’t.
I also elevate the bottom of the inner pot. I put a layer of LECA (lightweight expanded clay aggregate) balls at the base of the decorative outer pot. This lifts the drain holes off the flat bottom, so even if a tiny bit of water sneaks through, the roots never sit in it. It’s a small hack, but it’s saved my plants during weeks where I got distracted by my own overconfident watering.
The Water Quality Factor
Now, this is a pro tip that many overlook. Tap water isn't always your friend. I live in a city with hard water, and the mineral buildup can mess with the soil pH. Over time, this leads to nutrient lockout, weakened roots, and—you guessed it—a higher vulnerability to rot. I switched to using filtered water from my Brita pitcher. Honestly, the plant started pushing out leaves much faster after I made that change.
If you don’t want to filter, at least let your tap water sit out in an open container overnight. That allows chlorine and fluoride—two chemicals that can harm the beneficial microbes in your soil—to dissipate. Those microbes are your allies because they help break down organic matter and prevent harmful anaerobic bacteria from taking hold in waterlogged soil.
The Best Soil Mix for Xanadu (I Tested 5 Blends)
I’ve tried everything from straight cactus mix to imported aroid mixes from specialty shops. Honestly, if you buy a good base that has bark and perlite, you’re halfway there. But since we are talking pro tips, let me share my exact blend that drastically reduced my root rot cases.
You take 3 parts premium potting soil. I have to say avoid anything with “moisture control” on the label. Those hold too much water. Combine that with 2 parts coarse perlite. Not the fine dust you find in some cheap bags—you want the bigger, chunky perlite that looks like styrofoam balls. Then add 1 part orchid bark. This is the key ingredient. Bark creates air pockets that allow oxygen to reach the roots. Roots need to breathe just as much as they need water. If the mix is too dense, the roots suffocate, leading to cell death, and then opportunistic rot sets in.
I also throw in a handful of horticultural charcoal. It’s known for helping to filter impurities and it deters root rot by absorbing excess moisture and toxins—kind of like a water filter for your soil. This mix looks rough and chunky, but that’s exactly what you want. The chunky texture ensures that the water flows through in 10 seconds flat, whereas a dense soil mix might sit wet for a week.
My Honest Tips on Light and Location
I mentioned this early on, but it’s tied so closely to watering that I need to revisit it. A Xanadu in the wrong light will be unable to process water. Let me explain the mechanics.
If your plant is in a dark room, it’s not photosynthesizing. Plants take up water through their roots and release it through their leaves during transpiration—a process driven by light energy. In low light, transpiration nearly stops. So you might water it correctly, but the plant doesn’t pull any of that moisture up. The roots just sit there, oxygen is depleted, and you get the same result as if you poured ten gallons on it.
In my own south-facing room, my Xanadu sits about 4 feet from the window, behind a sheer curtain. That gives it about 1,500 to 2,500 foot-candles of light (if you’re using a meter). If you don’t have a meter, use your hand: cast a shadow over the plant’s spot. If the shadow has a sharp edge but is lightly diffused, you hit the jackpot. If the shadow is very sharp, it’s too strong—move it back. If there is no shadow, it’s too dark—go closer to the window.
When I gave my plant this light, it started using water at the appropriate rate. The soil dried out consistently between waterings, instead of staying soggy. The leaves got elongated and wavy. The whole plant just looked more alive. This is very much a "less is more" perspective. You don’t need an expensive grow light fixture, just a decent windowsill.
The "Soak and Dry" Method—My Exact Execution
Professional horticulturists at the RHS and the AHS often reference the “soak and dry” method. But they rarely tell you how to do it, so here is exactly how I do it every time without fail.
I move the plant to my bathtub or kitchen sink. The temperature of the water matters a lot—cold water shocks the roots and can cause root cell death, which again makes it easier for rot to take hold. I use tepid water, around room temperature. I fill the pot from the top, slowly. I need the entire surface to get wet, not just one spot. A watering can with a narrow spout that I move around is the best way to do this.
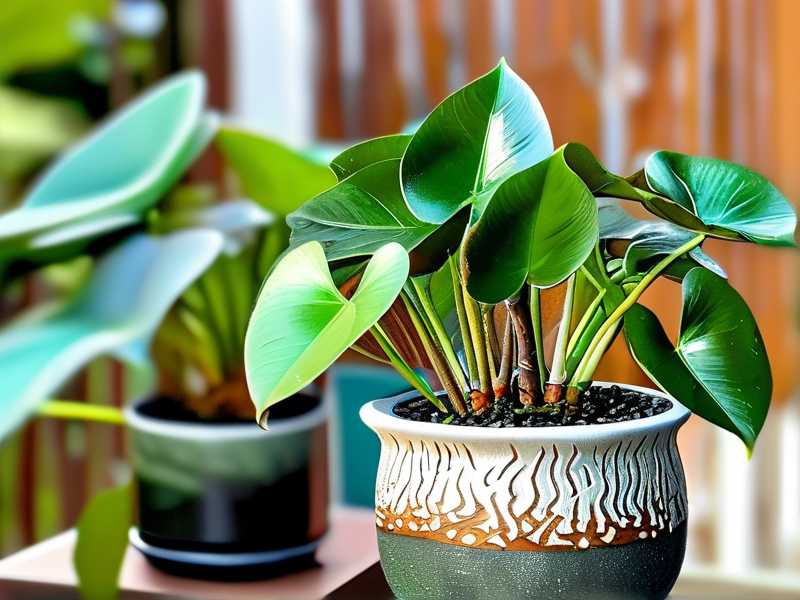
Once the water runs out of the drain holes, I stop pouring. Then, I wait five minutes. Surprise—the soil will often pull down more water as it compresses. After that five-minute pause, I pour again until it drains freely once more. This second flush ensures the water has saturated the entire root ball, not just run down the edges of the soil against the pot wall. This is a huge issue. If you don't do this double flush, you can get hydrophobic patches in the soil where the roots stay dry—which leads to root death and then mold.
After the second flush, I let the pot drain completely. For a large Xanadu, this can take up to 20 minutes. I do not—I repeat—do not put the plant back into its decorative outer pot until the dripping has stopped entirely. Then I might wipe the bottom of the nursery pot with a towel to ensure it is dry to the touch.
What About Humidity and Misting?
You see a lot of Instagram influencers misting their Xanadu every morning. Honestly, save your effort. The Xanadu is a tropical plant, sure, but it tolerates average home humidity (around 40–50%). Misting raises humidity for about 10 minutes before the water evaporates. Worse, misting the leaves directly can lead to fungal leaf spots if the water sits on the leaves overnight.
Instead of misting, I run a cheap humidifier next to my plant during the dry winter months. If you don’t want to buy one, placing a bowl of water near the plant to evaporate is a low-tech solution that works fine. Higher humidity reduces the stress on the leaves and lets the roots work efficiently without forcing you to overwater.
If you do get brown leaf tips, it’s not usually a humidity problem. It’s usually minerals in the tap water. That’s why filtered water matters so much. I saw such a huge difference in the tips of my leaves after switching to filtered water—no more brown, crusty edges.
Recognizing the Symptoms of Early Root Rot
I’m hoping you caught this before it’s too late. If you are reading this, you might already have a plant that looks sick. Let me give you my checklist for what happens a week before you know it’s root rot.
- The leaves turn a pale green, then yellow: The yellowing happens because the roots can’t deliver nutrients to the leaf tips. It usually starts on the lower, older leaves first.
- The stem base feels soft: If you squeeze the main stem just above the soil, it should be firm. If it's soft like a ripe grape, you are in emergency territory.
- The soil smells bad: Not earthy like fresh forest floor. I mean like rotten eggs or sewer smell. That is anaerobic bacteria.
- Fungus gnats: Those tiny black flies buzzing around the soil are a prime indicator that your top inch of soil is staying wet too long. They breed in the top 2 inches of organic matter.
If you see any of these signs, stop watering immediately. Take the plant out of its pot, knock off as much soil as possible, and inspect the roots. Healthy roots are firm and white. Rotten roots are brown or black and slip off easily when you pull them. Use those sterilized scissors to cut away everything that’s mushy. It’s a hard truth, but it’s better to lose 50% of the roots and keep the plant alive than to lose 100% and trash it.
Repotting Frequency and Why It Matters for Watering
Here is something that caught me by surprise: a Xanadu that needs repotting will suffer from watering issues even if you are doing everything right. Why? Because if the roots have completely filled the pot, the water will just run down the side of the root ball and out the drainage hole, leaving the middle bone dry. Conversely, if you have a pot that is way too large, the massive soil volume will hold water for too long, and the sparse root system will rot—this is the classic “pot too big” trap.
I repot my Xanadu roughly every two years, or whenever I see the roots creeping up over the top of the soil. When I pot up, I only size up by 2 inches in diameter. It seems like a modest increase, but the math on soil volume is huge. A pot that’s 10 inches wide holds much more moisture than an 8-inch pot. If you jump from 8 to 12, you’re setting yourself up for a disaster because the extra soil will stay wet. Go slow and steady with pot size.
Can You Bottom Water a Xanadu?
Many modern houseplant growers swear by bottom watering. I have tested this thoroughly. Does it work for the Xanadu? Let’s break it down.
Bottom watering involves placing the pot in a tray of water and letting the soil draw water up through the drainage holes. I tested this for two months on a smaller Xanadu. The positive side is that it keeps the top of the soil completely dry, which prevents fungus gnats and discourages any rot at the crown.
The negative side? Bottom watering can cause a build-up of mineral salts in the top layer of the soil because the water is wicking upwards and leaves salts behind. Plus, you often can’t tell how much water has been absorbed. However, the trick that I found works best is doing a hybrid: I top water deeply once a month to flush away salts, and then I bottom water in between watering sessions. This seems to offer the best of both worlds, but if you are a busy person or just setting up for the first time, top watering under a slow stream with a flexible spout is much simpler and works great.
If you do bottom water, fill the tray with an inch or two of room-temperature water. Place the pot in and leave it for 30 minutes. Check the top of the soil with your finger—is it moist? If yes, remove it from the tray and let it drain. If the top is still dry, give it another 15 minutes. In my experience, it takes about 45 minutes to an hour to properly rehydrate a 10-inch pot.
Seasonal Adjustments Nobody Talks About
I live in a climate with distinct seasons, and I can’t overstate how much my watering schedule changes. In the peak of summer, my Xanadu is putting out new growth every week. It drinks heavily, and I might water every 5–6 days.
Then winter hits. The heater kicks on and dries the air, but the light intensity drops a lot. The plant’s metabolism almost halts. During those months, I probably water once every 16–18 days. If I stuck to my summer habit, that would be fatal. I tend to grow more slowly during winter and pot my plants in a slightly tighter space to help prevent over-saturation of the roots.
I also suggest you reduce the amount of water you give in winter, even if you are watering on a longer interval. You might find a half-strength soak is all the plant needs. When the plant goes dormant, it can’t physically drink as much. The mix stays moist for a longer time, which can lead to a slow, silent root rot. I check the pot weight in winter—it takes a lot longer for it to feel light, and I trust that "heavy" feeling more than the calendar.
A Pro Tip on Using Moisture Meters
You can get a digital moisture meter for a reasonable price. I bought one expecting the device to make my life easy. The funny thing is, most budget moisture meters are wildly inaccurate if the soil contains a high amount of perlite or bark—which mine does. They measure the electrical conductivity of the water in the soil, but if they hit a chunk of perlite (which doesn't hold water), they register as “dry” even when the soil right next to it is damp.
I still use a simple analog meter, but I use it as a guide, not a definitive answer. I place the probe as close to the root ball as I can without damaging the roots, and I check two spots—one near the side, and one in the middle. If both read on the dry side of the meter (usually on level 3 or below), I consider watering. If one says "wet" and one says "dry," I leave it alone for another few days. Treat the meter like a secondary opinion rather than a traffic cop.
Troubleshooting Your Own Blunders
I want you to be prepared for the worst-case scenario. What happens if you accidentally dunk your Xanadu with water because you were distracted? Or if you rehydrated it and realized the pot has no drainage hole after all? Don’t panic. Here’s my rescue strategy.
If the soil is soaking wet, remove the whole root mass from the pot. Wrap the soil ball in newspaper or brown paper towels. This will wick out the excess moisture quickly. Change the paper twice during a single day. Leave the plant out of the pot for 12 hours if you have to. The air exchange will help dry the root zone. Then, pot it back up in a dry mix or add additional perlite to the current mix to increase drainage.
If you catch the rot late and the roots are mushy, you need to treat it like a cutting. Chop off all the foliage that looks healthy, leaving a few nodes on the stem. Place the stem in a jar of fresh water and put it in a bright window. Roots might take 2–3 weeks to emerge. Once you have a few inches of new, white roots, plant that cutting in a tiny 4-inch pot with fast-draining aroid mix. It’s a way to start over, and honestly, the new plant grows faster than you think. I have saved three "dead" Xanadus this way.
Conclusion: Give Up Perfection, Embrace Routine Checks
Let’s be honest, if you want to keep a Philodendron Xanadu alive without root rot, you’ll have to stop relying on a fixed calendar. You should go by touch, weight, and observation. I’ve been growing these plants for a few years now, and I still check the moisture by lifting the pot every single day. It’s not a chore anymore; it’s part of my morning coffee routine.
The overarching rule is very simple: dry down, then wet wet. Don’t let a "carefree tropical plant" label trick you into thinking it wants constant moisture. It doesn’t. It wants to breathe.
Frequently Asked Questions
1. How do I know exactly when my Xanadu needs watering? Insert your index finger deep into the soil. If the top two inches are totally dry and the pot feels very light, water it slowly until water comes out the bottom. Stop using a targeted number of days—your home environment changes the intervals too much.
2. Can I use ice cubes to water my Xanadu slowly? I strongly advise against this. Ice cubes shock the sensitive tropical roots and slow down water absorption. They also deliver water to only one localized area, leaving the rest of the root ball dry. Use room temperature water, and you’ll give your roots a gentle soak rather than a cold jolt.
3. Is yellowing always a sign of too much water? Not always, but it’s the first suspect. Light green leaves that turn yellow at the bottom usually point towards overwatering or poor drainage. However, check if the leaf tips are crispy or brown, in which case it might be dry air or underwatering. And if only the newest leaves are yellow, it could be a nutrient deficiency. When in doubt, pull it out of the pot and check the roots—that’s the only way to be a hundred percent sure.