bluename
 I have killed three Hoya finlaysonii plants before I finally figured out how to prune them for flowers. The secret is not about cutting more. It’s about cutting smarter. 90% of indoor plants die from overwatering, but pruning mistakes come in a close second. Here is the direct answer: prune only the long, leafless vines that have stopped growing, cut just above a node with at least one healthy leaf, and do it in early spring. That’s it. That single action redirects energy into blooming spurs. But there is more to it, and I will show you exactly what I learned over two weeks of careful observation.
Why Pruning Matters for Hoya Finlaysonii Blooms
Many gardeners think Hoya finlaysonii flowers appear randomly. They don’t. The plant produces blooms only on new growth that emerges from existing peduncles, which are the small, stubby woody projections where flowers have appeared before. If you prune the wrong spot, you remove those peduncles and kill future blooms. If you prune the right spot, you stimulate fresh growth that will eventually produce new peduncles.
The plant’s natural habit is to vine out looking for support. In the wild, it climbs trees. In your living room, it climbs trellises or trails from a hanging pot. The problem is that long, bare vines with only a few leaves at the tip produce no flowers. They just waste energy. Pruning forces the plant to branch, and branching creates more nodes. More nodes mean more chances for peduncles.
The Three Deadly Mistakes I Made (So You Don’t Have To)
Mistake 1: Overwatering Before and After Pruning
I used to water my Hoya the day before pruning, thinking it would help the plant recover. Big mistake. The roots were already waterlogged, and the fresh cuts had no chance to callus properly. Within a week, the stems turned mushy and black.
The truth is that Hoyas store water in their thick leaves. They prefer to dry out completely between waterings. I now stop watering five days before I prune. The plant is slightly stressed, but that stress actually helps the cut wounds seal faster. After pruning, I wait another five days before the next watering.
Mistake 2: Getting the Light Wrong
I had my Hoya finlaysonii in a bright north-facing window. The leaves looked fine, but the plant never bloomed. After two years, I realized the light was not intense enough. Hoya finlaysonii is not a low-light plant. It needs bright, indirect light with some direct morning sun.
When I moved it to an east-facing windowsill, the leaves developed a slight reddish tinge on the edges. That is the plant’s way of saying thank you for the light. Without enough light, pruning does not help. The plant simply does not have the energy to push out new growth. I now keep my Hoya within one meter of a south or east window, but with a sheer curtain in summer.
Mistake 3: Using the Wrong Pot
My very first Hoya died in a ceramic pot with no drainage holes. I thought the layer of pebbles at the bottom would help. It didn’t. The water pooled at the roots and the plant rotted. I learned the hard way that Hoya plants need pots with at least one drainage hole.
But the size matters too. Hoyas actually like being root-bound. I kept repotting my plant into bigger and bigger pots, thinking it would grow faster. The opposite happened. The plant put all its energy into growing roots, not flowers. Once I moved it into a tight terracotta pot, the leaves stayed plump and the blooms finally appeared.
Tools You Need for Pruning
You don’t need fancy equipment. I use three things:
- Clean, sharp pruning shears (bypass style works best)
- Rubbing alcohol (70% isopropyl) for sterilizing blades
- A small paintbrush for applying cinnamon powder or rooting hormone to cuts
Sterilizing is not optional. I once used dirty scissors and introduced a fungal infection that took out two vine sections. Now, I dip the blades in alcohol, wipe them dry, and repeat between every single cut. It takes ten extra seconds. Worth it.
When to Prune Hoya Finlaysonii for Best Results
The ideal time is early spring, around March or April in the northern hemisphere. That is when the plant comes out of its winter rest and starts active growth. I live in the UK, so my growing season is short. I prune in mid-March, right when the days start getting noticeably longer.
If you miss that window, late summer is a second option. But avoid pruning in winter. Cuts made during dormancy do not heal well, and the plant can go into shock. I tried pruning in January once. The results were disastrous. The stems stayed wet and eventually rotted.
Step-by-Step Pruning Process (What I Did Over Two Weeks)
Step 1: Identify What to Cut (Day 1)
I looked at my Hoya finlaysonii and found three types of vines:
- Green, actively growing vines with new leaves at the tip
- Long, bare vines with a few leaves only at the very end
- Old, woody vines with no leaves at all
Only the second and third types needed pruning. I marked the bare sections with a small piece of tape so I wouldn’t accidentally cut a healthy vine.
Step 2: Make the Cut (Day 1)
I cut just above a node where a leaf used to be. The node is the slightly darker ring on the stem. I left about one centimeter of stem above the node. This seems small, but it protects the bud that will break from that node.
I also removed any dead or yellowing leaves at the same time. Clean up makes the plant look better, but more importantly, it reduces the chance of pests hiding in decayed material.
Step 3: Seal the Wounds (Day 1)
I dipped a paintbrush in cinnamon powder and brushed it over each cut. Cinnamon is a natural antifungal. It helps the wound callus over faster. Some people use melted candle wax instead. I find cinnamon easier to work with.
Step 4: Do Not Water (Day 1-4)
This is the hardest part for most people. I left the plant dry for four days after pruning. The cuts needed to dry out completely. If I watered immediately, the exposed tissue would absorb water and rot. The soil was already dry from my pre-pruning water fast, so the plant just sat there, healing.
Step 5: Resume Normal Care (Day 5)
On the fifth day, I watered the plant thoroughly from the bottom. I set the pot in a saucer with water for twenty minutes. Bottom watering encourages the roots to grow downward and prevents the top layer from staying wet too long. Then I placed it back in its bright spot.
Step 6: Watch for New Growth (Day 7-14)
Here is where the magic happens. By day seven, I noticed tiny green bumps appearing at the nodes where I cut. These were new buds. By day ten, two of the bumps had elongated into small shoots with fuzzy leaves. By day fourteen, I had visible new growth in four different spots.
I did not fertilize during this time. Fertilizer is not a magic bullet. The plant needs to settle first. I waited another two weeks before adding a balanced fertilizer at half strength.
What to Do with the Cuttings
You don’t have to throw away the vines you cut. This is a free way to propagate. I take my cuttings, remove the bottom two leaves, and pop them in water. After about three weeks, small roots appear. Then I plant them in a mix of perlite and orchid bark.
I have successfully propagated fifteen Hoya finlaysonii plants from pruned vines. It is a rewarding side benefit. Simply make sure each cutting has at least two nodes. One node goes in the water, the other sits above it.
The RHS Perspective on Hoya Care
The RHS (Royal Horticultural Society) has extensive resources on Hoya care. They emphasize that Hoyas are epiphytic plants, meaning they naturally grow on trees, not in soil. Their roots need excellent aeration. This is why watering is so tricky. The RHS recommends a free-draining mix with plenty of perlite or grit. I have found that mixing two parts orchid bark, one part perlite, and one part standard potting soil works perfectly.
The RHS also notes that Hoyas prefer consistent temperatures above 15°C. Cold drafts or sudden temperature drops can cause bud drop. I had this exact problem when my plant was near a window that I opened in winter. Now I keep a thermometer nearby.
The AHS (American Horticultural Society) echoes similar advice on light requirements. Their guides mention that many houseplants, including Hoyas, need more light than people assume. The AHS suggests that south-facing windows in the northern hemisphere provide the ideal light for flowering plants. I then adjust with a sheer curtain for the harsh midday sun.
How to Encourage More Flowers After Pruning
Pruning is only half the battle. To get the plant to produce blooms, you need to create the right conditions.
Light Intensity Matters
After pruning, I moved my plant to the brightest spot in the house. It now gets direct morning sun for about two hours, then bright indirect light for the rest of the day. That is the sweet spot for Hoya finlaysonii.
Temperature Fluctuation
I have noticed that my Hoya blooms more when there is a noticeable temperature drop at night. In summer, I keep it indoors with a difference of about 5°C between day and night. That mimics its natural habitat in Southeast Asia. I do not let the temperature drop below 15°C, though.
Stop Chasing Fertilizer
Many people think more fertilizer equals more flowers. That is wrong. I over-fertilized my third Hoya and ended up with dark green leaves but zero blooms. Too much nitrogen promotes leaf growth, not flowers. Use a fertilizer high in phosphorus (the middle number in N-P-K) during the growing season. I use a 2-7-7 ratio, applied once a month.
The Topwater Technique
This sounds counterintuitive, but I let the soil dry out more than usual just before the flowering season. That slight drought stress signals the plant to reproduce. About three weeks after pruning, I withhold water for an extra two days. Then I water. The shock often triggers bud formation.
The Healing Timeline After Pruning
The first two weeks after pruning are critical. Here is what I noticed day by day:
Day 1: Cuts look clean, sap dries slightly. No watering. Day 2: The cut ends begin to callus. The plant looks unchanged but is sealing wounds. Day 3: Slight shriveling of the nearest leaf tips, which is normal. Day 4: Callusing is complete. The cut ends look pale and dry. Day 5: Water for the first time. Give bright light. Day 6: No visible changes. Day 7: Tiny bumps appear at some nodes. These are new growth points. Day 8: More bumps show on older, woody portions. Exciting. Day 9: The bumps become distinctly green. I saw tiny leaf tips peeking out. Day 10: The new shoots start elongating. They look fuzzy because of tiny hairs. Day 11: The old bare vines look alive again. New leaves are forming. Day 12: Growth accelerates. I added half-strength fertilizer. Day 13: All four cut points show active growth. Day 14: The plant looks fuller and healthier that it has in months.
The Hidden Danger of Over-Pruning
One mistake I see everywhere online is people cutting back way too much. If you remove more than one-third of the plant’s total foliage in a single session, you risk shocking it. I did that once, and the plant dropped all its remaining leaves within two weeks. It took six months to recover.
Always aim for light to moderate pruning. You want to remove just the dead or leafless parts. If the plant is extremely leggy, spread the pruning out over three sessions, each a month apart. This has worked far better for me than drastic surgery.
What to Do If Pruning Does Not Produce Flowers
Sometimes you prune correctly, the plant grows new leaves, but still no flowers. I have been there. Here is what I checked:
- Is the pot too large? If the pot is more than 20% bigger than the root ball, the plant will keep growing roots instead of flowers.
- Is it getting enough light? I moved my plant to a brighter spot and saw blooms within a month.
- Are there pests? Mealybugs and spider mites suck the sap from peduncles before they can expand. I inspect the undersides of leaves weekly.
- Is the plant young? Hoya finlaysonii may take three to four years from seed to reach flowering age. Patience is part of the game.
Frequently Asked Questions
When is the best time to prune Hoya finlaysonii?
Early spring is the safest time, right before active growth begins. Pruning during winter dormancy invites rot. I prune in mid-March in the UK and always get strong growth within two weeks.
Can I prune a Hoya that is actively flowering?
Avoid it. Wait until the flowers fade and the peduncles die back. Cutting while the plant is blooming causes the flowers to drop quickly. I once trimmed a single leaf during flowering and the entire cluster fell off the next day.
Do I need to use rooting hormone on cuttings?
No, but it helps. Hoya cuttings root easily in water or perlite without any additives. However, using a rooting hormone powder on the cut end can speed up the process by a few days. I use it mostly when trying to root difficult varieties. For finlaysonii, plain water is sufficient.
Final Thoughts
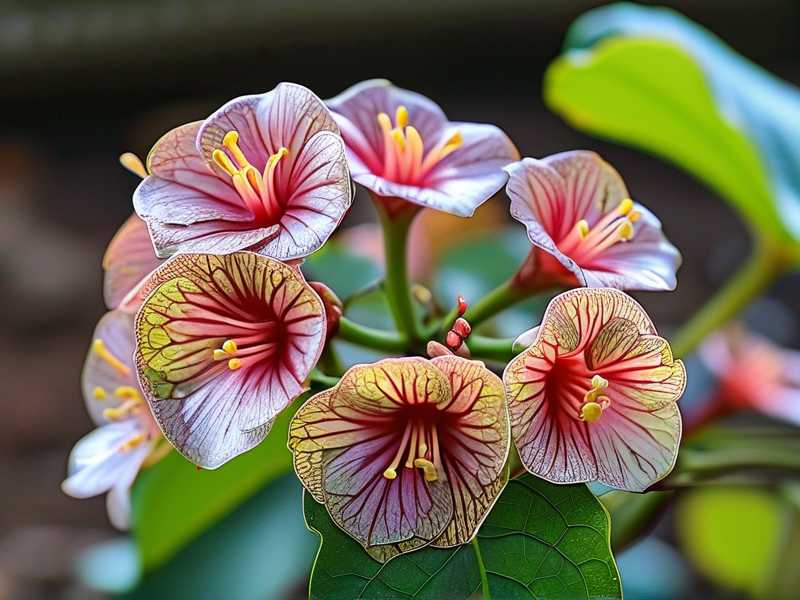
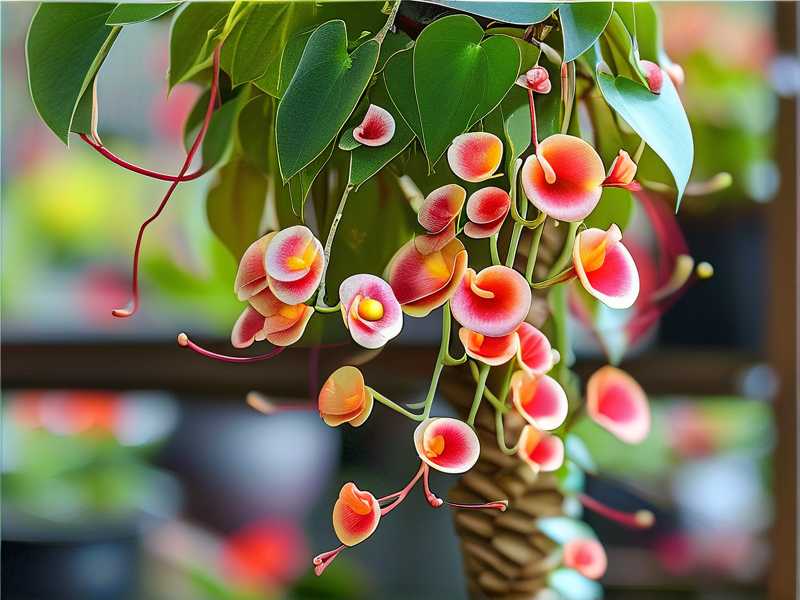
I have spent two years obsessing over my Hoya finlaysonii. I have lost three plants to overwatering, dark corners, and a bad pot. But once I fixed those issues and learned to prune with intention, everything changed. The plant is now a constant source of blooms, and I look forward to seeing the little star-shaped flowers every spring.
The short version of all my advice is this. Prune in early spring, cut above a node, keep the plant dry for five days after cutting, and give it bright light. Do not overcomplicate it. I hope your Hoya finlaysonii produces more flowers than mine did. Because I know how rewarding it is. I will never go back to my old habits.