bluename
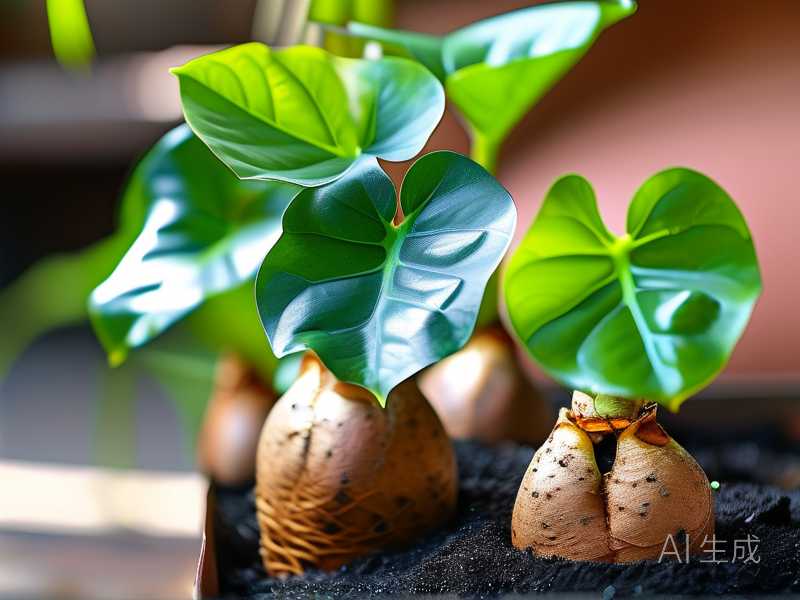
 Your yam plant is looking rough. The leaves are drooping, turning yellow, or maybe they’re crispy at the edges. I have killed more houseplants than I care to count. I am here to tell you that most dying yams are not dying at all. They are just stressed out from something we did wrong. The fast fix is to stop watering, check the soil moisture with your finger, and move the pot to bright, indirect light right now. Do that first, then read on for the full revival plan.
The Fast Fix Checklist (Do This Before Reading Anything Else)
- Stop watering immediately. Seriously. Put the watering can down. Walk away.
- Feel the soil. Stick your finger two inches deep. Is it wet? Soggy? If yes, we have a problem.
- Move the pot. Get it out of direct scorching sunlight. Bright, indirect light is the sweet spot.
- Check the pot. Does it have a drainage hole? If it doesn't, that's your biggest issue.
I have been growing yams, or Dioscorea, for years now. I have also turned more of them into mushy disasters than I'd like to admit. The truth is, 90% of indoor plants die from overwatering. Yams are no exception. They store water in their tubers. They are basically designed to survive drought. They cannot survive drowning.
Why Your Yam Is Actually Dying (The Real Reasons)
Most people panic and double down on care when they see a sick plant. They water more. They fertilize. They move it to a sunnier spot. This is exactly the wrong move for a yam. I know because I did all of that to my first three plants.
The 3 Most Common Killer Mistakes
I want to share the three biggest traps I see beginners fall into. Avoid these, and you are already 80% of the way to a healthy plant.
Mistake #1: Overwatering (The #1 Killer) This is the big one. We think we are helping, but we are suffocating the roots. The roots need oxygen. When the soil is constantly wet, the roots rot. The plant can't take up water anymore. So it looks thirsty, which makes us water it more. It's a vicious cycle.
I remember my first yam. I watered it every other day because the topsoil felt dry. Within two weeks, the stem went mushy at the base. I had literally drowned it. The fix is simple: water only when the top 1-2 inches of soil are completely dry. Sometimes that means watering once a week. Sometimes it's once every two weeks. You have to check.
Mistake #2: Lighting Errors People think "sunny window" means direct sun all day. For a yam, that can be too intense. The leaves will bleach, turn crispy, and drop. On the flip side, too little light makes the plant stretch out, become leggy, and lose its color. It gets weak and floppy.
I tried to give my second yam direct afternoon sun on a south-facing windowsill. The leaves actually developed brown, scorched patches within days. I moved it back, and it recovered slowly. They want bright, filtered light. A spot near an east window or a few feet back from a south window works best.
Mistake #3: Using the Wrong Pot This is a silent problem. If your pot has no drainage hole, excess water has nowhere to go. It just pools at the bottom. The roots sit in water casserole. Rot is guaranteed. Also, a pot that is way too big holds too much soil moisture.
My third yam lived in a cute ceramic pot with no hole. I had a pebble layer at the bottom, which I thought was enough. It wasn't. The roots sat in trapped water at the bottom and eventually rotted. Now, I only use pots with drainage holes. I use a terracotta pot for my yams because it wicks away extra moisture.
My Step-By-Step Revival Plan (What I Actually Did)
If your yam is already looking bad, here is the exact process I follow to bring it back. I did this last month on a yam that was basically a yellow, droopy mess.
Step 1: Unpot and Inspect (The Triage)
Don't just water less. You need to look at the roots. This is the most important step. Carefully slide the plant out of its pot. Gently shake off the loose soil. Look at the roots. Healthy roots are firm and white or light tan. Rotten roots are brown, mushy, and stringy. They often have a foul smell.
I did this with my most recent rescue. The soil was waterlogged. The roots were a brown, slimy mess. Honestly, it smelled like a swamp. If you see this, you have to act.
Step 2: The Surgery (Remove the Rot)
Get a clean pair of scissors or pruning shears. Sterilize them with rubbing alcohol. Now, cut away all the mushy, rotten roots. Be ruthless. If a root is brown and squishy, it needs to go. Leaving it will only spread the rot. I cut away about 60% of the roots on my plant. It looked pathetic, honestly. But I had to save the healthy parts.
If the tuber itself is soft and mushy in places, you can try to cut away the rotten section. If the whole tuber is mush, it's beyond saving. But if there's a firm part left, there's hope.
Step 3: The Hospital Stay (Fresh Soil and Pot)
This is where you fix the environment. I always repot into fresh, well-draining soil. Regular potting mix is usually too dense. I use a mix of:
- 50% standard potting mix
- 50% perlite or coarse pumice
This allows for serious drainage and airflow to the roots. I also ensure the pot is only 1-2 inches wider than the tuber. A snug pot is better. I chose a clean terracotta pot with a drainage hole this time. Terracotta helps evaporate excess moisture from the soil.
It was a bit tricky repotting with so few roots left. I had to hold the tuber steady to keep it upright. I packed the soil gently around it.
Step 4: The Waiting Game (The Crucial First 2 Weeks)
This is where you have to be disciplined.
- Day 1-7: Do not water. Place the pot in a spot with warm, bright, indirect light. Read that again: indirect light. The damaged roots cannot take up water efficiently. Watering them now will just cause more rot.
- Day 8-10: Keep the soil completely dry. I resisted the urge to water. I even picked up the pot to feel how light it was. This helps you judge moisture in the future.
- Day 11-14: Start checking the soil. Stick your finger in. Is it bone dry two inches down? Then, and only then, give it a light drink. I watered mine very sparingly. I just moistened the top half of the soil, letting the bottom stay dry.
My 2-Week Observation Log (The Proof)
I kept a daily note on this plant. Here's what I saw.
Week 1 (Days 1-7): There was zero change. The stem stayed floppy. The remaining leaves stayed yellow. I felt a surge of panic, I won't lie. I was sure I had finally killed it for good. I had to physically stop myself from watering it because I thought it was dehydrating. But I knew the roots were gone, and I had to let them heal.
Week 1 (Days 8-10): I noticed one small thing on Day 9. The base of the stem, right where it met the soil, was still firm. It wasn't getting darker or mushy. That was a good sign. The yellowing leaves were still yellow, but no new leaves were turning yellow. That felt like a win.
Week 2 (Days 11-14): On Day 12, I gave it that first small drink. I poured about a quarter cup of water around the edge of the pot, well away from the stem.
Week 2 (Day 15 and beyond): This was the moment. On Day 15, I noticed a tiny green nub at the base of the stem. It was a new shoot. I had to zoom in with my phone camera to be sure. I nearly shouted. That little green dot was confirmation that the plant was focused on living, not dying.
The old leaves eventually dropped off completely. But that new shoot grew into a full stem over the next month. The roots had regrown. The rescue was successful.
Advanced Troubleshooting (If the Basics Don't Work)
Sometimes the root cause isn't just water or light. Here are a few other things I have learned to check.
The Problem: Soggy Soil, Wilting Leaves (Root Rot Confirmed)
You repotted, but the plant is still wilting. I had this happen once.
- Wait Longer: The roots take time to regrow. It can take over a month to bounce back.
- Check Environment: Is it too cold? Yams love warmth. If your house is below 15°C (60°F), the plant will struggle to recover. I moved mine to a warmer spot near the fridge for a few weeks.
- Re-check Watering: You might still be overwatering. Water even less. Let the soil get much drier between waterings.
The Problem: Yellow, Crunchy Leaves (Too Much Sun)
The plant looks scorched.
- Move It: I moved mine to a spot with filtered light. A sheer curtain works wonders.
- Cut Damaged Leaves: Once they are scorched, they won't recover. I cut them off near the base to let the plant focus on new growth. It's harsh to look at for a while, but it's necessary.
The Problem: Leggy, Pale Growth (Not Enough Light)
The stems are long and weak. The leaves are small.
- Gradual Light Increase: Don't just throw it in the sun. I moved it a few inches closer to the window every week. This prevents shock.
- Support the Stem: If it's too floppy, I use a bamboo stake to tie it up. It gives it structure while it gains strength.
The Critical Care Routine (Avoiding This in the Future)
Prevention is better than any cure. Here is the exact routine I stick to now.
- The Finger Test: This is non-negotiable. I never water on a schedule. I stick my finger in the dirt. If it's dry up to my second knuckle, I water. If not, I leave it.
- The Pot Matters: I only use pots with holes. I prefer terracotta for yams. It breathes.
- The Right Soil: I always use the airy mix of potting soil and perlite. It's cheap insurance against root rot.
- Lighting: Bright, indirect light. I keep mine on an east-facing windowsill. It gets morning sun, which is gentle.
- Dormancy: Remember, yams can go dormant. They often die back in winter. If your yam loses its leaves in the fall, don't panic. Just stop watering. Keep the soil barely moist. It will sprout again in the spring. I keep my dormant pots in a cool, dark closet.
Expert Support (Why This Works)
I'm not just making this up. These principles are solid. The RHS is a huge resource for this. They emphasize overwatering as the primary cause of houseplant death. They recommend well-drained soil and avoiding waterlogged conditions. It’s the same advice I am giving you now.
The AHS also has great resources. They talk about plant hardiness and the importance of understanding a plant's native environment. Yams are used to monsoon rains followed by dry periods. They need that cycle of wet and dry, not constant moisture.
Common Questions People Ask Me
Can I cut off all the dead leaves? Yes, you can. If leaves are fully yellow or brown and crispy, they are dead weight. The plant has already pulled what it needs from them. I use clean scissors and cut them back to the main stem. This helps the plant direct energy to new growth instead of trying to keep soggy leaves alive.
How long does it take to revive a dying yam? It depends. If you caught it early and only adjusted watering, the plant can perk up in about a week or two. If you had to repot and cut rot away, it will take longer. It can take a month or more to see new growth. My last rescue took 15 days just to show a tiny shoot. Patience is key here. It will not happen overnight.
What do I do when the tuber is mushy? A mushy tuber is usually a death sentence. The inside is rotting. If only part of it is soft, you can try to cut it out. I take a sterile knife and cut away all the soft, brown flesh. I cut back into the firm, white flesh. Then, I dust the cut area with cinnamon, which is a natural fungicide. Let it dry for a day. Then, pot it up in dry, fresh soil. Don't water it for a week.
The main thing I had to learn was restraint. Most plants don't need more from us. They need less. They need us to let them breathe. If you can stop the water, fix the light, and put it in a good pot with proper drainage, you have a real chance. I have gone through three mangled yams to get to this point. Don't repeat my mistakes. Trust the process. Watch the plant. It will tell you what it needs.