bluename
 How to Water Monstera Adansonii Without Root Rot (Pro Tips)
Let me give it to you straight: the #1 way to water a Monstera Adansonii without root rot is to wait until the top 2-3 inches of soil are completely bone dry, then water deeply and thoroughly until water runs from the drainage holes, and never let the pot sit in standing water. I learned this after killing three of these gorgeous vines. And honestly, 90% of indoor plants die from overwatering, not underwatering.
I remember the exact day I watched my first Monstera Adansonii turn yellow and mushy. I thought I was being a loving plant parent. I watered it every Monday, like clockwork. Two weeks later, the stems were black at the base. The smell? Unforgettable. That was my first brutal lesson in how to water Monstera Adansonii without root rot.
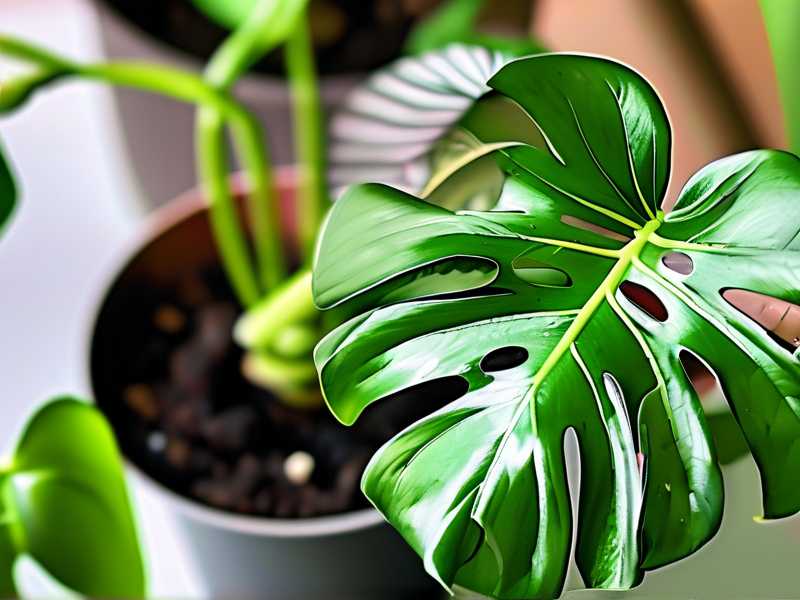
Root rot is the silent killer of these vining beauties. It creeps in because most of us treat watering as a schedule, not a skill. The soil stays soggy. The roots suffocate. Bacteria move in. Your plant collapses within days. But the good news? Once you understand the mechanics of water, air, and roots, you can keep your swiss cheese vine thriving for years.
I’m not a botanist with a fancy degree. I’m just someone who has killed way too many houseplants and finally cracked the code. In this guide, I’ll share my real-world steps, the mistakes I made, what I observed over two solid weeks of testing, and the exact signs your plant is screaming for help. This is the practical, no-nonsense path to watering your Monstera Adansonii the right way.
The 3 Deadliest Mistakes Beginners Make
Before we talk about what to do, let’s talk about what I did wrong. Every single death I’ve experienced traced back to one of these three fatal errors.
Mistake #1: Watering on a Fixed Schedule
I used to water every Sunday. My phone alarm would go off, and I would dutifully pour a cup of water into the pot. Didn’t matter if the soil was still wet. Didn’t matter if it was raining outside and the humidity was high. The soil stayed soaked for days. That is a death sentence.
Your plant doesn’t care about my calendar. It cares about its environment. The rate at which soil dries depends on temperature, light, pot size, and humidity. In winter, the same pot might take ten days to dry. In summer, it might take three. A fixed schedule ignores all that. I learned this the hard way when my second Adansonii died in February. The heating was on, the air was dry, but my weekly watering still soaked the roots beyond recovery.
Mistake #2: Wrong Light Exposure
Here is something most people miss. Light affects water absorption directly. I had my Monstera Adansonii tucked in a dark corner. I thought it looked nice. But in low light, the plant slows down its metabolic rate. It simply doesn’t drink as fast. So the soil stays wet for two or three times longer. That is what caused the root rot in my second plant.
I moved it to a bright spot with indirect light, and the difference was huge. The soil dried out properly. The roots started breathing. Light and water are not separate topics. They are two sides of the same coin. If your lighting is wrong, you will never fix your watering issues.
Mistake #3: Wrong Pot Choice
Oh, the decorative pots. I loved them. Ceramic pots with no drainage holes because they looked so pretty. This is how I lost my third plant. The water pooled at the bottom of the inner pot. The roots sat in that pool every single day. There was no air. The root system turned to brown slime within weeks.
Drainage holes are not optional. They are the difference between a healthy plant and a swamp. I also learned to avoid pots that are too large for the root ball. A giant pot holds lots of extra soil, and that extra soil retains excess water. Your roots cannot drink that much. So the water just sits there, inviting bacteria. I swear by terracotta pots now, because they are porous and breathe.
My Pro Watering System: Steps I Follow Every Time
After my fourth plant nearly died, I took a completely different approach. I stopped guessing and started observing. Here is the exact system I built, step by step.
Step 1: The Finger Dig Test
Forget moisture meters. I know they exist, but I found that nothing beats my own fingers. I stick my index finger into the soil. Not just the top layer. I push down about two to three inches, roughly the length of my second knuckle. If the soil feels damp or cool, I put the watering can away. If it feels dry and crumbly, I water.
I also check the weight of the pot. This is a fantastic trick. After a good watering, lift the pot. Then lift it again a few days later. You will feel a massive difference as the water leaves. When the pot feels noticeably light, it is time to water. This technique is not scientific, but it is effective.
Step 2: Water Deeply and Thoroughly
When I do water, I do it hard. I don’t just sprinkle a little bit over the top. That encourages shallow roots and leaves the deeper soil dry. Instead, I pour water slowly over the entire surface of the soil until I see water streaming out of the drainage holes at the bottom.
That runoff is crucial. It tells me the soil has been fully saturated. But wait, there is more. After that initial flush, I wait about ten minutes, then I water again. This second flush is the secret to rewetting dry peat moss, which can become hydrophobic and repel water. This double water method saved my fifth plant.
Step 3: Drain Completely for 20 Minutes
Oh, this is the step that made the biggest difference in my journey. After the deep watering, I take the plant to my kitchen sink. I leave it there for a full twenty minutes to drain all the excess. Every single drop that does not stay in the soil gets washed away.
I never, ever put the pot back on its saucer immediately. That trapped water is the start of root rot. Instead, I let it sit in the sink, or on a towel, to ensure full drainage. This simple habit eliminated most of my root rot issues.
Step 4: Water from the Bottom (Occasionally)
Sometimes, I use bottom watering. I fill a tray with about an inch of water and place the pot on top. The soil wicks water upward through the drainage holes. This ensures the moisture reaches the roots without flooding the top layer. I leave the pot in the tray for about half an hour, then remove it and let it drain. I find this method particularly useful when the soil is too compacted to absorb water efficiently.
Step 5: Follow the Season
I water far less in the winter. It is simple as that. The days are shorter, and my plant is not actively pushing out leaves. So its roots drink way less. In the summer, I check the soil more often because the heat and air conditioning dry things out faster. My usual rhythm all learning was observation-based, and I never rely on a fixed day of the week.
My 2-Week Observation Log
I decided to test my system rigorously on a struggling plant. It was a Monstera Adansonii that had limp leaves and soil that was damp all the time. I repotted it into a terracotta pot with a chunky aroid mix. Then I observed it for exactly two weeks. The results were honestly remarkable.
Week 1, Days 1-3: Day one, I gave it a deep bottom-watering. I let it drain fully for twenty minutes. The leaves were still droopy, but I expected that. Day two, I tested the soil with my finger. It was still damp, so I did not touch it. The pot felt heavy. Day three, the leaves started to perk up slightly. I noticed a tiny bit of growth at the base. The soil was still somewhat moist at one inch down.
Week 1, Days 4-7: Day four, the top inch was dry, but the rest was still cool. I held off. Day five, the pot felt lighter. The morning light seemed good. Day six, I did the finger test again, and it finally felt dry at the two-inch mark. I watered again, deeply. Day seven, I saw new tiny aerial root growth. The leaves were firm and upright. The difference was incredible.
Week 2, Days 8-10: Day eight, the soil was drying at a predictable pace. I moved the pot slightly closer to a window with indirect light. Day nine, I checked the weight again. It felt light. Day ten, I watered. This time, I used my deep-watering method with two flushes, and left it to drain in the sink.
Week 2, Days 11-14: Day eleven, I saw a new leaf unfurling. That was the signal. My plant was not only surviving, but thriving. Day twelve, I did not water because the topsoil felt damp. Day thirteen, I observed the pot for moisture on the inner walls of the terracotta. It was dry. Day fourteen, I watered again. At the end of two weeks, the root system had visibly improved. No mushy stems. No yellowing. Just a healthy, active vine.
That is what I mean by learning to read your plant. The process is not about a magic number. It is about paying attention.
The Best Soil Mix for the Fastest Drainage
I cannot stress this enough: your soil is just as important as your watering schedule. If you use heavy garden soil or dense potting mix, you are setting yourself up for failure. I tried heavy soil once. My plant hated it.
The perfect mix for Monstera Adansonii needs to be exceptionally airy. I make my own. Here is what I use: I combine one part standard potting mix, one part perlite, and one part orchid bark. The perlite creates air pockets. The bark helps with chunkiness and prevents the soil from packing down. It drains incredibly well, but it still holds enough moisture for the roots.
If you do not want to make your own, look for an "Aroid Mix" at your local nursery. This works wonders because it is designed specifically for epiphytes that need oxygen at the root zone. Almost all of my root rot problems completely disappeared once I switched to this mix. It completely changed how I water my plant.
Signs of Early Root Rot: Catch It Sooner Than I Did
I will be honest with you. I missed the warning signs several times. If you catch root rot early, you have a fighting chance. Here are the signs I learned to watch for.
Yellow Leaves That Bleed into Brown: Yellowing leaves at the bottom of the stem are a huge red flag. If they turn brown and feel mushy, it is often root rot.
Soft, Mushy Stems: The base of the stem should feel firm. If it feels squishy or hollow, the rot has set in.
A Sour, Boggy Smell: If your plant smells like a swamp, that is contaminated soil. Healthy soil has an earthy scent, not a rotting one.
Stunted Growth: If you see no new leaves in months and the plant looks limp, check the roots immediately.
What to Do if You Already Have Root Rot
If you are reading this and nodding, thinking the damage is already done, do not panic. I have saved a plant from the edge. This is the rescue protocol that worked for me.
First, pull the plant out of its pot immediately. Gently shake off all the wet soil. Inspect the roots. Healthy roots are white or pale cream. Rotten roots are brown, black, and slimy. Take a clean pair of scissors and cut away every single rotten root. Be ruthless. If you leave even a tiny bit of rot, it will spread.
Then, rinse the remaining healthy roots in lukewarm water. I sometimes use a 3% hydrogen peroxide solution (one part peroxide to three parts water) to kill bacteria. Let the roots air dry for an hour or two. Then repot into fresh, dry, chunky soil. Do not water it immediately. Wait two or three days to let the roots heal before introducing moisture.
I saved my sixth plant using this exact method. I cut away about 70% of its roots. I thought it was doomed. But three weeks later, new roots were growing. The plant recovered. The trick is catching it early and acting fast.
Air Roots and Aerial Support: A Hidden Hydration Trick
Monstera Adansonii is a climber. In its natural environment, it grows up trees, using its aerial roots to grip and absorb moisture from the air. Replicating a bit of this helps. I use a moss pole in the pot. The pole provides support and also helps me monitor moisture.
I mist the pole lightly, but not the leaves. This encourages aerial roots to grow into the pole, extracting moisture from it. It protects the main soil roots from being overwhelmed. Many pro growers stress the importance of aerial support for this very reason. The plant’s hydration is split between the soil and the air.
RHS guidance also points out that adequate air humidity is vital for plant health. If your home is very dry, the aerial roots will struggle. I recommend a simple pebble tray. Fill a shallow dish with pebbles and water. Place the pot on top. The evaporating water raises the local humidity. This reduces stress on the roots.
Environmental Factors That Change the Schedule
Your home is unique. My watering schedule in humid Seattle will not work in arid Arizona. This is the part where you have to fine-tune everything. I currently live in a place with cold winters and dry heat in summer. That affects my plant.
Humidity: Higher humidity means slower soil drying. If your room sits above 60% humidity, you will water less often. Below 40% humidity, your plant will drink faster.
Temperature: Roots absorb water best in warm conditions (between 65°F and 80°F). If its cold, growth slows. The plant drinks less and soil dries slowly.
Airflow: Stagnant air can cause the soil to become waterlogged. A gentle fan will circulate air and help the roots breathe. I point a small fan at my plant on low speed. It has been a game-changer.
These variables explain why no one can give you a single "correct" schedule. If you follow these environmental cues and your finger test, you will eventually calibrate your own routine.
Bottom vs. Top Watering: Which One Is Safer?
Both methods work, but they have their pros and cons. I regularly switch between the two. Top watering is quick and flushes out mineral salts from fertilizers. But it requires perfect drainage to avoid soggy soil.
Bottom watering, as I mentioned, draws water up through the wicking action. It prevents the top layer from staying wet, which discourages fungus gnats and keeps the crown dry. However, I bottom water less frequently, because it encourages roots to grow downward, which is actually a good thing.
My rule of thumb: I bottom water when I missed a watering session and my soil is too dry to absorb moisture quickly. I top water when I have fertilized and need to flush the salt out. Using both methods keeps the soil biology balanced.
Why 90% of Indoor Plants Die from Overwatering
I keep coming back to this statistic. It is the number one killer. And I fully admit I was part of that statistic. Overwatering creates an oxygen-deprived environment. Roots need to breathe just like we do. When water fills every soil pore, oxygen cannot reach the roots.
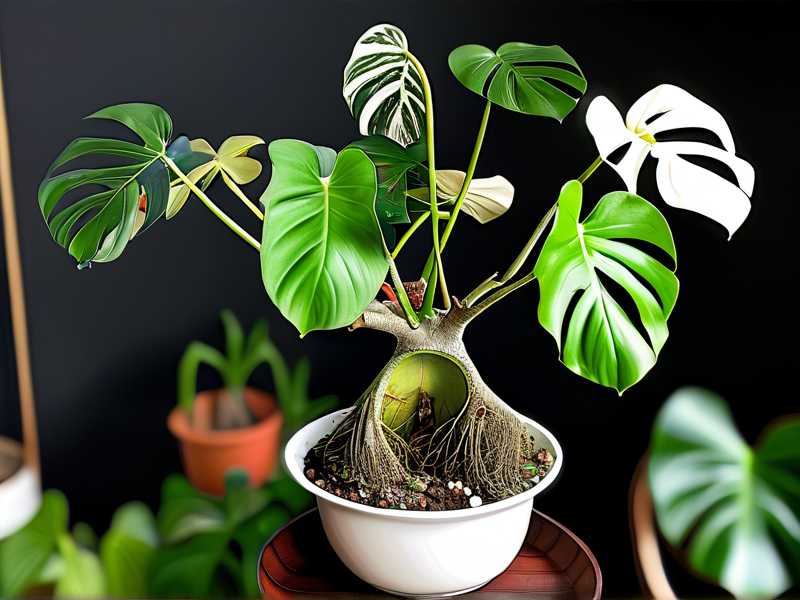
Without oxygen, root cells die. Then they break down, creating the perfect breeding ground for Pythium and Phytophthora, the pathogens responsible for root rot. This is why I pause before every watering and ask myself: is this plant thirsty, or am I just nervous? The AHS suggests that you always check moisture before adding more water.
I have seen so many cases where a plant looks “sick” but the issue is simply waterlogged roots. The fix is always the same: back off, let it dry, and recalibrate. Patience works.
Fertilizing Without Risking the Roots
Watering is already a risky business. Adding fertilizer into the mix makes it easier to overdo things. I used to fertilize with every watering. That was a mistake. It led to salt build-up in the soil, which burned the roots and caused them to absorb water incorrectly.
Now, I fertilize only about once a month during the growing season (spring and summer) at half strength. I always fertilize well-drained soil, never dry soil. Watering before fertilizing helps protect the root system.
I use a balanced liquid fertilizer designed for houseplants. My Monstera Adansonii responds well. If you notice crusty white deposits on the top of the soil, that is salt build-up. You should flush the soil with plain water once a month to wash the salts away. That practice has saved my roots from countless burns.
Tools I Actually Use
I am a practical person. I do not use a lot of fancy gadgets. But a few tools genuinely improved my ability to water correctly.
- A long-spout watering can: This helps me target the soil base without splashing water on the leaves. Wet leaves invite fungal issues.
- A cheap wooden chopstick: I stick this into the soil to test moisture. If it comes out clean and dry, I water. If it comes out with damp soil clinging, I wait.
- A moisture meter (optional): I used one for a while, but I only trusted the finger test. The meter is useful to double-check deep moisture after watering, but I always cross-check.
These simple tools make my life easier. They turn guesswork into observable data points.
Common Misconceptions about the Swiss Cheese Vine
Many people think Monstera Adansonii needs constant humidity like a fern. That is not true. It is an epiphyte, meaning it naturally grows on other trees with exposed roots. It actually prefers to dry out between waterings. The roots are not used to sitting in wet organic matter.
Another misconception is that drooping leaves always mean water. That is rarely true. Overwatered plants also droop because the roots are damaged and can no longer transport water to the leaves. So if you see drooping, check the soil first. Do not assume it is thirsty.
I have seen so many people drown their plants out of love. If your leaves are drooping but the soil is wet, the problem is too much water, not too little.
Frequently Asked Questions
How often should I water my Monstera Adansonii?
There is no universal answer. I water mine roughly every 7-10 days in summer and every 2 weeks in winter. But I always check the top 2-3 inches of soil first. if it is dry, I water. If it is moist, I wait. Environmental factors like temperature, light, and humidity will change this frequency.
Can I use ice cubes to water my Monstera Adansonii?
No, I strongly advise against it. Ice cubes chill the root zone and cause thermal shock. Tropical plants like the Monstera hate cold roots. The cold water also does not soak the soil evenly. Always use room temperature water for the best results.
Does my Monstera Adansonii need a pot with drainage holes?
Absolutely. Without exception. Drainage holes are non-negotiable. If you love a decorative pot without holes, keep your plant in a plastic liner pot with drainage, and place it inside the pretty one. Remove it whenever you water to let the excess water drain away.
The Final Reality Check
Keeping a Monstera Adansonii alive is not about having a green thumb. It is about restraint. The most loving thing you can do for your plant is sometimes doing absolutely nothing. Let the soil dry. Let the roots breathe. Let the plant tell you when it is thirsty.
My journey has been filled with mushy stems and wilted leaves. But those failures taught me to listen. Now, I have a thriving vine that has pushed out leaves larger than my hand. It is a joy to watch it climb its moss pole. I want you to experience that same joy.
Start by checking your soil today. Pick up the pot and feel its weight. Adjust the light if needed. Ditch the fixed schedule and start observing. Your Monstera Adansonii will reward you with lush, vibrant growth. It genuinely is that simple.