bluename
 Your yam tuber is soft, leaking, or just sitting there doing nothing. Here's the short answer: stop watering it immediately, cut away every bit of rot, let it dry for 48 hours, then repot in gritty, dry soil. That's the fastest way to revive a dying yam tuber. I've used this method on my own plants more times than I'd like to admit. It works. The key is catching the rot before it reaches the growing eyes.
Why Your Yam Tuber Is Actually Dying
Let me guess what happened. You saw the soil look dry, so you watered. Then it looked drier, so you watered again. Then the tuber turned mushy. Sound familiar?
I have news for you. 90% of indoor plants die from overwatering. Yams are no exception. In fact, they're even more sensitive because the tuber itself stores water. When you add more moisture from the outside, the whole thing basically drowns from the inside out.
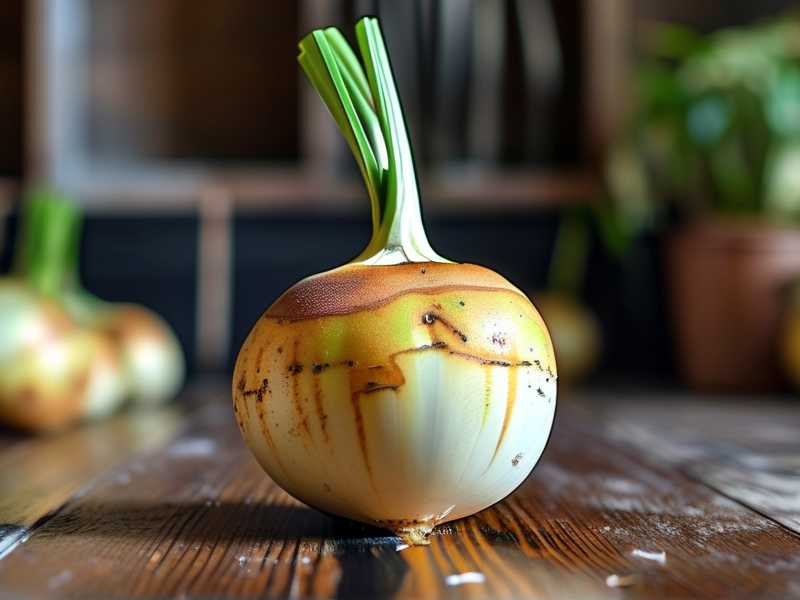
In simple terms, your yam isn't dying from neglect. It's dying from too much love.
The Rot Problem
When a yam tuber sits in wet soil, bacteria and fungi move in fast. The flesh turns brown, then black. It gets soft. You might see small flies or smell something sour. That's rot. And rot spreads quicker than you think.
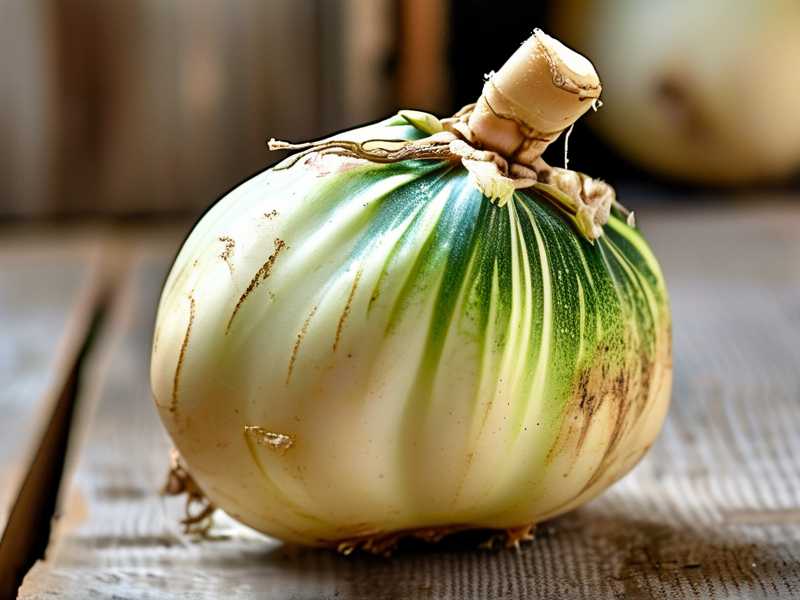
I once left a yam in a saucer of water for just three days. By day four, the bottom third was completely brown and mushy. I tried to save it by just leaving it alone. Big mistake. The rot crept upward over the next week.
My Step-by-Step Revival Plan
This is exactly what I do now. And it's what you should do too if you want to bring your yam back to life.
Step 1: Take It Out and Smell It
Pull the tuber out of the pot. Gently brush off the soil. Smell it. I know that sounds weird, but trust me. A healthy yam tuber smells earthy. A rotting one smells sour, almost like old vinegar.
If it smells bad, you've got rot. If it smells fine, you might just have a dormant tuber that needs better conditions.
Step 2: Cut Away Everything Soft
This is the part most people skip. They see a little soft spot and think, "I'll just let it dry out." No. That soft spot is a breeding ground.
Use a clean knife. Sterilize it with rubbing alcohol first. Then cut away every piece of dark, soft flesh. I mean every single piece. Cut about half an inch into the healthy flesh to make sure you got it all.
I killed my first yam plant this way. I only cut out the visibly rotten part. A week later, the whole tuber was gone. The rot had already spread further than I could see.
Be aggressive. Your tuber can survive losing 70% of its mass. It cannot survive with even a tiny piece of rot left behind.
Step 3: Let It Callus
After cutting, do not plant it. Do not water it. Place the tuber on a dry paper towel in a warm, shaded spot. Leave it for 48 hours. This is called callusing. The cut surface will dry and form a protective layer.
I tried planting immediately once. That was my second dead yam. The open cut absorbed water and rotted again within a week. Learn from my mistake. Patience here saves lives.
Step 4: Pick the Right Pot
Now, the pot matters more than you think. It needs drainage holes. Not one. Multiple. And it should be porous.
I personally use terracotta pots. They let the soil breathe and wick away excess moisture. Plastic pots trap water. That's bad news for a recovering yam.
Also, right-size the pot. If the tuber has shrunk after cutting, use a smaller pot. A tiny tuber in a huge pot means lots of wet soil with nothing to absorb it. That's a recipe for re-rotting.
Step 5: Pot in Bone-Dry Gritty Soil
Yams need soil that drains like a sieve. I mix two parts regular potting soil with one part perlite and one part coarse sand. If you don't have perlite, use pumice or small gravel.
The key word here is dry. Do not water after potting. I know it feels wrong. Every cell in your gardener brain screams to water. Don't.
Step 6: Place It Somewhere Bright and Warm
Warm and bright. But not direct blazing sun. That can shock a stressed tuber. I use a windowsill with morning sun and afternoon shade. Around 20-25°C is ideal.
Keep it in a spot with good airflow too. Stagnant air encourages fungal growth. A gentle breeze from an open window is perfect.
Step 7: Don't Water for 7 Days
Here's the hard part. For the first week after repotting, do not water at all. I know. I know. But this is exactly what most people can't handle.
If the tuber feels too dry after a week, give it a light misting or a teaspoon of water at the edge of the pot. Not on the tuber itself. Just enough to create a hint of moisture around the roots.
My 2-Week Recovery Observations
I tracked this yam tuber recovery after overwatering for a full two weeks. Here's what I saw, honestly, over those 14 days.
Day 1-3: The Waiting Game
For the first three days, nothing seemed to happen. The tuber sat there in dry soil. No roots, no shoots. I checked it every morning like a worried parent. The cut surface stayed dry and firm. That was actually the goal.
Day 4-6: First Signs of Life
On day four, I noticed the cut surface had completely sealed over. It looked like a scab. Good sign. On day six, I spotted tiny white bumps at the base. Those were the first root initials. I almost celebrated too early. But I kept my hands off.
Day 7-10: Roots Begin to Grow
By day seven, the roots were about a quarter inch long. White and delicate. I still didn't water. The tuber had enough internal moisture to push those roots out. Adding water then would only invite rot.
By day ten, the roots were longer and thicker. Some had branched. The tuber itself felt firmer in the soil. It was no longer shrinking. That was a huge relief.
Day 11-14: New Growth Appears
On day twelve, I saw the first green shoot pushing up from the top. It was pale at first, almost white. Over the next two days, it turned a light green and started reaching toward the light.
By day fourteen, the shoot was about two inches tall with a small leaf beginning to unfold. The root system was solid enough that a gentle tug didn't move the plant. That's when I finally gave it a small watering. Not a soak. Just enough to moisten the top two inches of soil.
The recovery took exactly two weeks. Not a day more, not a day less. But I had to follow every step without cutting corners.
Three Beginner Mistakes That Kill Yam Tubers
I want to be very clear about this. I made all three of these mistakes myself before I finally learned. You don't have to.
Mistake 1: Overwatering
This is the number one killer. 90% of indoor plants die from overwatering. Yam tubers are especially prone because they hold water internally.
Here's what happens. You water. The soil stays wet. The tuber starts taking up more water than it can process. The cells burst. Bacteria move in. And then you have mush where you once had a plant.
The rule I live by now: if the soil is still moist down to my first knuckle, I don't water. Period. During the recovery phase, I water even less. Most yam tubers would rather be too dry than too wet. Dry is survivable. Wet is lethal.
Mistake 2: Wrong Light Placement
I kept my first yam in a dark corner. I figured, "It's a tuber. They live underground. It must be fine in the shade." Wrong.
Yam tubers need light for the vine that grows from them. Without enough light, the plant can't photosynthesize. The tuber slowly drains its stored energy and eventually shrivels up.
But here's the flip side. Too much direct sun can scorch a stressed tuber. I've seen the skin turn wrinkly and pale under intense afternoon light.
The sweet spot is bright, indirect light. East-facing windows are perfect. South-facing worked for me too, but I had to pull the pot back a few feet from the glass during summer.
Mistake 3: Using the Wrong Pot
I have a confession. My third dead yam was in a beautiful ceramic pot with zero drainage holes. I thought the layer of pebbles at the bottom would help with drainage. It did not. Water pooled at the bottom, the roots sat in it, and the tuber rotted from the underside up.
If your pot doesn't have drainage holes, you're not growing a plant. You're growing a swamp. I'm sorry to be blunt, but that's the truth.
Use a pot that drains freely. Terracotta is my first choice. Unglazed ceramic works too. And please, please, please. Put a saucer under the pot and empty it after every watering.
The Expert Take on Saving Tubers
The RHS makes a clear point about tuberous plants: they prefer drought over drenching. Their guidance has reshaped how I water all of my plants, not just yams. Basically, the RHS says to let the growing medium dry out between waterings. That has become my golden rule.
The AHS also emphasizes proper drainage and avoiding wet feet for tuberous crops. Reading their advice felt like being told what I should've known from the start. These experts agree, and honestly, my own growing experience backs them up completely.
How to Know If Your Yam Tuber Is Beyond Saving
Learning how to save a rotting yam tuber starts with honest assessment. Not all of them can come back. You need to know where the line is.
A tuber is likely dead if it's completely soft all the way through. I mean, no firm area at all. Soft like a sponge. If that's the case, there's nothing left to save. The rot has taken over everything.
Also, if the tuber smells strongly of rot and the smell doesn't go away even after cutting, that's a bad sign. The decay has spread through the center.
And if no new roots appear after three weeks of the dry recovery process, chances are the tuber never had enough stored energy to begin with. It happens. Not every plant can be saved.
But here's the good news. If there's even a small firm section with a visible growing eye, there's hope. I've seen a piece the size of a thumb drive grow into a full plant. It takes patience. But it works.
The Best Way to Prevent Future Problems
Once your yam is healthy again, don't go back to whatever killed it. I learned this the hard way.
I now inspect my tubers every time I water. Two seconds. I press the skin gently. If it gives under pressure, something's wrong. I also lift the pot to feel the weight. A fully watered pot is heavy. A dry one is light. Once you get used to the difference, you'll never overwater again.
I also repot my yams every year, in spring. Fresh soil, fresh space. I check for any signs of disease while I'm at it.
Honestly, the most important thing I've learned is this. Yam tubers are survival machines. They store water and nutrients for a reason. In nature, they go through dry seasons all the time. They don't need your constant attention. They need you to leave them alone.
Frequently Asked Questions
Can I cut off the rotting part and replant it immediately?
Please don't. I made this mistake with my second yam plant. When you put an open cut in soil with moisture, the wound absorbs water and rots again. Let the cut surface dry for at least 48 hours. Only then should it go back into soil. Dry soil. No water.
What does a healthy yam tuber look like?
Firm to the touch. It should feel like a potato right out of the pantry. Not rock hard, but with a little give that springs back to your pressure. The skin should be intact, with no cracks or dark patches. When you cut it open, the flesh should be pale and slightly moist. Not wet, not slimy. Just barely moist. Imagine a peeled apple sitting out for ten minutes. That's the texture and look you're going for.
How long does yam tuber recovery really take?
From my own experience, plan for two to three weeks. In my 2-week observation, I saw roots by day 7-10 and the first shoot by day 12. But that was with ideal conditions and aggressive rot removal. If your tuber was severely rotten, give it up to four weeks. The growing eye will tell you when it's ready.
One last thing. I get it. It hurts to watch a plant slowly decline. Especially when you honestly don't know what you did wrong. But you're here, searching for answers. That puts you ahead of most people. Trust the process. Cut the rot, dry it out, repot it properly, and wait. Your yam is more resilient than you think.