bluename
 How to Grow Early vs Late Tulip Varieties: A Gardener's Care Guide
I love tulips, but for years, I struggled with a common frustration: my tulip display would burst into color and then vanish all too quickly, leaving my spring garden bare by mid-season. I wanted a continuous cascade of blooms from the first warm days until summer’s edge. The solution wasn't just planting more bulbs; it was understanding the fundamental differences between early and late tulip varieties and tailoring my care to each. If you've ever wondered how to extend your tulip season or why some of your bulbs thrive while others falter, you're in the right place. I spent an entire season experimenting, observing, and yes, making mistakes, to figure out the precise care tips for early-flowering versus late-flowering tulips. Let me walk you through what I learned.
Understanding the Tulip Timeline: It's More Than Just Bloom Time
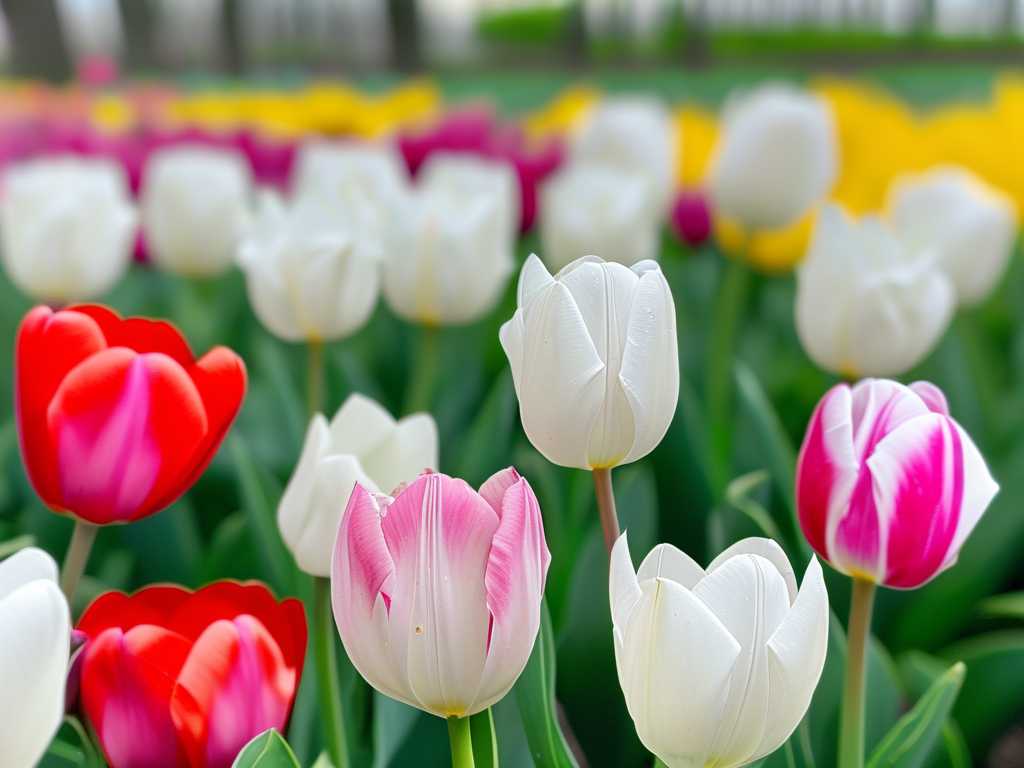
Before we dig into the care specifics, it's crucial to know what we're dealing with. Early tulips, like the classic Single Early and Double Early types, are the spring's eager heralds. They often push through the last of the snow and bloom when the air is still crisp. Late tulips, including Darwin Hybrids, Lily-flowered, and Parrot tulips, are the grand finale. They take their time, building up resources to produce often larger, more elaborate blooms weeks later.
This isn't just a scheduling difference; it's a physiological one. Their growth cycles demand different approaches from us as gardeners. The Royal Horticultural Society (RHS) categorizes tulips by these flowering periods for a reason—it's the first clue to their needs.
Planting: The First Critical Divergence
My fall planting ritual used to be one-size-fits-all. I'd plant all my bulbs in October, 8 inches deep, and hope for the best. The results were inconsistent. After consulting resources from both the RHS and the American Horticultural Society (AHA), I refined my technique for each type.
For early tulips, I now plant them in mid to late autumn, but I ensure they are in the ground at least 6 weeks before the ground is expected to freeze hard. Their depth is standard—about 3 times the height of the bulb. The real key for earlies is location. They need the sunniest, warmest spot in your garden to trigger their early emergence. A south-facing slope or a bed against a warm wall is ideal. I plant them slightly shallower (about 6-7 inches deep) in these spots to help the soil around them warm up faster in late winter.
For late tulips, the strategy shifts. These bulbs benefit from being planted deeper and later. I wait until late autumn, even early winter in my zone, to plant them. A depth of 8 inches is my standard. This deeper planting keeps the bulb's developing flower bud cooler for longer in the spring, which is essential for preventing premature growth and ensuring a strong, sturdy stem. It also provides better insulation against any unexpected late freezes. I learned this the hard way one year when a warm March followed by an April frost "fried" the emerging buds of my late tulips that were planted too shallowly.
The Two-Week Observation: Emergence and Early Care
This is where the real-time observation began. In early spring, as the soil temperature inched above 50°F, my early tulips were the first to show green tips. This triggered my first care task: protective mulching.
- Week 1 Observation (Early Tulips): Sprouts are 1-2 inches tall. A late frost forecast sent me into action. I lightly covered the emerging shoots with a loose, breathable frost cloth overnight. For areas without cloth, a sprinkle of loose straw or shredded leaves worked as a temporary blanket. The mistake I made: Using a plastic sheet once. It trapped moisture and caused rot on a few shoots. Always use breathable material.
- Week 2 Observation (Early Tulips): Stems are now 4-5 inches tall, and flower buds are forming within the leaves. The frost danger is lessening. My care shifted to moisture. I gave them a gentle, deep watering (about 1 inch) since we were in a dry spell. The soil was well-draining, so no waterlogged conditions.
- Week 1 & 2 Observation (Late Tulips): Meanwhile, in the late tulip bed, the soil was still mostly bare. A few green tips were just barely visible. No action was needed here except patience. Disturbing the soil or adding fertilizer now would be counterproductive.
Watering and Feeding: Fueling Different Schedules
Both types need consistent moisture during their active growth and bloom period, but their feeding schedules differ dramatically.
Early tulips are sprinters. Once they emerged, I applied a balanced, water-soluble fertilizer (like a 10-10-10) diluted to half-strength. I did this once as the leaves were expanding and again just as the flower buds began to show color. This gives them the quick energy boost they need for their fast-paced show. After blooming, I continued to water the foliage until it began to yellow.
Late tulips are marathon runners. They have a longer vegetative period. I hold off on any spring feeding until their foliage is well out of the ground (about 6 inches tall). Then, I apply a fertilizer slightly higher in phosphorus (the middle number) to support bud development. According to AHA guidelines, avoiding high-nitrogen fertilizers is key here, as it promotes weak, floppy growth in these taller varieties. I feed them once at this 6-inch stage and that's it. Their deeper planting and longer growth period allow them to access more native soil nutrients.
The Post-Bloom Period: The Most Important Step Everyone Gets Wrong
Here lies the biggest care difference and the most common pitfall. How you treat the foliage after blooming directly impacts next year's performance, especially for late tulips.
For early tulips, I'm pragmatic. These varieties are less reliable perennializers. I often treat them as annuals for a guaranteed brilliant display. If I want to try saving them, I deadhead the spent flower immediately, leaving all leaves intact. I water lightly for a few weeks, then let the foliage die back naturally before lifting the bulbs, drying them, and storing them in a cool, dry place for replanting in the fall.
For late tulips, particularly Darwin Hybrids which are known for better perennial performance, post-bloom care is non-negotiable. I never, ever braid or cut down the green leaves. This is the plant's solar panel. The foliage must be allowed to photosynthesize for a minimum of 6 weeks after blooming to recharge the bulb for next year. I immediately snap off the seed head (deadheading) to prevent energy waste on seed production. I continue to water the area if conditions are dry. To hide the yellowing foliage, I plant late-emerging perennials like hostas or daylilies around them. This "companion planting" technique, recommended by the RHS, keeps the garden looking full while the tulips complete their essential life cycle.
My Season-Long Takeaways for Tulip Care Success
My season of focused care taught me that success with early and late tulips isn't accidental. It's a deliberate practice. Early tulips demand prime sunny real estate and quick, accessible nutrients for their short, brilliant performance. Late tulips require strategic deep planting, patient feeding, and, above all, disciplined post-bloom foliage care to encourage a return visit next spring. By respecting their inherent biological clocks, you can orchestrate a tulip symphony that lasts for months, not just weeks.
Frequently Asked Questions
Can I plant early and late tulips in the same bed? Absolutely, and I highly recommend it for a long season of color. The key is to plant the late tulips deeper. Place the late tulip bulbs at their proper depth (8 inches), cover with soil, then place the early tulip bulbs above them at their shallower depth (6 inches) and cover. The early tulips will bloom and fade before the late tulips need the space and sunlight.
Why are my late tulips not coming back the second year? This is the most common issue. The likely culprit is cutting down the foliage too soon. The bulb is exhausted after blooming and hasn't had time to rebuild its stores. Ensure the leaves get at least 6 weeks of green life after the flower fades. Also, ensure they are planted in perfectly draining soil; soggy summer soil causes bulb rot.
What is the best fertilizer for tulip bulbs? At planting time, use a balanced bulb fertilizer mixed into the soil below the bulb. In spring, for early tulips, a balanced water-soluble fertilizer works well. For late tulips, a fertilizer with a higher phosphorus ratio (like a 5-10-5) applied as they grow supports strong stems and flowers. Always follow package instructions to avoid over-feeding.
The journey from a fleeting tulip display to a prolonged spring spectacle is all about understanding timing. By giving your early bloomers a warm, fast start and your late bloomers a cool, deep foundation and the patience to recharge, you'll unlock the full potential of every bulb you plant. Happy gardening