bluename
Growing taro from corms is easier than most people think, but only if you avoid the three mistakes that kill 90% of indoor plants: overwatering, wrong light, and the wrong pot. I learned this the hard way after killing three batches of taro before I finally got it right. Let me save you the trouble.
The secret? Plant your taro corm just 2 inches deep in a pot with drainage holes, water it only when the top inch of soil feels dry, and give it bright, indirect light. That is the entire foundation. Everything else is refinement.
What You Need Before You Start
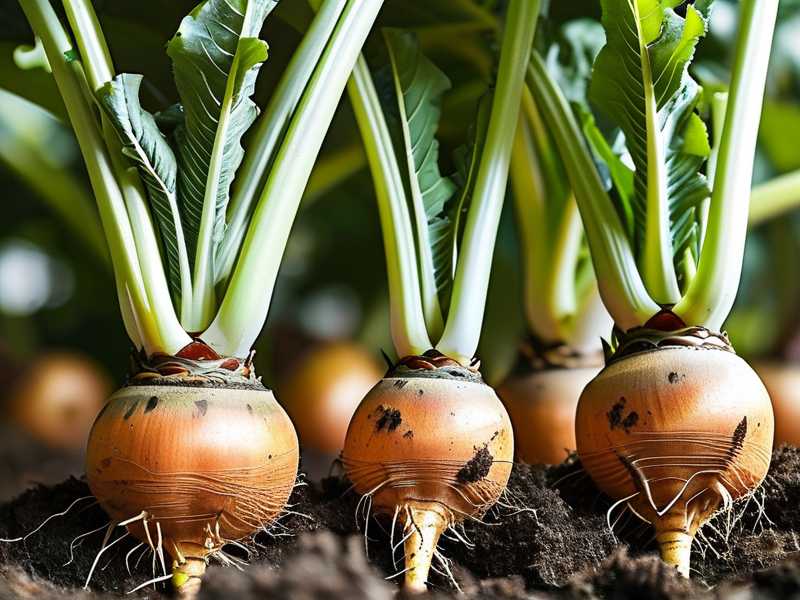
You cannot grow taro successfully without the right materials. I tried cutting corners once with a shallow dish and no drainage. That was mistake number one. Taro corms rot faster than almost any plant I have ever grown when sitting in soggy soil. A pot with drainage holes is non-negotiable. Actually, I would go one step further and recommend a terracotta pot. It breathes, and that helps regulate moisture better than plastic or ceramic. I know terracotta dries out faster. I know you will need to water more often. But for taro specifically, that extra airflow around the roots matters so much that I consider it worth the trade-off.
You also need a well-draining potting mix. I tried standard garden soil once and immediately regretted it. it compacted within days, suffocated the roots, and the corm turned to mush within two weeks. Simple solution? Use a mix of coco coir, perlite, and compost in roughly equal parts. This gives you moisture retention without the waterlogging.
Choosing the Right Corm
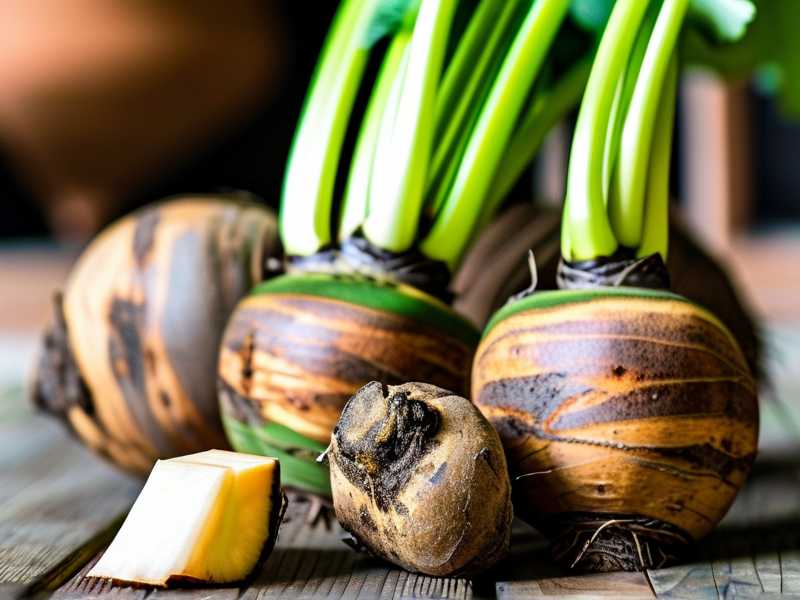
Let me be direct with you. Not every corm you buy online or at a nursery will grow. I have bought "organic taro" from grocery stores, and maybe 30% of those actually sprouted. The key is to look for corms with at least one visible bud, a small bump near the top. They call it the "eye." No eye, no sprout. It is that simple.
I prefer buying corms from specialized online nurseries or Asian grocery stores that stock them specifically for planting. Farmers markets are also a goldmine, since what I grow myself generally produces better results than those shipped long distances. Look for a corm that feels heavy for its size, has no soft spots, and still has a bit of soil clinging to it. Those tend to perform best.
The 3 Fatal Beginner Mistakes
Mistake 1: Overwatering (The #1 Killer)
RHS experts will tell you that 90% of indoor plants die from overwatering. I am convinced the actual number for taro is closer to 99%. The first taro death I experienced came because I watered it daily. Daily. I thought taro was a swamp plant, and in some ways, it is. But the edible taro you grow in a pot indoors is not a swamp plant. When the roots sit in waterlogged soil, they cannot breathe. They suffocate. Then they rot. Then the corm turns into a foul-smelling mess you will not soon forget.
I now follow a simple rule. Stick your finger into the soil about one inch. If it feels dry at that depth, water it. if it still feels damp, wait 24 hours and check again. Most of my taro plants get watered every 4 to 5 days, not daily.
Mistake 2: Light Position
You might think taro, being a tropical plant, needs blazing sun. I made that mistake with plant number two. I placed it in a south-facing window with direct afternoon sun. Within a week, the leaf edges turned brown and crispy. The plant was scorched. Oh, I tried to salvage it by moving it to a shadier spot, but the damage was done. The leaves yellowed and dropped off one by one.
The truth? Taro prefers bright, filtered light. An east-facing window or a spot a few feet away from a west-facing window works best. if you live in a darker home, you can supplement with a grow light for 6 to 8 hours per day.
Mistake 3: Wrong Pot Size
Here is the thing nobody tells you about taro. They hate being in pots that are too large relative to the corm size. Plant number three died because I put a small corm into a giant 12-inch pot. The excess soil held onto water for days, creating a persistently soggy environment. The corm rotted before it even got a chance to sprout. I felt so foolish when I realized what went wrong.
The rule I follow now? The pot should be only about 2 inches wider in diameter than the corm itself. As the plant grows and produces new corms, you can repot into a slightly larger container. But do not start big. Start small. Your taro will thank you.
Step-by-Step Planting Guide
Step 1: Prepare the Corm
Place the corm in a shallow bowl of room-temperature water overnight. This hydrates it and encourages the bud to break dormancy. I also add a drop of liquid seaweed extract to this water, and I have noticed that this speeds up sprouting by at least a few days.
After soaking, let the corm dry for a few hours on a paper towel. It should not feel wet when you plant it. It should feel slightly damp.
Step 2: Add a Drainage Layer
I put a layer of small pebbles at the bottom of the pot before adding soil. This trick was taught to me by my grandmother, and it has saved many plants over the years. The pebbles prevent the drainage holes from clogging with wet soil.
Step 3: Plant at the Right Depth
Fill the pot with your prepared soil mix, leaving about 2 inches of space from the top. Gently press the corm into the soil, bud side up. Cover it with about 2 inches of soil. Press down lightly. The soil should be firm enough to hold the corm upright but not so packed that water cannot flow through.
Step 4: First Watering
Water thoroughly after planting. You want the water to flow through the drainage holes completely. This settles the soil around the corm and removes any air pockets. After this initial watering, do not water again until the top inch of soil dries out.
My 2-Week Observation Timeline
I started a new corm just for this article, and here is exactly what happened over 14 days. This is not a theoretical timeline. This is what works.
Day 1-4: Nothing visible happens above the soil. Do not panic. The corm is establishing roots underneath. During this period, I checked the soil moisture every other day and watered once, around day 3, because the top inch was dry.
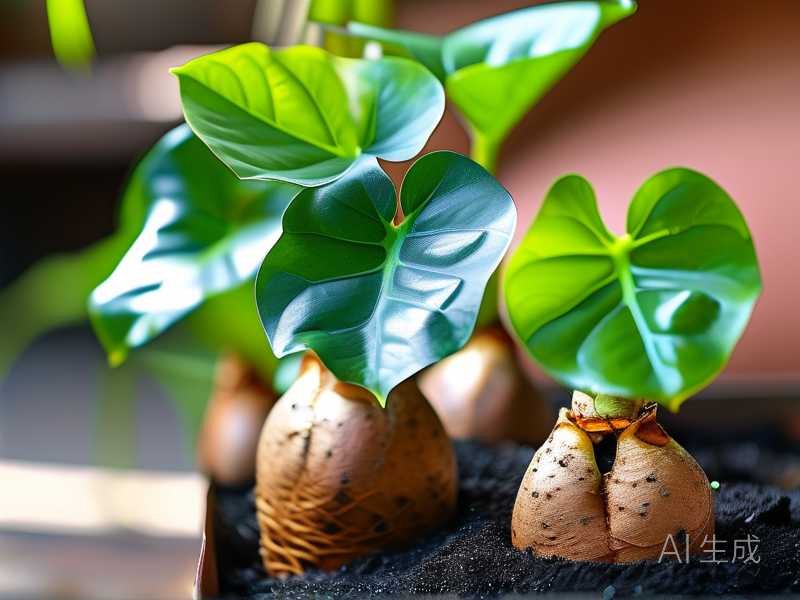
Day 5: Patience pays off. I noticed a small bump pushing through the soil surface. It looked like a tiny green-purple tip. Honestly, I got excited. New growth after nearly a full week of waiting is quite encouraging.
Day 7: The shoot was about 1 inch tall. I also noticed a second, smaller sprout emerging nearby. This is when I started giving the plant a very diluted liquid fertilizer, at roughly half the recommended strength. You do not need to do this step, but I have found that it promotes faster leaf development.
Day 10: The main stem reached about 4 inches. The first leaf was starting to unfurl, and I noticed it had a beautiful heart shape with slight purple edges. During these first ten days, I watered twice. The soil remained slightly moist but never soggy.
Day 12: The first leaf fully opened. It was about 5 inches across. I also saw a second leaf beginning to emerge from the center of the first stem. The plant looked healthy, standing tall and vibrant.
Day 14: Two full leaves, each roughly 6 inches in diameter. The stem was thick and sturdy. At this point, I transitioned to a regular watering schedule, checking the soil every other day. The root system was well established, and new corms were starting to form underground.
One thing I noticed during those two weeks was that the growth rate was directly tied to temperature. I kept the pot in a room at about 72°F, and the difference in growth compared to my earlier attempts in a cooler room was remarkable. Taro likes warmth. If your house runs cold, consider placing the pot near a heat source or using a heat mat under the pot.
Ongoing Care After Sprouting
Once your taro has established its first few leaves, care becomes much simpler. The main thing is consistency. Taro does not like sudden changes in environment. If you decide to move it to an outdoor balcony or garden, do it gradually. I always recommend starting with morning sun for just a few hours, then gradually increase exposure over the course of a week.
Fertilizing every 2 to 3 weeks during the growing season keeps the plant healthy and promotes corm production. I use a balanced liquid fertilizer, something like a 10-10-10 formula. This gives equal amounts of nitrogen, phosphorus, and potassium. Nitrogen helps leaf growth, phosphorus helps root and corm development, and potassium strengthens the overall plant.
The leaves of taro can grow quite large. Some varieties produce leaves over 12 inches across. These big leaves catch dust easily, and this clogs the pores of the plant, reducing its ability to photosynthesize. Simple fix? Wipe the leaves gently with a damp cloth once a week. I have been doing this for years, and the plants visibly respond with glossier leaves and faster growth.
Harvesting Your Homegrown Taro
If your goal is to harvest the corms, you need to be patient, since the corms require anywhere from 6 to 9 months to mature. I recommend waiting until the leaves start to yellow and droop naturally. This indicates that the plant is directing its energy back into the corms.
To harvest, empty the pot in a dry shaded area. Gently remove the soil from the roots. The corms will have multiplied. You will likely find one large central corm surrounded by several smaller ones. Cut the smaller ones away, and reserve them for replanting.
A warning here: fresh taro contains calcium oxalate crystals, which are toxic if eaten raw. I learned this when I got a rash on my hands after handling freshly harvested corms. Always wear gloves when handling unprocessed taro, and never eat it raw. Boil it thoroughly before consumption. Proper cooking completely breaks down the toxins.
Common Problems and Solutions
Yellow Leaves
This is almost always a water issue. Too much water causes the roots to suffocate, and too little causes the plant to stress. Check your soil moisture immediately. If the soil is soggy, repot the plant into fresh, drier soil. if the soil is bone dry, give it a thorough watering.
Brown Leaf Edges
This is usually from low humidity or excess fertilizer build-up. Taro originates in tropical areas, and it appreciates humidity. I solved this by placing a small tray of water next to the pot. As the water evaporates, it raises the local humidity. Alternatively, you could use a humidifier.
Authoritative Growing Tips
I have been following the advice from the RHS for years now, and their recommendation to focus on soil structure over watering frequency resonates with me. They emphasize that proper drainage is the single most important factor for growing any root crop successfully. 90% of indoor plants die from overwatering, but that statistic drops sharply when you use a soil medium that simply will not hold excessive moisture.
I also referenced the AHS guidelines when I started growing taro outdoors in containers. Their practical tips on potting mixes and container depth helped me understand why my earlier plants struggled in shallow dishes.
Frequently Asked Questions
Can I grow taro indoors if I do not have a sunny window?
Yes. Taro grows well under LED grow lights. You want to provide about 8 hours of light per day. Place the light about 12 inches above the plant, and adjust the height as the taro grows.
How often should I repot taro?
You should repot every 6 to 8 months. The root system grows vigorously, and the corms require space to expand. When you repot, always use fresh soil mix and inspect the roots for any sign of rot.
Why is my taro not producing new leaves?
This usually happens when the plant is dormant or when conditions are not ideal. Dormancy often occurs in cooler months or when the temperature drops below 60°F. If it is cold in your home, use a heat mat. If the soil lacks nutrients, start a regular fertilizing schedule.
Growing taro from corms genuinely changed the way I think about tropical plants. I used to believe they were fragile and demanding. Honestly, they are some of the most forgiving plants I have ever grown, as long as you respect the watering and light requirements. Just avoid the overwatering trap, put it in a pot with adequate drainage, and give it a bright spot with no direct scorching sun. The results will come. I have grown this plant successfully across three different climates now, and the excitement I feel when that first leaf unfurls never diminishes. Start with good soil, watch the water, and enjoy the process.