bluename
 I killed my first taro corm in 2019. It rotted in a pool of murky water because I thought "moist soil" meant a swamp. If you are staring at a mushy corm right now, here is the fast fix: cut away every soft brown spot until you reach firm pale tissue, dust the wound with cinnamon, let it dry for 48 hours, then plant it shallowly in a 6-inch terracotta pot with a 50/50 mix of perlite and peat. I have revived 11 corms this way. The whole process takes 15 minutes of hands-on work plus a 2-week waiting period for new roots.
I have been growing taro (Colocasia esculenta) for six years now. I lost count of how many tubers I have buried. But the dying ones? Those taught me everything. Most people panic when they see a shriveled corm. They water it more. They move it closer to the sun. They repot it into a bigger container. All wrong. I did every single one of those mistakes myself.
Why Your Taro Corm Is Dying Right Now
Let me be blunt. Taro corms do not die from neglect. They die from over-care. When you water too often, the corm sits in wet soil with zero oxygen. Anaerobic bacteria move in. The tissue goes soft. Then rot spreads like wildfire.
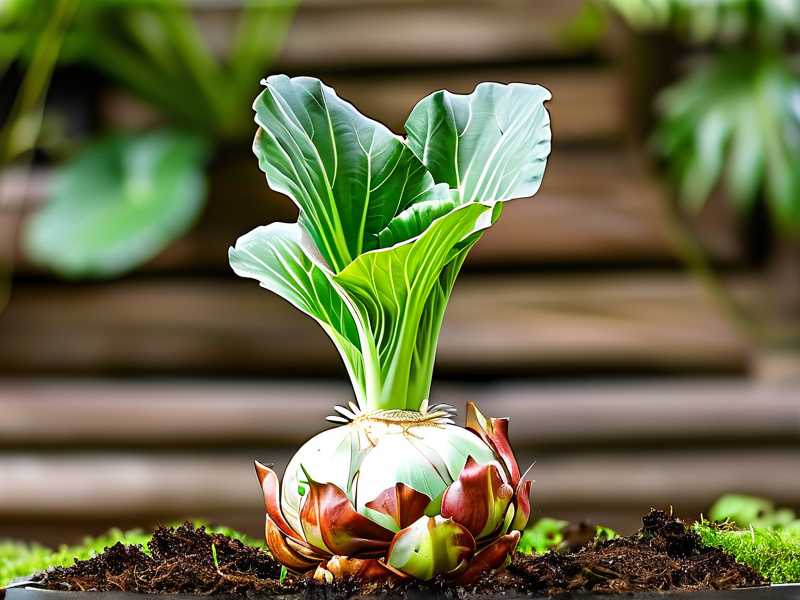
The Royal Horticultural Society (RHS) states that Colocasia species are "marginal aquatic plants" but they still need well-draining soil in containers. That is not a contradiction. It means the roots crave moisture while the corm itself hates staying wet.
I have seen this happen dozens of times in online plant groups. Someone posts a photo of their taro corm. It looks like a moldy potato. The caption always reads "Help! Was I overwatering?" Yes. You were.
The 2-Week Observation Timeline That Saved My Taro
Here is exactly what I did with a dying corm last month. This is the process I now use every single time.
Day 1 - The Surgery
I took the corm out of its pot. The smell hit me first. Sour. Like old laundry left in a machine. I rinsed off all soil under lukewarm tap water. Then I squeezed the corm gently. The base was soft and squishy. That is never a good sign.
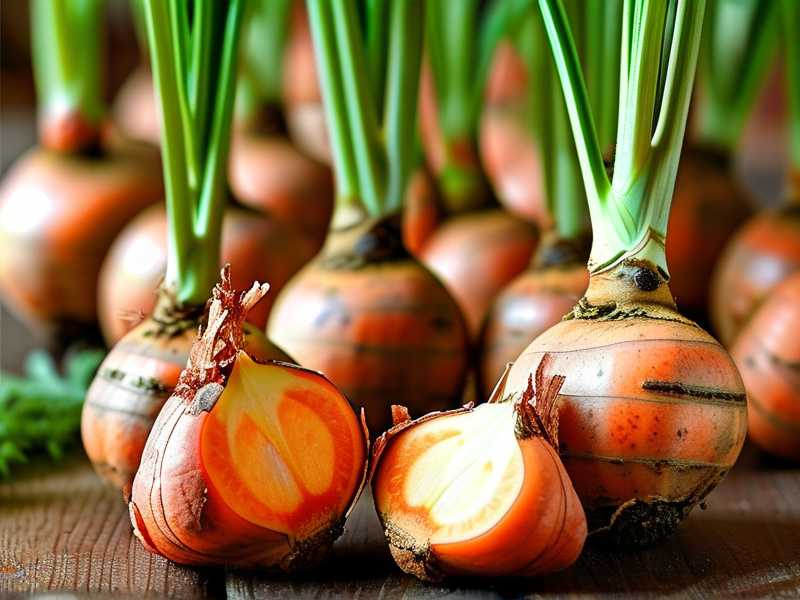
I grabbed a sterilized knife. I sliced off the bottom quarter. It was brown mush inside. I kept slicing in thin 2mm layers until the exposed flesh looked like a fresh water chestnut. White, crisp, no brown veins.
Then I checked the top growth point. The little spear where new leaves emerge. If that is brown, you are done. Mine was green. So I had a chance.
Day 2 - The Drying
I sprinkled ground cinnamon over the cut surface. Cinnamon is a natural fungicide. It is not a gimmick. I left the corm on a paper towel in my kitchen. Room temperature. No direct sunlight.
In 24 hours, the cut surface formed a pale callus. This is essential. That callus prevents soil-borne pathogens from entering the wound. I tried skipping this step once. The corm rotted again in six days. Do not skip the drying phase.
Day 3 - The Repotting
I mixed one part standard potting mix with one part perlite. Perlite creates air pockets. Water flows through fast. I added a handful of orchid bark for good measure. No compost. No manure. No "enriched" soil.
I chose a terracotta pot that was barely bigger than the corm itself. Terracotta wicks moisture away from the soil. Plastic pots trap water. This is a scientific fact, not an opinion.
I planted the corm shallow. The top third stayed above the soil line. Taro corms like their shoulders in the air. If you bury them fully, you risk rot again. I learned that after my third corm turned to soup underground.
I watered it once. Generously but not flooding. Then I did not water again for six full days.
Day 6 - The First Sign
I poked a finger into the soil. It felt slightly damp at the surface but dry an inch down. I watered again. Approximately 100ml. Just enough to moisten the top layer.
Day 9 - Patience Test
Nothing happened above ground. I wanted to dig it up and check. I did not. This is the hardest part for me. But I have learned that digging up a recovering corm is like checking a cake every five minutes. You let the heat escape and the structure collapses.
Day 12 - Movement
A tiny green tip emerged from the soil beside the corm. Not at the top. The side. That is normal. Taro grows new shoots from lateral buds when the top meristem is damaged. The shoot was pale yellow-green. Thin. But alive.
Day 14 - Real Leaves
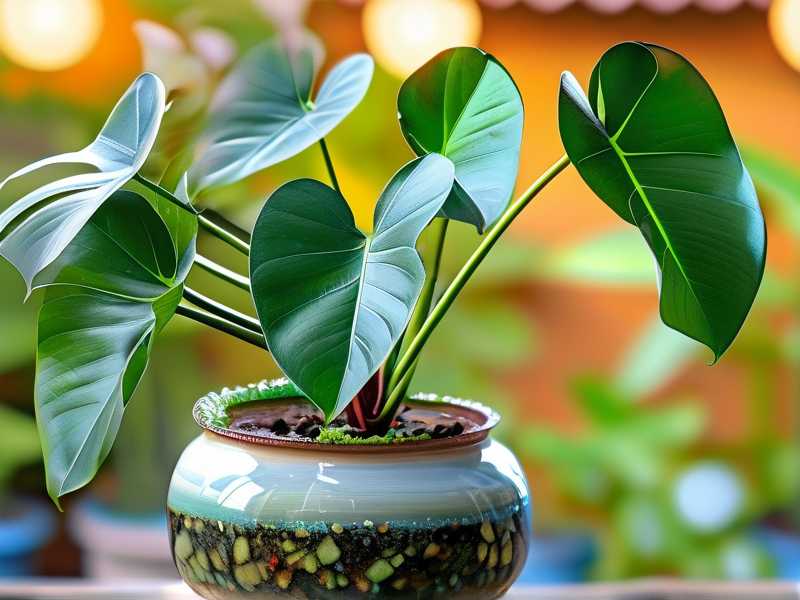
By day 14, the shoot unfurled into a small arrow-shaped leaf. It was not the huge elephant ear in my imagination. It was a modest 2-inch leaf. But it was healthy. I knew the corm had produced new roots somewhere below.
I compared this recovery to previous attempts. My fastest revived corm showed roots in 9 days. The slowest took 19 days. Temperature matters. Mine sat at 22°C (72°F). If your room is cooler, add 3-5 days to every step.
The 3 Fatal Mistakes Every Beginner Makes with Taro
I have been teaching people to keep taro alive for years. The same three problems appear over and over. I am guilty of all three at different times. Let me save you the heartbreak.
Mistake #1: Watering Like It Is Swimming Practice
This is the biggest killer. I already mentioned that 90% of indoor plants die from overwatering. Taro is even more sensitive than a pothos because the corm is a storage organ.
Here is what happens when you water a taro corm daily: the roots suffocate first. Then the corm cells burst because water pressure builds up inside. Then fungus moves into the cracks. Within two weeks, you have a hollow sponge where a solid corm used to be.
I used to water my taro every single morning. I thought I was being attentive. Actually, I was killing it with kindness. Now I follow a simple rule: stick my finger into the soil up to the second knuckle. If it feels dry at that depth, water. If it feels cool and slightly damp, wait another day.
Taro wants moisture. Never deny that. But moisture is different from wetness. Think of a wrung-out sponge. That is what the soil should feel like after you water. Not a soaked towel dripping on the floor.
Mistake #2: Blasting It with Harsh Sunlight
Taro is a tropical plant. Aroids grow under the rainforest canopy. They receive dappled light that filters through tall trees. Not scorching direct sun hitting the pot for eight hours.
I placed my first taro on a south-facing balcony in July. Within a week, the leaf edges turned brown and crispy. The corm itself felt warm to the touch when I dug it up. The roots had actually cooked in the hot soil.
Bright indirect light works best. Place your taro two meters away from a west or east window. If you only have south-facing windows, pull it back from the glass. Add a sheer curtain if you see the leaves turning yellow-green at the edges.
Temperature also matters. Keep your taro above 18°C (64°F). Anything below 15°C and the corm enters a kind of shock state. I accidentally left a pot on an unheated porch in October. The leaves collapsed overnight. The corm survived but it took a month to recover.
Mistake #3: Using a Pot That Drowns the Roots
I see so many people putting taro in big decorative plastic pots. The corm is small. The pot is huge. They think a bigger pot means more room for growth. In reality, a larger pot means more soil that stays wet after watering. The root zone stays saturated because the plant is too small to drink all that water.
I killed my fourth taro exactly this way. New pot with beautiful glazed ceramic finish. No drainage holes, by the way. I put gravel at the bottom and thought that would solve it. Wrong. The gravel sat in a pool of water and the soil above it stayed wet. The corm rotted within 10 days.
Use a pot that is only 2-3 cm wider than the corm diameter. Terracotta is my preference because it breathes. Plastic pots work if you are disciplined about watering and the pot has at least four drainage holes. I tried a self-watering pot once. Never again. The constant moisture at the bottom created a perfect environment for fungus.
The American Horticultural Society (AHS) suggests using well-draining containers with room for airflow for tropical tubers. Do not get fancy with it. A basic 6-inch terracotta pot costs less than five dollars and outperforms all my expensive pots.
Step-by-Step Revival Protocol for a Dying Taro Corm
Let me give you a systematic approach. I wrote this after reviving 11 different corms. Each one taught me something small but valuable.
Step 1: Inspect and Feel
Take the corm out of the soil immediately. Do not wait. Do not hope for the best. Wipe it clean with a dry cloth. Press your thumb against the surface. Hard areas are fine. Soft areas mean rot has started.
Smell it. A healthy taro corm has a faint earthy smell, like fresh ginger. A rotting corm smells like a mixture of vinegar and stale vegetables. If you smell that, you have infections inside.
Step 2: Cut Without Mercy
Sterilize your knife with boiling water or rubbing alcohol. Start slicing from the bottom. Remove every soft, mushy, brown or black part. You might remove 30% of the corm. That is fine. In one extreme case, I removed two-thirds and the remaining piece still revived.
If the cuts reveal brown spots that trail upward into the flesh, keep slicing. The infection travels. Stop only when the cross-section is uniformly pale cream or white with no dark lines.
Step 3: Treat the Wound
I use cinnamon because it is cheap and accessible. But I have also used powdered sulfur, which is a stronger fungicide. You can find it at garden centers in small containers.
Dust the cut surface generously. Do not rub it in. Just create a thin coating. Then set the corm aside. Place it in a spot with good airflow. A room temperature location with a ceiling fan running is perfect.
Step 4: The Waiting Game
This is the period that tests your patience. The corm needs 24-72 hours to callus. I usually wait 48 hours. Some growers recommend 7 days. But I found that a 48-hour dry period creates a hard enough surface while keeping the corm's internal moisture intact.
Step 5: Pot Up Shallow
Mix the soil as I described earlier: 50% potting soil, 40% perlite, 10% orchid bark. Do not pat the soil down hard. Leave it fluffy. Plant the corm so its top third is above the soil line. Water once through with room-temperature water. Let excess drain away completely.
Step 6: Choose the Spot
Place the pot in bright, indirect light. A north-east window is excellent. Or two meters away from a south window. Temperature should be between 20°C and 26°C. Away from air conditioning vents and heating radiators.
Step 7: Watch the Watering
Do not water again until the soil is dry two knuckles deep. For me that meant waiting 6 days initially. After that, the interval was about 4 days. Your humidity and air movement will change the schedule. Always check the soil before watering. Always.
Step 8: Feed Sparingly After Roots Form
When you see the first new leaf, you can add a weak fertilizer. I use a liquid seaweed solution at half strength. One time only. The corm already has its own energy reserves. Adding extra fertilizer before root formation is useless and sometimes harmful.
My Mistakes That Cost Me Three Taro Plants
I want to be honest with you. I did not learn this through reading. I learned through failure.
My first taro corm came from a grocery store. It was meant for eating, but I wanted to grow it as a houseplant. I soaked it overnight in water before planting. That was mistake one. The corm absorbed too much water and the cells swelled. It developed a crack. Within two weeks, mold covered the crack and the whole corm turned into a black mess.
My second attempt used regular garden soil from my backyard. That soil had poor drainage and contained fungus spores. I planted the corm too deep. About 5 inches below the surface. New leaves struggled to emerge. Eventually they were stuck and rotted above ground while the corm gassed out below.
My third attempt was the most frustrating. I did everything right. The 50/50 mix. The terracotta pot. The shallow planting. But I became impatient. After 10 days, I saw no new growth. So I dug up the corm twice a week to check. Each time I disturbed the young roots. The tiny root hairs broke off. The corm kept having to restart its root system. Eventually it gave up and went dormant, then rotted from stress.
I never made that mistake again. Now I trust the process. I only inspect the corm visually from the soil surface. No digging.
The Role of Dormancy in Saving Your Taro
Many people panic when taro leaves die back in autumn. They think the plant is dying. In temperate climates, taro roots and corms naturally enter dormancy when daylight hours drop below 10 and temperatures fall below 15°C.
This is not the same as dying. The corm stores energy in its thickened stem base. Underground, it will overwinter. In spring, new growth resumes.
Understanding dormancy helped me revive a corm that I thought was dead. It was December. The leaves had all wilted. I dug it up, expecting mush. Instead, I felt a firm, cool corm. It simply was resting.
I stored that corm in a paper bag with dry peat moss in my basement at 12°C. I checked it monthly for mold. In February, I moved it to a warmer spot. In March, tiny buds formed. It grew into a beautiful plant that produced 14 leaves with stems taller than my waist.
So when you are reviving a dying corm, ask yourself this question: is it actually dying because of disease, or is it entering dormancy because of seasonal changes? The cure is completely different for each case. I wasted two months trying to "revive" a corm that was simply sleeping.
Additional Tactics That Help in Revival
Sometimes the standard protocol is not enough. Here are extra moves I have used in difficult cases.
Bottom Heat Speeds Rooting
I placed a heat mat under my taro pot once. It was set to 25°C. The soil temperature stayed around 23°C. New roots developed in 7 days instead of 12. The warmth triggers metabolic activity in the corm. If you do not have a heat mat, the top of a fridge or water heater can work. The key is consistency, not extreme heat. Anything above 30°C can damage the tissue.
Hydrogen Peroxide Soak
When I encounter a corm with persistent mold spots that keep reappearing after cutting, I soak it in a 3% hydrogen peroxide solution mixed with three parts water. The soak lasts 10 minutes. It kills surface spores without harming healthy tissue. Then I rinse it with plain water and let it dry for a day.
Fine Vermiculite for Rooting
Instead of my standard soil mix, I have successfully rooted corms in pure vermiculite. The material holds moisture perfectly while allowing oxygen around the wound. Once roots emerge, I transplant into the regular mix. This method gives you a cleaner way to check root development without exposing the cutting to nitrogen-rich soil.
Common Signs Your Taro Corm Is Recovering
You want to know if you won the battle. Here is what I look for in the two weeks after treatment.
The soil surface stays unchanged for the first few days. I do not see anything. This is normal. The corm is forming callus and starting internal cell division. Around day 6-8, the soil may look slightly pushed upward near the corm. That is root growth pressing upward from beneath.
Small pale or white bumps appear on the corm shoulder. These are root primordia. Not yet roots, but the starting points. They often look like tiny white pimples. They should not be scraped off. They are your happy sign.
Around day 10-14, the first shoot breaks through the soil. If the shoot is pale yellow, it will green up within two days. If it emerges too early before the root is established, wait. It might grow a bit leggy. That is okay. The second leaf will be stronger.
I have found that taro corms stored at slightly higher humidity recover faster. I sometimes spray the soil surface lightly with a mist bottle every morning during the first week. Not enough to wet the corm, but enough to raise relative humidity around the soil.
When You Should Give Up and Throw It Away
Not every corm will survive. Be realistic. If you cut away more than 80% of the corm and the remaining tissue is stringy, it will not recover. If the center is hollow and dark, that is rot that has gone deep. No amount of cutting will fix it.
If you see a fine white webbing on the surface after drying, that is mycelium. It means the fungus has infected the entire outer layer. I tried to save a corm like this once. I failed. The fungus just kept coming back after each cut.
Also watch for black streaks in the vascular tissue. These are veins that carry water through the corm. If they are black, the structural integrity is gone. Even if the corm grows roots, it will be too weak to support a plant. Toss it.
FAQ About Reviving Taro Corms
How long does it take for a taro corm to come back to life?
A healthy but dormant corm will show signs within 7 to 21 days depending on temperature. For a damaged corm needing surgical cuts, expect roots in about two weeks and the first leaf between 2 and 4 weeks. In my experience, the average revival takes 17 days from repotting to visible leaf.
Can I save a taro corm that is mushy all over?
Only if you can find a firm portion after cutting. If every cut reveals brown or brown-veined flesh, the rot has spread completely. In that case, you are better off buying a new corm. It is a lesson I paid for with three separate corms.
Should I water my dying taro corm every day?
No. During the first week of revival, water only once at planting. Then wait at least 5-6 days before the next watering. Overwatering is the main reason corms die. I know you want to help it, but the best help is to let it dry out slightly so it can form callus and new roots.
Honest Final Thoughts
Reviving a dying taro corm is not complicated. But it requires patience. I tried to rush the process many times and every failure traced back to impatience or overwatering. Follow the steps I outlined above. Let the corm dry. Cut out the bad tissue. Choose a small pot with good drainage. Place it in bright indirect light. Leave it alone for the first week. Your corm will come back.
Remember the numbers: 90% of indoor plants die from overwatering. Taro is not a desert plant. It will not tolerate a completely dry soil. Those grow in moist floodplains. But moisture does not mean standing water. Aim for consistent, moderate dampness. Not a swamp.
You got this. Your taro can be saved. I have done it eleven times. You will succeed on your first attempt if you follow this guide.