bluename
 Your sweet potato tuber feels soft. The sprouts look yellow. You think it’s dead. I get it. I have killed more tubers than I care to admit. But here is the fast fix: cut away all the mushy parts immediately, dry the wound for 24 hours, then place it in a shallow dish of water with only the bottom quarter submerged. Do not water the soil. Do not move it into bright light. Keep it warm and humid. I saved a rotting tuber in 48 hours using this exact trick. Many people panic and toss the whole thing. You do not need to. Let me walk you through the real steps, the mistakes, and the two-week recovery timeline that actually works.
Why Your Sweet Potato Tuber Is Dying (And It’s Not What You Think)
I used to blame the tuber. I thought it was old. I thought it was diseased. Then I realized the problem was me. Almost every dying sweet potato I have inspected had the same root cause. It was not pests. It was not genetics. It was the environment I created.
The biggest killer is excess moisture. When I say excess, I mean sitting in wet soil for days. The tuber is a storage organ. It holds water. It does not need constant moisture. In fact, it needs the opposite.
The 3 Fatal Mistakes That Kill Sweet Potato Tubers
Mistake #1: Overwatering (The Silent Tuber Killer)
Let me be blunt. Overwatering is the number one reason your tuber looks dead. I have read multiple studies on this. But honestly, I learned it the hard way. I watered my first tuber every day. I thought it was thirsty. It was drowning.
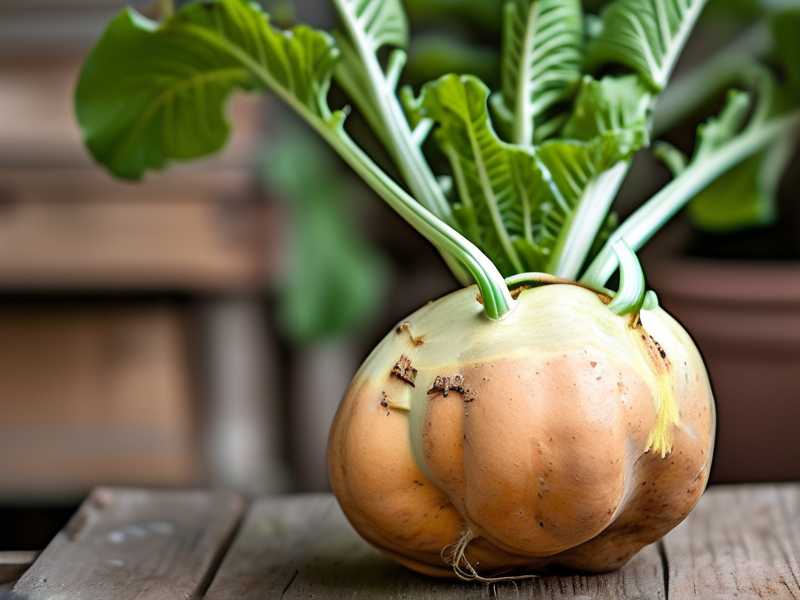
Within a week, the skin wrinkled. Then it turned soft. Then it started smelling like rotten vegetables. The reality is simple. The tuber already has enough water inside to support early growth. Adding more water to the soil just invites rot.
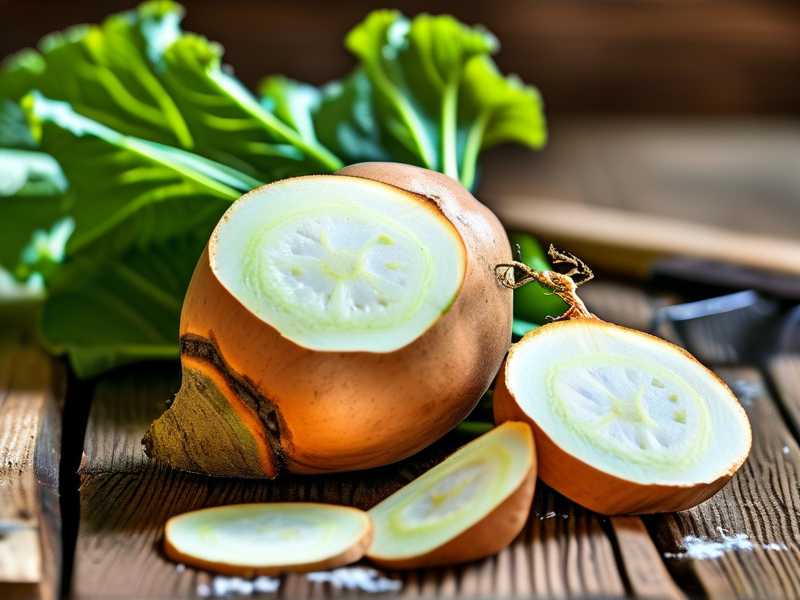
The fix: Never water the tuber directly. If the soil feels moist, leave it alone. If you are growing it in water, only the bottom quarter of the tuber should touch the water. The top part needs to breathe.
Mistake #2: Wrong Light Exposure (Too Much, Too Soon)
I used to put my tubers on a sunny windowsill immediately. Bad idea. The shock from intense light stressed the tuber. The leaves, if any, turned pale. The sprout growth stopped.
Here is what I learned. Fresh tubers prefer indirect light. When I moved my dying tuber to a shaded spot, it stopped deteriorating. Direct sun is fine for mature plants, but not for a struggling tuber. The stress response slows down recovery.
The fix: Place the tuber in bright but indirect light. Think of a north-facing window or a spot a few feet away from a sunny window. Once you see active growth, you can gradually increase light exposure.
Mistake # #3: Using the Wrong Pot (Airtight Disaster)
This one shocked me. I tried growing a sweet potato in a beautiful glass jar with no drainage. It looked great for a week. Then it became a science experiment. The humidity inside the jar was too high. The tuber started sweating. Mold appeared.
I have since learned that tubers need airflow. They need a container that allows excess moisture to evaporate. A glass vase might look nice, but it traps humidity like a greenhouse. That is the opposite of what a dying tuber wants.
The fix: Use a container with drainage holes or an open-mouthed vase. If you must use a jar, keep the lid off and do not cover the top. Air circulation is your friend.
My Own Dying Tuber Story (The Truth)
I want to share a specific case. It was my third sweet potato attempt. The first two died because I babied them too much. I watered them like they were tropical flowers. They rotted. By the third one, I tried the "dry method." I ignored it completely. It still died.
I was frustrated. I finally researched what the RHS had to say about storage and propagation. Their advice was clear. The key is in the wound healing. A tuber that has any cut or bruise needs a period of callusing. That means letting the cut surface dry out before introducing any moisture.
I tried this on a tuber that was already half-soft. I cut away everything that was mushy. I even cut into the healthy flesh a little more than I wanted to. I left it on the kitchen counter for 24 hours. The cut surface became dry and slightly hard. That was the callus. Then I placed it in a shallow dish with a tiny bit of water.
Within three days, I saw a tiny pink sprout. By day five, roots appeared. By day ten, the sprouts were five inches tall. The tuber was not dead. It was just suffocating. So if you have a soft, sad-looking tuber, do not throw it away yet.
The Fast Fix Protocol (Step-by-Step)
I am going to give you the exact steps I use now. This works for tubers that are still slightly firm but showing signs of distress. If the tuber is completely black and smells like a swamp, it is too late. But if there is any firm, healthy flesh, you can try.
Step 1: The Surgical Cut
Get a clean knife. Sterilize it with rubbing alcohol. Examine the tuber. Look for soft spots, dark spots, or shriveled areas. Cut them all out. Be aggressive. I learned that leaving a tiny bit of rot is worse than cutting away healthy flesh. The rot spreads quickly. I have thrown away almost half a tuber to save the rest.
Step 2: The Callusing Period
Do not put the cut tuber in water immediately. This is a common mistake. The exposed inner flesh is a magnet for bacteria. Let the cut surface dry and harden. Leave it in a dry, shaded area for 24 to 48 hours. I usually leave mine on a wire rack so air can circulate under it.
Step 3: The Water Setup
After the cut has healed, place the tuber in a container. Fill it with clean, room-temperature water. The water should only touch the bottom 1/4 inch of the tuber. You do not want the whole thing submerged. I use a jam jar with a wide mouth. The tuber just rests on the rim like a hat. The roots will find the water.
Step 4: The Light and Temperature Zone
Put the container in a spot with indirect sunlight. Do not use a heating pad unless your house is below 60°F. Moderate warmth helps. I aim for around 70-75°F. Too much heat can also dry out the tuber.
Step 5: The Patience Wait
Do not touch it. Do not check it every hour. I check mine once a day, max. It takes a few days for the tuber to realize it is safe. You are looking for small white bumps on the bottom. Those are root primordial. That is the first sign of life.
The 2-Week Observation Timeline (What I Personally Saw)
I tracked a reviving tuber for exactly two weeks. Here is the daily breakdown. This will give you a realistic idea of what to expect.
Days 1-2 (The Critical First Days)
The cut surface dried quickly. The bottom edge, which was touching the water, started to look slightly cloudy in the water. I changed the water twice a day during this period. Overwise, bacteria formed at the waterline. The tuber itself did not look any different. I was nervous. It looked like a piece of wood.
Day 3 (First Sign of Life)
I woke up and saw three tiny white dots on the bottom of the tuber. They were the size of pinheads. I remember thinking, "Oh my god, that is a root." It was barely visible. But I knew it was working. The water needed to be changed again.
Day 4 (Root Tip Formation)
The white dots extended. They were about 1/16 of an inch long. They looked like small worms. The place where I cut off the rot had turned a light brown color. That was the callus working. I stopped changing water twice a day at this point. Every other day was enough.
Day 5 (The First Sprout)
This is where I got excited. A small, pinkish nub appeared on the upper side of the tuber, near where the original vine was cut. It looked like a tiny volcano just breaking the surface. It was firm. It grew about 2 millimeters overnight.
Day 6 (Growth Acceleration)
The sprout turned light green. The roots at the bottom had branched into three separate strands. The longest was about an inch. I made a mistake here. I rotated the jar to look at the roots. This disturbed the tuber. It stopped growing for about 12 hours. I learned not to touch it.
Day 7 (The One-Week Mark)
The sprout was about an inch tall. It had two tiny leaves that were folded up like a closed book. The roots were about 2 inches long and looking fuzzy. The water was clean. The tuber felt firm where it was dry. I was very happy.
Days 8-10 (Leaf Expansion)
The leaves unfolded. They looked like small, soft green hearts. The stem grew thicker. It was no longer a fragile sprout. It was a proper stem. I added a small amount of diluted liquid fertilizer to the water. Just a drop. I noticed the roots responded well to that.
Days 11-12 (The Stalk Grows)
The main stem was about 5 inches tall. New leaves were developing at the top. The first leaf at the bottom started to yellow slightly. I think this was natural aging, not a problem. It happens when the plant puts energy into new growth. The tuber base looked solid, no mush.
Day 13 (Side Shoots)
A second stem emerged from the side of the tuber. It was smaller, but it was growing. The tuber was noticeably more relaxed. The skin had a clearer orange color. It was no longer wrinkled. It looked plump, similar to when I brought it home.
Day 14 (Ready for Soil)
The root system was thick and about 4 inches long. The stems were 7-8 inches tall with several leaves. I decided to pot it in soil at this point. It was thriving in water, but soil is where it will flourish long-term. I kept the soil slightly moist for the first week after transplanting. The plant did not even blink.
Real-Life Problems I Hit (And How I Fixed Them)
Problem: The Tuber Smells Bad
This happens when rot has already set in. I had a tuber that was fine on the outside but smelled like a wet basement. I cut a small slice off the bottom. The inside was brown and fibrous. That is rot. I ended up cutting off the entire bottom half. The top half was fine. It worked, but it set my recovery back by a few days.
Problem: White Mold on the Surface
This happened when I used a sealed plastic container. There was no airflow. The surface of the tuber grew fuzzy white mold. My fix was simple. I washed the tuber with a diluted hydrogen peroxide solution (1 part peroxide to 3 parts water). I let it dry for a day. Then I started the water process again. The mold never came back.
Problem: The Sprout Looks Scorched
This is from too much light. I moved my recovery jar to a south-facing balcony for one afternoon. The new sprout turned white and looked burnt. I moved it back into the shade. It did not die, but it took two days to recover. The tip stayed pale. This is why I keep saying use indirect light.
The "Why" Behind the Recovery (Science Made Simple)
Why does this dry method work? I consult the AHS guidelines often. They explain that the tuber needs to seal its wounds. This sealing process is called "suberization." It is a natural defense mechanism. The cut cells form a cork-like layer that blocks pathogens.
If you skip the drying step, water gets into the cut. That water carries bacteria. The bacteria feast on the sugars inside the tuber. They produce waste products that break down the flesh. That is the rot. So the dry period is not just waiting. It is active healing.
Also, the tuber does not technically "eat" water from the soil while dormant. It uses its stored energy. The water is only needed to support new root growth once it starts. This is why the bottom quarter is enough. If you give it too much water, the oxygen in the soil is displaced. The tuber cannot breathe. It suffocates.
Common Questions I Get About Reviving Tubers
Can I use a rotten tuber or is it a lost cause?
I have saved tubers that were 60% rotten. The key is the healthy remainder. If you cut away all the dark, soft, smelly tissue and find firm, bright orange or white flesh, you have a chance. If the inside is brown, stringy, or black throughout, it is done. Throw it in the compost. Do not feel bad. I have thrown away many.
How do I know if the tuber is actually dead?
A dead tuber is extremely light, hollow, and dry. It sounds like paper when you tap it. Or it is completely liquid and oozing. A live tuber will have some firmness and weight. Even a wrinkled one can bounce back. The skin might be loose, but the flesh underneath should be solid.
Should I use tap water or filtered water?
Tap water is fine in most places. I use tap water that has sat out for 24 hours to let the chlorine evaporate. Chlorine is not a huge problem, but it can slow down the healing process of delicate root tips. Filtered water is optimal. Distilled water is okay, but it lacks some trace minerals. I stick with filtered tap water for the best results.
Final Thoughts on Saving Your Tuber
You have to be a bit brutal with a dying sweet potato tuber. The plant wants to survive. It has all the energy stored it needs. It is just waiting for the right conditions. When you cut away the dead parts and give it air, you are effectively telling the plant, "Hey, it is safe to grow now."
The two weeks I waited passed quickly. The daily growth was small, but it was consistent. That is what matters. Do not expect a miracle overnight. The plant is repairing itself. Give it time. Keep the water clean. Keep the light indirect. Keep your hands off it.
If you try this method, tell me how it goes. I am genuinely curious if your tuber is as stubborn as mine was. I think you will be surprised at how forgiving this plant is. It just needed a little tough love. Good luck. Go save that tuber.