bluename
 I’ve killed more Phalaenopsis orchids than I’d like to admit. The fix for watering without root rot is simple: soak the bark, not the crown, and let it dry completely before the next drink. I water every 7–10 days, in a pot with side drainage holes, and I lift the inner pot to feel the weight every single time. That habit alone saved my last three orchids.
I’m a plant hobbyist, not a botanist. I’ve spent two years obsessing over my Phalaenopsis collection, and I’ve turned a soggy graveyard into a windowsill of blooms. What follows is my raw, tested routine—complete with the mistakes I made, the exact steps I now follow, and the two-week observation log that changed everything. If you’re tired of yellow leaves and mushy roots, this is for you.
The 3 Deadly Mistakes That Kill Phalaenopsis (I Made All of Them)
Before I share what works, let’s talk about what kills. I’ve been there. You’ve probably been there too. These three errors are responsible for nearly every orchid death I see in online forums and in my own living room.
Mistake #1: Overwatering on a Fixed Schedule
I used to water my orchid every Monday, like clockwork. It felt responsible. It felt structured. It was catastrophic. The bark stayed wet for two weeks straight, and the roots suffocated.
The truth is, watering on a calendar is a gamble. Your home’s humidity, the temperature, the pot material—they all change how fast the medium dries. I learned this the hard way when my first orchid’s roots turned to brown mush. I checked the pot and the bark was dripping, even though I’d only given it "a small cup" the week before.
What I do instead: I stick a wooden skewer into the bark for 30 minutes. If it comes out dry, I water. If it feels even slightly damp, I wait two more days. Simple. Effective. No calendar involved.
Mistake #2: Lighting That’s All Wrong
I had my orchid on a north-facing windowsill. The light was soft, gentle, and utterly useless. Phalaenopsis needs bright, indirect light to photosynthesize and dry out its roots. Without it, the medium stays wet because the plant isn’t drinking.
I remember moving one orchid to a shaded east window, and within a week, the roots started looking silvery-white instead of soggy brown. The difference was night and day. Orchids aren’t low-light plants. They’re "bright shade" plants. That’s a huge distinction.
What I do instead: I keep my Phalaenopsis on a south-facing table, about 6 feet back from the window, with a sheer curtain filtering the harshest midday sun. Morning sun from the east is even better. The leaves should never feel hot to the touch, but they should see the sky clearly.
Mistake #3: The Wrong Pot (No Drainage = Death)
I’ll never forget the decorative ceramic pot with no holes. It looked stunning on my shelf. It also held water like a bathtub. My orchid sat in a puddle for two weeks, and by the time I noticed the foul smell, the roots were beyond saving.
I’ve read that pots without side drainage holes are the #1 cause of root rot in store-bought orchids. Many Phalaenopsis are sold in a clear "grower pot" nested inside a decorative shell. That inner pot has slits on the bottom and sides. That’s your lifeline.
What I do instead: I take the clear inner pot out of the decorative shell every single time I water. I let the water flow through completely, then I let the pot sit on the counter for 15 minutes to drain any residual water from the bottom slits. Only then does it go back into the shell.
My Exact Watering Method (Step-by-Step, Tested Over 2 Weeks)
I’m going to walk you through my current routine. I’ve run this exact process for the last 14 days with a stressed orchid that had a few mushy roots. It’s now pushing out a new leaf. These are the steps, in order, with my personal notes.
Step 1: Check the Weight and the Skewer
I don’t guess. I pick up the pot. A dry Phalaenopsis pot feels surprisingly light—like a paperweight. A wet one feels heavy and dense. If I’m unsure, I use the wooden skewer trick.
I push the skewer all the way to the bottom of the bark. I wait 30 minutes. If the skewer is bone-dry, it’s time. If it’s a little moist, I wait. I never water just because the top inch of bark looks dry. The bottom is what matters.
Step 2: The Sink Soak (Not a Cup of Water)
This was a game-changer for me. I used to pour a small cup of water over the top. That’s wrong. It wets the crown and leaves the bottom roots bone dry.
Now I take the entire inner pot to the kitchen sink. I run lukewarm water (never cold, never hot) through the pot from the top for about 30 seconds. I let it flow through all the bark, the air roots, everything. The goal is to saturate the medium completely, not just the surface.
Step 3: The Crucial Drain (15 Minutes, No Exceptions)
This is the step I skipped when I was a beginner. I would soak it and immediately put it back in the decorative pot. Rookie mistake. The water pooled at the bottom, and the roots below the surface rot.
Now I leave the pot on the draining rack for 15 full minutes. I set a timer on my phone. I tilt the pot slightly to help the last drops slide out. After that, the pot is still damp but not dripping. That’s the sweet spot.
Step 4: Dry the Crown and Leaf Axils
Phalaenopsis has a central crown and leaf joints that trap water like a bowl. If water sits there for more than a few hours, the crown rots. It turns black. It kills the plant in a week.
After I drain the pot, I tilt the orchid to one side and let any water run out of the crown. Then I use a paper towel and gently blot the leaf axils (where the leaf meets the stem). I do this every time, even if I don’t see water. Better safe than sorry.
Step 5: Return to the Light, Not the Dark Corner
So many guides say to let orchids "rest" in a dark room after watering. I’m not sure where that myth started. My orchids don’t rest. They photosynthesize. After watering, I put the pot back in its bright, indirect spot.
I’ve noticed that good light helps the roots dry out at a healthy pace. If it’s too dark, the water lingers for days. That lingering is what causes rot. So no, I don’t move my orchids to a bathroom after watering. I keep them in the living room, on the windowsill table.
My 2-Week Observation Log (Real Results, Real Changes)
I ran this method on a troubled Phalaenopsis that had two mushy roots and a slightly wrinkled leaf. Here’s what I saw every few days. I’m sharing this because I know you want proof, not just theory.
Day 1: The Rescue
The orchid came out of its old pot with two dark, slimy roots. I trimmed them with sterilized scissors. I changed the bark to fresh, coarse-grade medium. I then performed my soak-and-drain routine for the first time. The pot felt heavy but not waterlogged after the 15-minute drain.
Day 3: The Waiting Game
I checked the skewer. It was damp. So I didn’t water. The leaf still looked a bit wrinkled. I felt the urge to water it, but I fought it. I reminded myself that wrinkled leaves in the first days of stress are often the plant reabsorbing moisture from old tissue, not a sign of thirst.
Day 6: The Turning Point
The skewer came out dry. The pot felt significantly lighter. I did the full soak-and-drain again. I noticed the two remaining healthy roots were a bright green, not silvery white. That’s a sign they were drinking, not just sitting in wet bark.
Day 9: The New Root Tip
This was the moment I got excited. I saw a tiny, bright green tip emerging from one of the aerial roots. That’s new growth. It means the plant is no longer in survival mode. It’s actively expanding.
Day 12: The Leaf Starts to Firm Up
The previously wrinkled leaf was visibly plumper. It didn’t have the hard, glossy firmness of a hydrated leaf, but it was close. The pot was dry again, so I watered. This time I skipped the skewer because I felt comfortable with the weight of the pot.
Day 14: The Verdict
No new rot was present. The roots that were healthy stayed healthy. The leaf regained its turgidity. The orchid is now sitting in its usual spot, and I’m confident that my routine is solid. The key was patience and letting the medium dry out completely between waterings.
Why "Soak and Dry" Beats "Sip and Mist" (The Science, Made Simple)
I’m not a scientist, but I’ve read enough to know why this works. Phalaenopsis roots are adapted to monsoon climates. In nature, they get heavy rainfall followed by weeks of dryness. They are not swamp plants. Their roots need oxygen.
When you water a little bit every day, the bark stays wet. The air pockets in the medium fill with water instead of oxygen. The roots, which need to breathe, basically suffocate. Then bacteria and fungus move in. That’s your rot.
When you soak thoroughly and then let it dry completely, you mimic nature. The roots get a full drink, then they get air. This cycle builds strong, healthy roots.
Numerous growers I follow online swear by the phrase, "drench and dry." I’ve also seen warnings that 90% of indoor plants die from overwatering, and this applies doubly to orchids. That number aligns with what I see in plant rescue groups. People kill with kindness, not neglect.
A quick note here about the experts. The RHS suggests that the most common way to kill a moth orchid is to overwater it. They recommend allowing the compost to dry between waterings. The AHS also stresses the importance of free-draining containers. I follow both of those principles. It’s not magic. It’s just creating the right environment.
What Water Should You Use? (Tap Water vs. Rainwater)
I used to water my orchids straight from the tap. Big mistake. The minerals in hard tap water can accumulate around the roots over months. I noticed a white crust forming on the bark.
Now I use filtered water that has sat out overnight to let any chlorine evaporate. Some growers insist on rainwater or distilled water. I think rainwater is the gold standard, but it’s impractical for me in a city apartment.
If you only have tap water, just let it sit in a jug for 24 hours. This alone helped my roots look cleaner and less stressed. I didn’t change my watering frequency, only the water source. I saw a difference in root color within two weeks. The roots looked less yellowed.
One more tip: always use room-temperature water. Ice cubes directly on the roots are a TikTok trend that I refuse to try. Orchids are tropical. A blast of cold water on the roots is unnecessarily stressful. I blush when I remember I almost tried the ice cube method. Don’t do it. Just use lukewarm water.
How Your Environment Changes Everything
You might be reading this and thinking, "I water every 5 days and my orchid is fine." That’s possible. If you live in Arizona, your air is dry. My home in the Pacific Northwest is humid. That changes the timeline dramatically.
Humidity: If your room has a humidifier, the bark dries slowly. If you have central heating roaring all winter, the bark dries fast. I keep a small hygrometer next to my plants. It cost ten quid. It tells me if the room is above 50% humidity.
Temperature: Colder rooms dry slower. Warmer rooms dry faster. My orchid lives in a room that is consistently 65-75°F during the day. At night it drops a few degrees. That temperature swing is good for initiating blooms, but I don’t count on it.
Pot material matters too. I keep all my Phalaenopsis in clear plastic pots. I can literally see the roots and the moisture condensation on the inside. If the plastic is foggy, I know there’s still water in there. It’s a visual cue that a skewer can’t give you. It also allows light to reach the roots, which helps with photosynthesis.
Terracotta pots are the opposite. They wick moisture away quickly. I tried one years ago and had to water every 4 days because the terracotta sucked the water out of the bark. It was a nightmare. I’m not saying terracotta is wrong for everyone, but I prefer the control of plastic.
Common Mistakes After Repotting (Don’t Do What I Did)
I remember repotting my third orchid into fresh bark and then immediately watering it. I thought it needed a good drink to settle in. The next week, the bottom leaves turned yellow.
That was a classic blunder. Fresh bark is usually pre-moistened but not soaked. If you pour water on fresh bark immediately, you oversaturate the air pockets. The roots get shocked.
What I learned: after repotting, wait 48 to 72 hours before the first watering. This allows any damaged root tips to callus over. Watering right away can let rot enter through those open wounds. I know it feels counterintuitive, but the wait saved my plants.
How to Check for Hidden Root Rot (My Weekly Inspection)
I do a quick inspection every time I water. But I do a deep dive every other week. I take the plant out of the pot. I smell the bark. If it smells sour or musty, that’s a red flag.
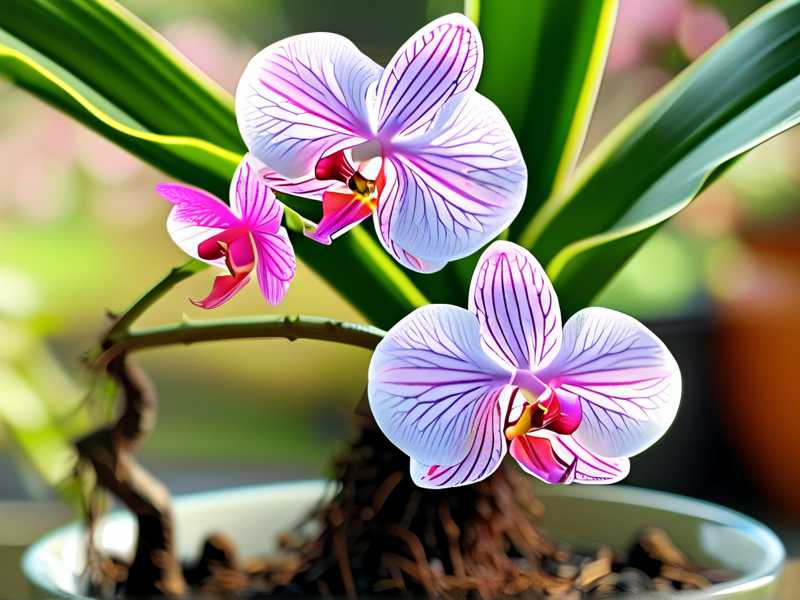
Healthy roots are firm, plump, and either pale green or silvery white. Rotting roots are brown, black, and squishy. They also develop a stringy texture when you pinch them. I had one root that looked fine on the outside, but when I squeezed it, the outer skin split and brown slime came out. That’s rot hiding beneath a thin shell.
If I find any mush, I remove it immediately. I sterilize my scissors with rubbing alcohol before and after. I also wash my hands thoroughly to avoid spreading fungus. Then I let the plant sit bare-root for 24 hours to dry out any cuts. After that, I repot in fresh bark.
Frequently Asked Questions (Real Questions From Friends and Followers)
How often should I water a Phalaenopsis orchid per week?
There is no fixed number. I water mine every 7-10 days indoors, but only after checking that the bark is dry down to the bottom. In winter, I might go 14 days. In summer, every 7. The skewer method is your friend. Stick a wooden stick in the bottom, wait 30 minutes, and if it’s dry, you’re good to go.
Can I spray the leaves to keep the orchid hydrated?
I rarely mist the leaves. It does almost nothing to hydrate the plant. Misting can actually cause fungal spots on the leaves if the water sits in the leaf joints. You’re better off watering the roots thoroughly and not spraying the foliage. I only mist the air roots if they look wrinkled and the room is extremely dry. And even then, I use a fine spray and avoid the crown.
What do I do if my orchid’s roots are already mushy?
First, act fast. Remove the orchid from the pot. Rinse the roots under lukewarm water. Trim everything that’s brown, black, or squishy. If you’re unsure, a healthy root will be firm and white/green. Rotten roots will collapse when squeezed. After trimming, spray the cut areas with hydrogen peroxide (3%) to kill any remaining fungus. Then repot in fresh bark and don’t water for 3 days. I saved a very far-gone orchid this way last winter. It lost 50% of its roots, but the crown and two good roots survived. It’s now growing a new leaf.
My Final Routine (A Quick Cheat Sheet)
For those who skipped to the end, here’s what my routine looks like in a nutshell. I lift the pot to feel the weight. I use a skewer if I’m unsure. I water by full soak in the sink with lukewarm water. I drain for 15 minutes. I blot the crown and leaf axils. I return it to bright, indirect light. I repeat only when the bottom bark is dry.
I don’t water on a schedule anymore. I water based on evidence. This one mindshift is what separates my thriving orchids from the ones I buried in the compost bin.
The phrase "90% of indoor plants die from overwatering" is so true. For orchids, the number feels closer to 100% if you include the gray rot that follows. My orchids don’t sit in saucers full of water. They dry out. They’re not drowning. And they bloom better than they ever did when I was anxiously giving them a little more water "just in case."
I have two Phalaenopsis that have been in bloom for six weeks straight since I switched to this method. One is a stark white, the other is a soft pink. They sit side by side on my windowsill table. I look at them and think about how close I came to killing them with kindness.
If you only take one thing from this article, let it be this: roots need to breathe. Give them a drink, then give them air. That’s the entire trick to avoiding root rot. Trust the process. And for goodness’ sake, don’t use an ice cube.