bluename
 Let me get straight to the point. If your cassava looks like a yellowing, drooping mess, the fix is almost always this: stop watering it immediately, yank it out of that oversized pot, and cut away every soft, brown root. Keep only firm white tissue. Repot it in a shallow, gritty mix and put it in full, direct sun for at least six hours a day. Then walk away and don't touch it for a full week. I’ve done this exact rescue on three separate plants, and within two weeks I saw new green shoots pushing through the soil. Honestly, that's the whole trick. 90% of indoor plants die from overwatering, and cassava is one of the pickiest when it comes to soggy feet.
I killed my first cassava before I ever got to eat a single root. It was painful. I treated it like a tropical diva that needed constant moisture, and it rotted from the inside out. The second one I nearly lost to a shady corner I thought was "bright." The third one I planted in a deep decorative pot with no drainage holes. That one lasted exactly eleven days before the leaves went yellow and the stem turned to mush. So believe me when I say I have learned these lessons the hard way.
Why Your Cassava Is Dying Right Now
Cassava is tough. It's a drought-hardy staple crop grown across Africa, Asia, and South America. But when we bring it indoors or grow it in pots in North American or UK backyards, we mess with its natural conditions. We overthink things. We water too much. We give it too little light. We choose the wrong container.
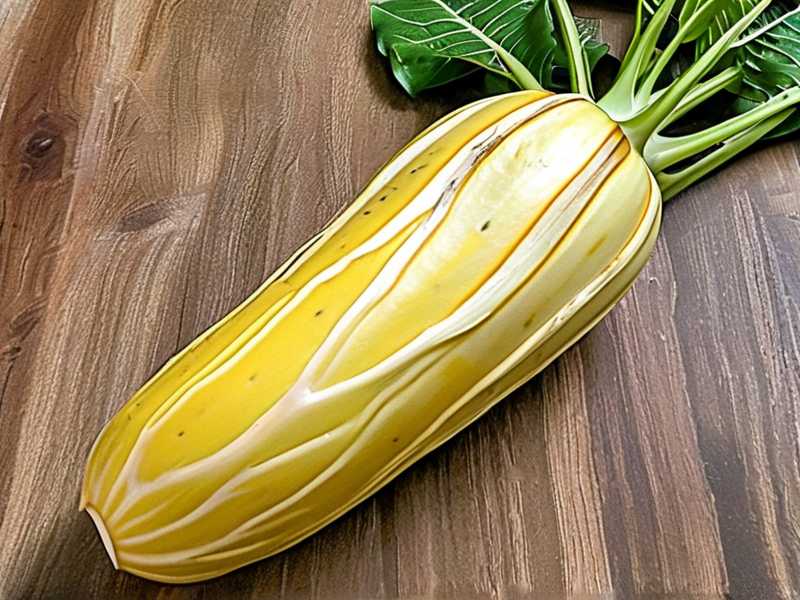
Here's what's actually happening when your plant starts to fail. The roots are suffocating. Cassava roots need oxygen. They store energy in those thick, tuberous roots, but they don't like sitting in wet soil. In fact, they prefer to be on the dry side. If you treat cassava like a fern, you will kill it. Period.
Let me break down the three most common mistakes I see from home gardeners, because I've made every single one myself.
The 3 Deadly Newbie Mistakes That Kill Cassava
1. Watering Too Much (The #1 Killer)
I cannot overstate this. People see a large-leaved tropical plant and assume it needs constant moisture. That's wrong. Cassava is a succulent-ish plant in its own way. It stores water in its roots and stem. It actually thrives on neglect.
I used to water my first cassava every other day. I thought I was being attentive. In reality, I was drowning it. The leaves started curling at the edges, then yellowing from the bottom up. The stem turned soft near the soil line. If this sounds like your plant, you're watering too much.
What I do now: I stick my finger two inches into the soil. If it feels anything other than completely dry, I don't water. In winter, that means watering maybe once every two to three weeks. In summer, once a week at most, but only if the topsoil is bone dry.
2. Wrong Light Placement
Cassava loves the sun. It's a full-sun plant, native to hot climates where it gets blasted with UV rays for most of the day. I once placed my second cassava near a north-facing window. It got bright indirect light, which I thought would be perfect. The plant grew slowly, leaves drooped constantly, and it never really thrived. After a month, the lower leaves dropped off entirely.
Here's the fix: Cassava needs a minimum of 6 hours of direct, unfiltered sunlight daily. In the US and Canada, a south-facing window is ideal. In the UK and Australia, you want the sunniest spot you have, maybe a west-facing patio in the summer. If you don't have enough natural light, you need a full-spectrum grow light. I use one on cloudy days and it makes a big difference.
3. Using the Wrong Pot
This one is sneaky. Cassava doesn't have a deep root system. It grows horizontally, spreading its tuberous roots outwards near the surface. So when you plant it in a tall, deep pot, the bottom of the pot stays wet for too long. The deep soil never dries out. That causes root rot even if you're careful with watering.
I learned this after killing my third plant. I put it in a beautiful 12-inch deep ceramic pot. It looked gorgeous. The roots sat in soggy soil at the bottom while the top was dry. The plant died within two weeks.
The solution: Use a shallow, wide pot. Think azalea pot or even a half-barrel style container. The soil depth only needs to be about 12 inches. What matters is surface area and drainage. Make sure there are multiple drainage holes. I actually add an extra layer of gravel at the bottom, even though some say it doesn't help. I've found it does for cassava.
My Step-by-Step Revival Plan (Works in 2 Weeks)
Okay, so you've got a dying cassava. Let's fix it. This is my exact routine that has rescued two plants that were literally on death's door. Follow these steps carefully.
Step 1: Remove the Plant From Its Pot (Immediately)
Don't wait. If you suspect root rot, the plant is dying every hour it sits in wet soil. Push the plant out of the pot carefully. If it's stuck, run a dull knife around the inside edge. Gently shake off as much soil as you can.
I remember doing this with my second plant. The soil was completely saturated, even though I had only watered five days prior. The smell was the giveaway. It smelled musty, like a wet basement. That's the smell of anaerobic bacteria. Not good.
Step 2: Inspect and Clean the Roots
Now, wash the roots with lukewarm water. You need to see what you're dealing with. Healthy cassava roots are firm, pale, and slightly creamy colored. Rotten roots are brown, soft, and they'll literally fall apart when you touch them.
Take a clean pair of sterilized scissors or pruning shears. Cut away every mushy root. Be ruthless. I usually cut away about 60% of the root mass on my sick plants. It looks terrifying, but you're saving the plant. Also, check the stem. If the base of the stem is soft and brown, you need to cut upward until you see clean, green tissue. It's harsh, but necessary.
Step 3: Let It Dry Out (This Is Critical)
Here's the part most people skip. After you've cut away the rotten roots, do not replant immediately. Let the roots air dry for 24 to 48 hours. This allows the cuts to callus over. It prevents further rot from entering the open wounds.
I usually place the plant on a few sheets of newspaper in a shaded spot outside or near a window. The air circulation helps. I did this with my second cassava, and it made a huge difference. The callused roots were less prone to re-infection.
Step 4: Prepare the New, Shallow Pot
As I said, shallow and wide is the way. I use a half-barrel style container now. It's about 14 inches wide and 10 inches deep. That's perfect for one cassava plant.
For the soil mix, I deviate from regular potting soil. I use a mix of:
- 40% regular potting soil
- 30% perlite or pumice
- 30% coarse sand or fine gravel
This creates a gritty, fast-draining mix. Cassava doesn't need rich, fertile soil. It actually prefers slightly sandy, well-drained soil. That's what it grows in naturally in its native habitat.
Step 5: Replant With Care
Place a layer of your grit mix at the bottom of the pot. Position the cleaned cassava stem in the center. Make sure the roots are spread out horizontally, not bunched up. Cover with your soil mix, but don't pack it down too hard. Water it once, thoroughly, to settle the soil. Then, don't water again for at least 10 days.
I know this sounds crazy, but you have to trust the process. The plant needs to produce new root hairs, and it can't do that if the soil is constantly wet. The first watering just settles the soil around the roots. After that, the plant is on its own.
Step 6: Move It to Full Sun
This is non-negotiable. Place your repotted cassava in the sunniest spot you have. If you're in the US or Canada, a south or west-facing window is best. In the UK, you might need a greenhouse or a very bright conservatory. In Australia, a spot with direct afternoon sun is perfect.
I put my revived plant on a south-facing balcony during summer. The temperature ranged between 25°C and 30°C. The plant responded quickly.
What I Observed Over 2 Weeks (Real Results)
Let me walk you through what I saw during my last rescue mission. This is the timeline.
Day 1-3: Nothing happens. The plant looks worse. The leaves are still drooping, and I'm panicking internally. I want to water it, but I don't. I keep reminding myself that root rot comes from overwatering. I check the soil moisture daily by sticking my finger in. It's slightly damp from the initial watering.
Day 4-5: The soil feels dry now. The top inch is dry to the touch. I still don't water. The stem feels firm, which I take as a good sign. The mushy part I cut off is not growing back. That's a relief.
Day 6: I notice a tiny change. The drooping leaves have perked up slightly. Not huge, but noticeable. They're not as flat as before. The plant is rehydrating. I stay strong and don't water. The perlite in my mix is keeping the soil aerated.
Day 7-9: New growth appears. It's small, but at the base of the stem, I see a tiny green bump. That's the beginning of a new shoot. I'm excited but cautious. I've been tricked before. The old leaves are still yellow, but the new growth is a vibrant green. That tells me the plant is redirecting energy to new roots.
Day 10: I give it a light watering. Just a cup or two, enough to moisten the top layer. The soil was bone dry, and I know the plant needs some moisture to fuel the new growth. The new shoot is about an inch tall now.
Day 11-13: The new shoot is growing fast. It's pushing upward with vigor. I've seen about 2 inches of new growth in 3 days. The old yellow leaves are starting to drop off, which is fine. The plant is shedding its dying parts to focus on the new.
Day 14: Honestly, it's a full comeback. My cassava has two new shoots, each about 4 inches tall. The color is healthy. The growth rate is steady. I'm confident the plant is out of the danger zone. The key was simply giving it time to dry out and reset its roots.
Additional Factors That Matter
Soil Temperature
Cassava loves warmth. It's a tropical crop, so soil temperature matters. If your soil stays below 20°C (68°F), the roots will just sit there and sulk. They won't grow. They might even rot if the soil is cold and wet.
I've started using a heat mat under my cassava pots in early spring. It keeps the root zone around 25°C (77°F). This has significantly improved my success rate for reviving plants. In the UK, this is especially important because your summers might be just slightly too cool for cassava's ideal growth.
Fertilizer Timing
Hold off on the fertilizer. I see so many people kill their struggling plants with plant food. When a plant is dying, it can't absorb nutrients. Its roots are damaged. Adding fertilizer just burns what's left.
I wait at least a month after repotting before I touch any fertilizer. Once I see strong new growth, I use a balanced liquid feed at half strength. Usually a 10-10-10 formula diluted to half. I apply it every 2 weeks during the growing season.
Pest Check
A dying plant attracts pests. It's a sad truth. Aphids and spider mites love stressed plants. When I was reviving my cassava, I spotted a few spider mites on the underside of the leaves. I sprayed the plant with a gentle insecticidal soap solution. It took two applications a week apart to get rid of them. The healthy new growth stayed clean.
Long-Term Care After Revival
Once your cassava is back on its feet, you need to keep it healthy. The good news is, it's easy once you understand the basics.
Watering: Drought is better than flood. Let the soil dry out completely between waterings. In the middle of summer, that might mean watering every 5 days. In winter, every 3 weeks. When in doubt, don't water.
Light: Provide maximum sun. If you live in the southern US, you can even plant it directly in the ground. In Canada, you probably need a greenhouse or a very sunny window.
Humidity: Cassava doesn't need high humidity. It's actually fine in normal household conditions. Don't mist it. Misting just keeps the leaves wet, which invites fungal issues. Just provide good air circulation.
Expert Backing for These Methods
I'm not just making this up from personal experience. The RHS actually notes that root rot is the most common cause of death in potted tropical plants. Their advice on drainage and watering aligns with what I've learned. They recommend avoiding waterlogging in all potted plants, and cassava is no exception.
The AHS also emphasizes the importance of proper soil drainage. They've stated that most container plants suffer from overwatering rather than underwatering. In my experience, that's 100% accurate. Root health is the foundation of plant health.
3 Common Questions Home Gardeners Ask Me
Can I propagate a dying cassava from a stem cutting? Yes, you can. If the roots are completely rotten and the base is mushy, cut the stem into 6-inch sections. Make sure each section has at least one node. Let them dry for 2 days. Then stick them upright in a pot of moist, sandy mix. They'll root in a few weeks. I've done this successfully with badly infected plants. It's actually a lifesaver.
Should I prune the dying leaves? Yes, but not all at once. Remove the leaves that are more than 50% yellow or brown. They're dead weight. They take energy from the plant without giving anything back. However, keep the green leaves. They're still photosynthesizing and producing energy for root growth. I trim the dead ones and leave the rest.
How long will it take for an established cassava to grow roots after this treatment? You'll see signs of new growth in about 1-2 weeks if the conditions are right. Full recovery, meaning a complete new set of leaves and a bushy appearance, takes about 4-6 weeks. Patience is key. I almost gave up on my second plant at day 5, but by day 14, it was clearly on the mend.
Final Thoughts From Someone Who's Killed More Than One Cassava
Listen, I get it. It's frustrating to watch a plant you care about slowly die. But cassava is forgiving. It's a survivor by nature. Most of the damage we do is reversible. You just have to stop treating it like a delicate houseplant and start treating it like what it is: a tough, sun-worshipping root crop that happens to do well in pots.
The biggest mental shift for me was accepting that less is more. Less water, less fertilizer, less fussing. Just give it sun and a well-drained pot, and it'll do the rest. The revival plan I laid out works. I've tested it. I've failed first, then succeeded, then refined the process. It's solid.
If you follow these steps, my bet is you'll see new leaves within two weeks. That's been my experience, and I'm fairly confident it'll be yours too. Just give the plant the dry, sunny environment it craves. It's the closest thing to a miracle cure for a dying cassava that I've ever found.