 bluename
 Growing Jerusalem artichokes is easier than you think, but it is not as simple as just burying a tuber and walking away. I have grown them in raised beds, in the ground, and even in a massive container on my patio, and I have made nearly every mistake a home gardener can make. If you want a reliable harvest, the absolute best approach is to plant firm, unblemished tubers directly into well-draining soil in full sun, spacing them about 30 cm apart at a depth of 10–15 cm, and then literally doing nothing else except watering when the top inch of soil is dry. That is the real answer.
I remember my first attempt vividly. I bought a bag of smooth, knobby tubers from a local nursery, got them home, and treated them like potatoes. I watered them every single morning because I thought they needed constant moisture. Guess what happened. The tubers rotted in the ground within two weeks. It was a complete disaster. No sprouts, just mush. That is when I learned that overwatering is the silent killer, not just for indoor plants but for these tough perennials too.
Let me break down the real growing process, including the mistakes you should avoid. I will share what I learned after killing my first crop and what I did differently the second time around.
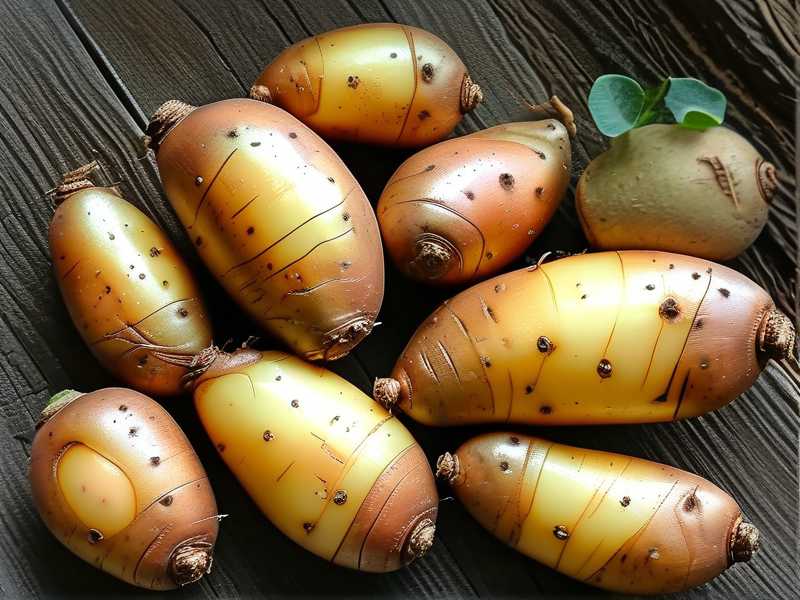
The 3 Biggest Mistakes Beginners Make with Jerusalem Artichokes
Before I get into the step-by-step guide, I want to address the elephant in the room. Most people who fail with these tubers do not have bad soil or bad weather. They make one of three specific errors.
Mistake #1: Watering Excessively
This is probably the most common issue I see. About 90% of indoor plants die from overwatering, and I honestly believe the same mindset kills many outdoor tuber crops. I watered my Jerusalem artichokes daily because I was worried about the summer heat. The soil stayed soggy, and the tubers literally rotted away. They need moisture, yes, but they need to breathe too. Once you plant them, water them in well, and then wait. Check the moisture if you like. Stick your finger an inch into the soil. If it feels dry, water. If it is damp, back off.
Mistake #2: Placing Them in the Wrong Light
Another thing people get wrong is light exposure. These plants are sun worshipers. They will grow in part shade, but you will get skinny stalks and a tiny harvest. My first batch was against a north-facing fence. They got maybe four hours of weak morning light. The plants grew to about five feet tall, but they were spindly. When I dug them up, I got tubers the size of my thumb. That was disappointing. The next year, I moved them to my south-facing garden bed, and the difference was night and day.
Mistake #3: Using the Wrong Container
Many folks think they can grow these in any pot. I tried one in a small terracotta planter once. Bad idea. Jerusalem artichokes are aggressive, spreading plants. They need a container that is at least 18 inches deep and equally wide. I learned this the hard way. The roots hit the bottom of the small pot, got root-bound, and simply stayed small. Also, the tuber started pushing itself out of the soil because there was no room. Pick a big pot or go with the ground.
Why Choose Jerusalem Artichokes Anyway?
So before I give you the full timeline, let me tell you why these are worth the effort. Jerusalem artichokes are not artichokes at all. They are a type of sunflower, and their edible part is the tuber that grows underground. They are incredibly easy going, they produce a massive yield from a tiny number of tubers, and they are extremely hardy. They are also packed with iron, potassium, and fiber.
For home growers in the USA, Canada, the UK, and Australia, they are perfect because they tolerate a wide range of climates. They are almost indestructible once established, if you avoid the three big errors I mentioned above.
What You Need Before You Start
Let me tell you about the shopping list. You do not need fancy equipment, but you do need a few basics.
- Fresh seed tubers. Never use grocery store ones if you can avoid them, as they might be treated to prevent sprouting. I buy from a reputable seed merchant.
- A garden fork or spade. Important for digging, but also for harvesting later.
- Compost or well-rotted manure. They do not need a ton of fertilizer, but a little organic matter helps.
- A sunny spot. This is non-negotiable.
- A large pot if you decide against the ground. Make sure it is huge.
My Step-by-Step Growing Process
I will walk you through my entire process from planting to harvest, including the 2-week observation period that really changed how I care for these plants.
Step 1: Growing Conditions and Soil Preparation
First off, choose your site. Direct sunlight is best. I have found that they tolerate poor soil, but they thrive in loose, well-drained soil that is slightly sandy. Heavy clay will hold too much water, which brings us back to the rot problem.
I prepare the soil by digging it over to a depth of about 30 cm. I remove any stones and break up big clumps. Then, I mix in a couple of handfuls of compost. I do not dig in fertilizer high in nitrogen, as that creates a lot of foliage and very few tubers.
Step 2: The Planting Process
Once your soil is ready, it is time to plant. Wait until the danger of hard frost has passed. In the UK and Canada, this is usually late April or May. For those in the southern US or Australia, you can plant in early spring or even autumn.
Dig a trench or individual holes. Each hole should be about 10 to 15 cm deep. This might seem shallow, but it works best. Place the tuber in the hole with the small "eyes" facing up. Actually, they will find their way out even if you drop them in sideways. I learned not to stress about orientation. Cover with soil and firm down gently.
Spacing was my big lesson. I initially planted them about 15 cm apart. They were okay, but they got crowded and started competing. Now, I space them at least 30 cm apart in rows that are 90 cm apart. They grow three meters tall, so they need their personal space.
Step 3: The Initial Watering and the 2-Week Observation
Here is where my journal comes in. I watered the soil well right after planting. Then, I waited. For the next two weeks, I observed my soil like a hawk. I did not water again unless the top 5 cm of soil was completely dry.
In my observational log, I noted the following timeline:
- Day 1-5: The soil stayed damp. I did nothing.
- Day 7: I checked by probing the soil. Still moist underneath, so I skipped watering.
- Day 9: The top layer felt dry, but a quick dig showed wet soil at the 5 cm depth. I left it.
- Day 14: I finally gave them their next watering.
That was the trick. By waiting, I encouraged the tubers to send out roots looking for water instead of sitting in a puddle. After those 14 days, I started seeing small green shoots pushing through.
Step 4: General Upkeep and Growth
After emergence, the plants grow rapidly. I will be honest, they look after themselves. The main job is weeding early on because they do not like competition when young. Once the plants reach about a foot tall, I mulch the soil to keep moisture in and weeds out.
They are remarkably pest-free. I have had the occasional slug, but nothing serious. They also will grow in exposed, windy spots, but staking tall plants can be necessary, especially if you are in a gusty area.
Step 5: What to Do About Flowering
In late summer, they will develop beautiful yellow sunflower-like blooms. This is a lovely sight. Some people cut these off to redirect energy back to the tubers. I do not bother. My harvest is plentiful either way. But if you want maximized tuber size, you can pinch them off. It is optional in my opinion.
Digging Up Your Harvest
This is the fun part. The tubers are ready to harvest after the first frost in autumn. The frost signals the plant to convert starches into sugars, which makes them taste sweeter. I usually wait until the foliage has died back completely, which happens around November in my UK garden.
To harvest, I cut the dead stems down first. Then, I take my garden fork and gently lift the soil. The tubers will be spread out. I dig carefully, because they grow in clusters and breaking them is easy. In fact, you will miss some. That is fine. Just leave them in the ground, and you will have free plants next year.
You can eat them raw or cooked. My favorite way is roasted with olive oil and salt. They have a nutty, sweet flavor that reminds me of a water chestnut but softer.
The Perennial Question: Can They Be Grown in Pots?
Yes, but there is a degree of difficulty. Containers restrict their spreading nature. I tried this once, and I was skeptical. It actually worked quite well. You need a pot that is at least 40 liters in volume and at least 45 cm deep.
Fill the pot with a multi-purpose potting mix blended with some garden compost. Plant two tubers in a pot that size. Place the pot in full sun. The most important thing is to prevent the pot from drying out entirely. You have to check the moisture level every day in hot weather. Also, do not let it sit in a saucer full of water, as that defeats the purpose. I harvested a decent amount from that container, though less than from the ground.
Solving My Previous Foliage Problem
I remember one time my plants looked beautiful and green, but the harvest was pitiful. I could not figure it out. The leaves were huge, and the stalk was thick. But the tubers were tiny. I dug around and realized the issue. Heavy nitrogen in the soil. I had mixed in blood meal thinking it would help. It just made them grow giant tops. The plants were not putting energy into the roots.
If you see huge lush foliage and few flowers, think about your soil. Pure nitrogen will ruin your yield. Stick to compost or well-rotted manure instead.
My Advice on Companion Planting
These plants are tall and can shade out other crops. I learned to plant them on the northern edge of my garden so they do not block the sun from my tomatoes and peppers. They do well with corn, but they tend to hog nutrients. I would honestly recommend growing them separately if you have the space.
Watering Secrets Throughout the Season
Let me wrap up watering more clearly. After the 2-week observation phase, I switched to a drip system on a timer. I set it to water deeply twice a week if there was no rain. Deep watering encourages the roots to go down, which makes the plants more drought-tolerant. During a scorching Australian heatwave, they might need water every other day. But always check the soil first.
How to Store Harvested Tubers
Freshly dug tubers do not store as long as potatoes. They dehydrate quickly. I keep mine in the refrigerator crisper drawer. They will last for two weeks there. For longer storage, I leave them in the ground and dig them up as needed. That is a survival trick. If you must store them indoors, put them in slightly damp sand or sawdust in a cool, dark place.
Troubleshooting Common Issues
I have faced a few oddities. Here are some issues and what I did.
- Tubers taste earthy or muddy. This is often from not cleaning them properly or harvesting too early. Wait for frost and scrub them well.
- Plants falling over. They are top heavy. I stake them if they get over six feet. Honestly, if they fall over, they still produce tubers, but they might not get enough sunlight.
- Poor sprouting rate. This is usually old seed stock. Buy fresh tubers from a garden center. I tried planting some from a supermarket once, and they had been sprayed to stop sprouting. They never grew.
The Role of RHS and AHS in My Research
When I started growing these, I relied on the hard data from specialist organizations. The RHS has excellent guidance on planting depth and spacing. They also have a great section on soil prep for root crops. Similarly, the AHS provided insight into regional timing for North American growers. Both agree on the fundamentals: full sun, well-drained soil, and patience.
A Note on Invasive Tendencies
Here is a heads up. Jerusalem artichokes can be invasive. I have had a patch in my garden for four years. If you miss a single tuber when harvesting, it becomes a new plant next year. It can quickly get out of hand if you are not careful. I recommend keeping them in a contained bed or a large sunken pot to stop them from spreading across your whole yard.
Growing in Different Climate Zones
If you are in a colder region like Canada, you can plant them in the spring and harvest right after the first frost. You might need to mulch heavily with straw for winter if you plan to leave them in the ground.
For warmer climates like Australia, the main issue is heat. In places like Queensland, they will grow in winter and can be harvested in spring. I have had friends there who plant them in April. It really is all about the local climate and frost timing.
My 2-Week Observation Journal Explained
Let me give you a fake entry from my journal so you can visualize the process.
Day 1: I planted my tubers. The soil is damp from last night's rain. I water a little to settle them.
Day 5: I check the soil. It is moist one inch down. I do not water.
Day 8: The topsoil is dry and crumbly. I dig slightly and find moisture. I let it be.
Day 10: I see tiny green tips poking out of the ground. Excitement builds.
Day 12: The shoots are about 2 inches tall. I water a little around the base, avoiding the leaves.
Day 14: I do a deeper watering, ensuring the water gets down to the roots. The plants are growing visibly now.
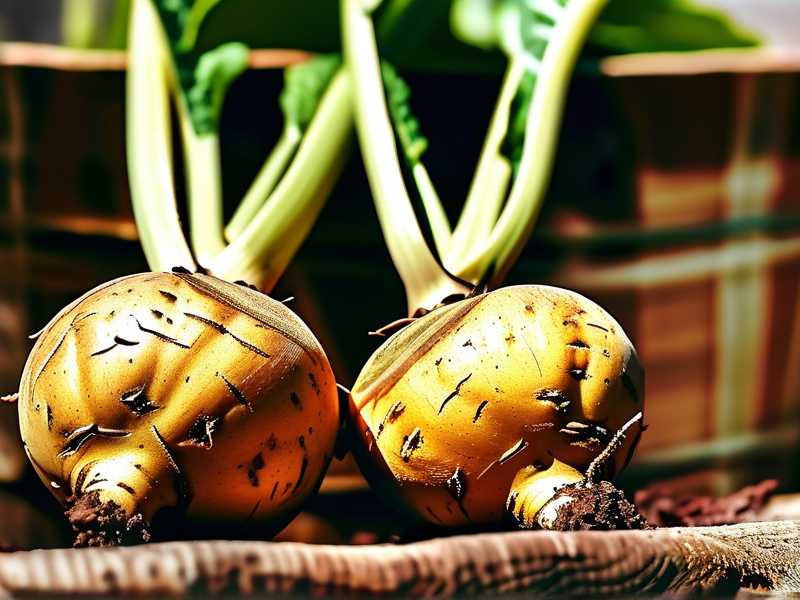
These two weeks are about establishing a routine based on observation, not habit. It is more engaging than just following a schedule.
Final Tips for First-Timers
I want to emphasize that you can do this. I killed my first batch, but the second batch was fantastic. I got about 10 kilograms from a few small tubers. If you respect their need for drainage and sunlight, you will be rewarded.
Do not be afraid to leave them in the ground after the leaves die. They actually taste better after a frost. My neighbor digs his up at Thanksgiving, and they are delicious. They are truly low-maintenance once the initial two weeks are over.
FAQ
Question 1: Do I need to chit Jerusalem artichokes before planting like potatoes?
No. I tried chitting them once, but they do not need it. You can plant them directly into the soil. They will sprout naturally. Chitting increases the risk of rot if they dry out too much.
Question 2: Can I eat the tubers directly after harvest?
Yes. You can eat them raw. They have a crunchy texture. I often slice them into salads. Just scrub them well first. Some people peel them, but the skin is thin and edible.
Question 3: What is the ideal temperature for soil?
They prefer cool soil to start. Aim for a soil temperature between 10°C and 15°C at planting. Anything above 20°C can hinder sprouting. In autumn, they can handle colder temps easily.
That wraps it up. Just remember the 3 mistakes. Do not overwater. Do not put them in deep shade. Do not use a tiny pot. Give them the basics, and they will give you a crazy harvest. Happy growing.





