bluename
 Stop watering your anthurium on a schedule. That is the single biggest mistake I see everywhere. Forget the calendar, and forget the "once a week" rule you found on some random blog. The truth is, I killed my first two anthuriums by drowning them with kindness. I was so scared of underwatering that I poured water in every Sunday like clockwork. The result? Soggy roots, yellow leaves, and a one-way ticket to root rot city. 90% of indoor plants die from overwatering, and anthuriums are especially prone to this fatal error.
Here is the answer you need right now: only water your anthurium when the top 1-2 inches of the potting mix are completely dry to the touch. For me, that usually translates to every 7-10 days in my living room conditions. But you must check the soil, not the calendar. My current plant thrives because I stick my finger in the dirt, feel for moisture, and I ignore the day of the week completely. This one simple habit, plus the pro tips below, will save your plant from the dreaded root rot.
The 3 Deadly Sins of Anthurium Care (And How to Avoid Them)
Before we dive into my step-by-step watering routine, we need to talk about the big picture. I have compiled this list after killing more plants than I care to admit. If you are a beginner, look at these three mistakes first. They are the reasons why most anthuriums fail indoors.
Mistake #1: Watering on a Rote Schedule
This is the #1 killer. I used to set a reminder on my phone. "Water Anthurium - Sunday 9 AM." It felt so responsible. But plants don't read calendars. They drink based on light, temperature, humidity, and the season.
Once, I went on a trip in the middle of winter. My apartment was cold, and the soil stayed wet for weeks. My "Sunday watering" schedule was still in my head, and when I got back, I watered again. The roots had already been sitting in moisture for too long. Within days, the stems turned mushy at the base. That was my second plant lost to root rot.
The fix is simple logic: the soil is the boss. You are just the assistant. You need to check the soil moisture first before you even pick up the watering can. A moisture meter is a great tool if you don't like getting your hands dirty, but nothing beats the feel of your own finger.
Mistake #2: Wrong Light, Wrong Water Usage
You might not think light is a watering issue. But it absolutely is. If your anthurium is sitting in a dark corner, it isn't photosynthesizing much. It isn't drinking water. The soil will stay soggy for ages. Then you water it because the top looks dry, but the bottom is a swamp.
I tried keeping one on a bookshelf that was about 6 feet away from a north-facing window. The leaves were gorgeous, but the soil stayed damp for 3 weeks. I kept waiting for it to dry out so I could water it, but it just sat there, cold and wet.
The solution is to find the sweet spot. Bright, indirect light is what they want. A few feet from an east or west-facing window is perfect. In brighter light, the plant uses up water faster, which means the soil dries out quicker. This actually reduces your risk of rot because the roots get that dry period they crave.
Mistake #3: Using the Wrong Pot
This is a physical problem I see all the time. Anthuriums come in those cheap plastic nursery pots that are often too deep and hold water in the bottom. If you slip that into a decorative ceramic pot with no drainage, you are asking for trouble.
I bought a beautiful glazed pot once. It was dark blue and perfect for my living room. I planted my anthurium directly in it. There was one drainage hole, but I put a saucer under it. I watered it, and the saucer filled with water. I emptied it, but the pot was so thick and deep that the bottom of the soil stayed wet for two weeks. The roots were constantly sitting in a cold, wet zone. That was my third anthurium to go.
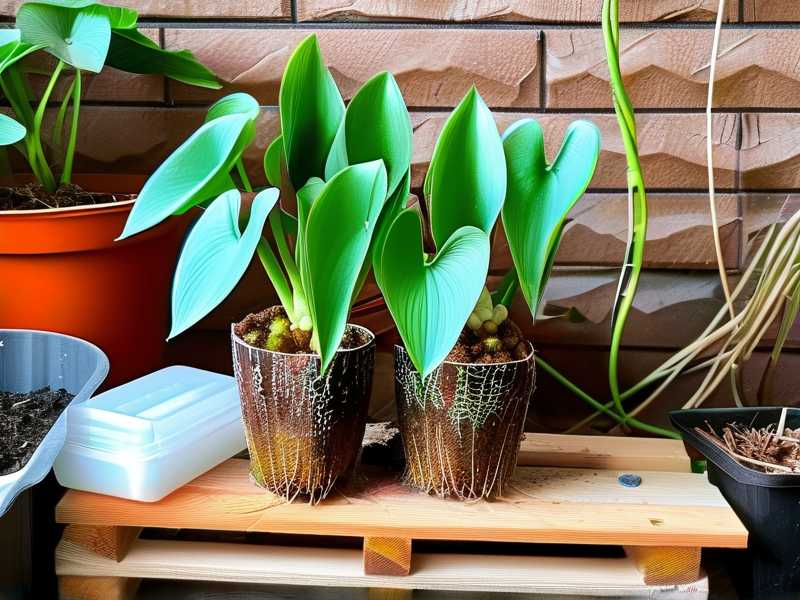
You need a pot with serious drainage. A plastic pot with lots of holes is fine. Or better yet, use an orchid pot with slits on the sides. This lets air get to the roots, which they love. It also prevents water from pooling at the bottom. Don't use a pot that is too big. Anthuriums actually prefer to be slightly root-bound. A snug pot means the soil dries out faster, which is exactly what we want.
My 2-Week Deep Dive: The Step-by-Step Pro Routine
Okay, let me show you exactly what I do now. I have been using this routine for a while, and it has completely saved my current anthurium. I even tracked a full 2-week cycle to show you how the soil moisture changes day by day. This is the real, hands-on experience part. I want you to see that watering is not a single event. It is a process of observation.
Week 1, Day 1: The Assessment
I started with my standard check. I stuck my index finger about 1.5 inches deep into the potting mix. It felt completely dry. There was no coolness or moisture clinging to my skin. My anthurium is in a 6-inch plastic pot with drainage holes. I decided it was time to water.
My Exact Watering Method:
- I took the plant to my kitchen sink. This is crucial. You don't want water dripping onto your furniture.
- I filled a watering can with room-temperature filtered water. Cold water can shock the tropical roots.
- I slowly poured the water over the entire top surface of the soil. I don't just water one spot. I go around the pot until I see water streaming out of the drainage holes at the bottom.
- I let it sit in the sink for about 10 minutes to drain completely. I don't put it back in the saucer until it stops dripping.
Week 1, Day 3: Patience
I didn't touch the watering can. The top of the soil felt a little damp, but nothing more. The pot felt slightly heavy. I checked the leaves. They were firm and waxy to the touch. This is the best indicator of a happy, hydrated plant. I did nothing.
Week 1, Day 5: The Dry Down
I noticed the top half-inch of soil was dry again. But I know better than to water now. The bottom of the pot still has moisture. I could tell the pot was still a bit too heavy. This is where overwaterers fail. They see a dry top and panic. You have to trust the process. The roots need air. Let them breathe.
Week 1, Day 7: The Middle Check
A week had passed since the last watering. I did the "lift test." I picked up the pot. It felt surprisingly light compared to a few days ago. The top 2 inches felt dry. This is the moment I look for. It is the perfect balance that triggers me to water again.
I watered again using the exact same sink method. I poured until it drained freely. I watched the water run through the soil. It wasn't pooling on top, which tells me the soil hasn't become compacted and water-repellent. It was absorbing nicely.
Week 2, Day 2: The Mistake I Almost Made
This is where I have a story for you. The next day, my plant was sitting near an open window. It was a warm day, and I thought, "Maybe it needs a little mist." But I stopped myself. Misting is a myth. It raises humidity for about 10 minutes and can actually lead to fungal leaf spots if the water sits.
I reminded myself that the roots are the only thing that takes up water for the plant. The leaves don't absorb meaningful moisture from misting. I left it alone. This is a discipline issue more than a skill issue.
Week 2, Day 6: The Observation
The leaves looked amazing. They had that almost plastic-like shine that indicates good health. I noticed a new leaf unfolding from the top. This is a huge sign of success. The old leaves weren't yellowing. The stems weren't mushy. The soil was dry to the touch again.
Week 2, Day 7: The Final Watering
I watered it for the third time in that 2-week period. That seems like a very normal cadence for my environment. In the summer, it might be every 5 days because the heat is on and the air is dry. In winter, I might get away with watering every 14 days. The key here is that the interval changes. It is never static.
The "Soak and Drain" vs. Bottom Watering
There are two main ways you can water anthuriums, and I have tried both.
The first is the "Soak and Drain" method I described above. You pour from the top until water runs out the bottom. This ensures all the roots get moisture, even the ones at the bottom of the pot. It also flushes out any built-up fertilizer salts.
The second is "Bottom Watering". You fill a saucer or tray with water and sit the pot in it. The soil wicks up the water through the drain holes. This is great for plants with dense foliage that you don't want to get wet.
However, for anthuriums, I prefer bottom watering for a specific reason. It prevents the crown of the plant (where the stems emerge from the soil) from getting wet. If water sits in that crown, it can cause rot in the stem, which is even harder to fix than root rot.
To bottom water, I fill a bowl with a couple inches of water and place the pot in it. I check every 20 minutes, but here is the catch. You need to take the pot out before the top of the soil gets wet. If the top is wet, you know the wicking has gone too far and the soil is too saturated. I usually set a timer for 15 minutes, and then take it out to drain. It’s a bit more work, but for the cleanest result, I think it works best.
Common Cure: Rescuing an Anthurium with Root Rot
But what if you are reading this too late? I have been there. That smell of damp, sour soil is unmistakable. If you suspect root rot, you need to act fast. Don't just wait for it to wither.
First, you have to take the plant out of the pot. Gently loosen the soil around the roots with your fingers. Rinse the roots under lukewarm water to wash away the old, infected soil.
Then, you have to be brutal. Healthy roots are white or light tan and firm. Rotten roots are brown or black, feel mushy, and will easily pull apart. You have to cut away all of the rotten parts with scissors. You have to cut into healthy tissue to stop the infection from spreading.
I use a pair of sterilized pruning shears for this. I had to do this to my plant last year, and I lost about 60% of the root mass. It was heartbreaking. Then, I treated the remaining roots with a very diluted hydrogen peroxide solution (about 1 part 3% hydrogen peroxide to 3 parts water). This helps kill any remaining bacteria and fungus.
Then, I replanted it in a completely fresh, well-draining potting mix. I use a mix of orchid bark, perlite, and a bit of standard potting soil. This is not a time to reuse the old soil. That soil is already infected. That drastic surgery saved my plant, but honestly, it is much better to avoid the rot in the first place by following the simple drying rules above.
FAQ: Your Last-Minute Anthurium Watering Questions
I get asked a ton of questions about this plant. Here are the three I hear most often, and my honest answers based on what I have tried.
1. Should I water my anthurium with ice cubes?
Absolutely not. I see this trend all over social media, and I tried it with a different plant once. Tropical plants like anthuriums despise cold water. Ice cubes will shock the roots and cause immediate stress. The roots of an anthurium are used to consistent warmth. I always use room-temperature water that has been sitting out for a few hours. Cold water can cause leaf drop and make the plant more susceptible to disease.
2. What does an overwatered anthurium look like during week one?
You will notice the lower leaves turning yellow first. The yellowing often has a brown, soggy edge. You feel the soil, and it feels more like mud than soil. The pot will be very heavy. You might even see fungus gnats flying out of the soil. Those tiny flies are a dead giveaway that you are keeping the soil too wet. The top soil might be dry, but you have to lift the pot to feel how heavy it is. If it is heavy, the bottom is wet.
3. Is humidity more important than watering for anthuriums?
This is a great question. They do love humidity. They are native to tropical rainforests. But humid air is not a substitute for watering. The root system does the hydrating. High humidity just prevents the leaves from losing too much water to the air. I don't use a humidifier for mine, but I do keep it near a kitchen sink where steam rises. The most important thing is still the roots. Airy, moist soil is the goal, not just humid air. Getting the roots right will make the plant so much stronger than just blasting it with mist.
The Value of a Chunky Mix and Expert Advice
Let’s talk about the soil again, because the right watering technique can't save a bad soil. My anthurium would be dead today if I hadn't switched to a chunky mix.
I used to think that premium potting soil was good enough. It wasn't. It was too dense. It held water like a sponge, which is the exact opposite of what an anthurium needs.
I now mix my own. I use about 3 parts orchid bark, 2 parts perlite, and 1 part coco coir. The orchid bark is the key. It creates air pockets around the roots. It allows water to flow through quickly instead of pooling. This physically prevents the roots from sitting in water, which is the definition of root rot prevention. Its fast-draining nature is your best friend.
For authority, I have to point you to the experts. The Royal Horticultural Society (RHS) has a brilliant guide on anthurium cultivation that emphasizes this need for a free-draining environment. They recommend a loam-less potting compost with extra grit or bark. That advice saved me from using regular garden soil.
Similarly, the American Horticultural Society (AHS) highlights the importance of matching watering frequency to the plant's environment, not a fixed date. They stress using warm water and avoiding chilling the roots.
The bottom line is, this plant is not as hard as people think. You just have to get out of the "just add water" mindset. You have to become a detective. You check the soil. You check the leaf firmness. You check the weight of the pot.
I know it feels scary to leave plant dry. That dry period is what keeps root rot away. The roots need to breathe. Air is just as important as water.
I have lost three anthuriums to rot. I know the sorrow of watching beautiful leaves go limp and mushy. But I promise you, if you stick to the "dry down" method, if you put your finger in the soil to check the moisture, and if you make sure that pot has holes in it, you will enjoy your anthurium for years. My current one has been in the same spot for almost a year now, and it just bloomed again last week. It is a great feeling to finally get it right. Just take it slow, and let the roots decide when they are thirsty. They will thank you for it.