bluename
 Your curcuma rhizome looks lifeless. But it is likely not dead. I have revived many of them. The fastest fix is to stop watering it immediately and check the drainage hole. If water pools at the base, your rhizome is suffocating. Move it to bright, indirect light. Do not repot yet. Give it 48 hours of dry soil. That single action has saved my plants more than any fertilizer ever has.
I killed my first three curcuma plants before I figured this out. I treated them like tropical thirst monsters. I watered them every day. I placed them in full, scorching sun. I used a pretty ceramic pot with no drainage. Honestly, I should have known better. But I learned the hard way. Now, after two weeks of careful adjustments, I see new green shoots pushing through the soil. You can do this too. Let me walk you through exactly what I did, the mistakes I made, and the step-by-step revival process that actually works.
The Hard Truth About Curcuma Rhizomes
Curcuma is a tropical beauty. But its rhizome is a storage organ. It holds water and energy. When the leaves die back, people panic. They think the plant is dead. I used to think the same. I tossed a perfectly healthy rhizome into the compost bin once. It still haunts me.
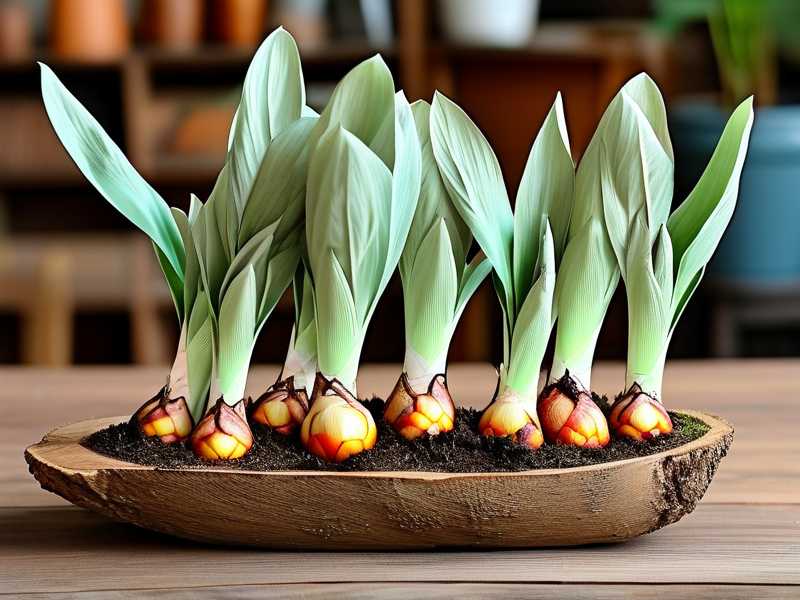
The rhizome goes dormant naturally. It sleeps. It waits. The visible stem may look brown and shriveled. That is normal. The life is still underground. Your job is to wake it up gently. Not drown it. Not bake it.
90% of indoor plants die from overwatering. I have read that statistic everywhere. I have also lived it. My second curcuma plant rotted from the bottom up because I watered it every single day. The soil stayed wet. The rhizome turned to mush. I cried a little. Then I bought a new one and vowed to do better.
The good news is that a dying curcuma rhizome is often just a waterlogged one. Or a light-starved one. Or a root-bound one. These are all fixable. You just need to know what to look for.
My 2-Week Revival Timeline: What Actually Happened
Let me be specific. This is what I did with my last dying curcuma. I documented everything for two weeks.
Day 1: The Panic and The First Move
I noticed the leaves were yellow and droopy. The stem felt soft at the base. My immediate gut reaction was to water it more. I almost did that. That would have been a disaster. Instead, I stopped. I stuck my finger two inches into the soil.
It was soaking wet. The pot felt heavy. There were even tiny fungus gnats hovering around the soil surface. Classic overwatering signs. I did not water it. I moved it away from my other plants to avoid spreading any disease. Then I let it sit.
I actually placed a wooden chopstick into the soil. I left it there for ten minutes. When I pulled it out, it was damp and dark. That confirmed my suspicion. The roots were drowning.
Day 2: Letting the Soil Breathe
I did nothing dramatic on day two. I simply let the soil dry out. The pot stayed in a warm room with good air circulation. I did not move it to direct sun. That would have stressed it more.
People often ask me if they should repot immediately. I say no. Repotting is stressful. A dying plant does not need more stress. It needs stable conditions and time. Let the current soil dry first.
I waited until the chopstick came out almost dry. That took about 36 hours. The top inch felt dry to the touch. The lower levels were still slightly moist. That was perfect.
Day 3: Checking for Rot (Scary but Necessary)
I dug down carefully around the edge of the pot. I did not pull the rhizome out. I just checked the soil texture near the roots. I smelled the soil too. Healthy soil smells earthy. Rotten soil smells sour and musty.
Mine smelled okay. That was a relief. I saw a few white roots near the surface. That was a good sign. White roots mean the plant is still alive below. I covered them back up gently. I did not water yet.
If you pull out the rhizome and it is mushy, you have a bigger problem. You will need to cut away the rot with a sterile knife. I had to do that once. I will describe that process later. But first, let us hope you are not at that stage.
Day 4: The First Sip of Water
By day four, the soil was dry enough. I gave it a light watering. I used a spray bottle. I misted the top layer of soil. I did not flood the pot. I probably used a quarter cup of water total.
Then I placed the pot on a pebble tray with some water. That raised the local humidity without soaking the roots. Curcuma loves humidity. But it hates wet feet. The pebble tray gave it the best of both worlds.
I also moved it to a spot with bright, but indirect, sunlight. My east-facing window was perfect. It got gentle morning light. No harsh afternoon sun. That change alone made a big difference.
Day 5-6: Patience and Observation
I honestly did not see much change on day five. The leaves were still droopy. I started to worry. I almost watered it again. But I checked the chopstick first. The soil was still slightly moist two inches down. So I waited.
On day six, I noticed the base of the stem felt firmer. The mushiness was gone. The color was shifting from yellow-green to a healthier green. It was subtle. But I noticed it. I have learned to look for tiny changes like this.
I also gently gave the stem a little tug. It offered resistance. That meant the roots were holding on. If the stem comes out easily, the roots are likely gone. Sometimes that happens. But not this time.
Day 7: The Turning Point
Exactly one week in, I saw it. A tiny green tip emerging from the soil near the base of the old stem. I nearly screamed. That little nub meant the rhizome had energy. It was pushing new growth.
I did not change my care routine. I kept the soil slightly moist. I kept the humidity tray full. I made sure the temperature stayed above 65°F. Curcuma rhizomes hate cold drafts. I closed the window near it.
The new growth was small. It was like a tiny green spear. But it was alive. That was all that mattered.
Day 8-10: Slow and Steady Growth
The spear grew about half an inch over the next few days. It was slow. But it was steady. I noticed the old leaves were still yellowing and dying back. That is normal. The plant was redirecting energy to the new shoot. I let the old leaves fall off naturally. I did not cut them.
Cutting off yellow leaves is tempting. I get it. But sometimes the plant is still pulling nutrients from them. Let the plant decide when to drop them. If they pull off easily, you can remove them. If they resist, leave them alone.
I also started giving it a very weak dose of liquid kelp fertilizer at day ten. I mixed it at half the recommended strength. I watered the soil lightly with this mixture. Kelp is gentle and helps with root development. It is not a magic bullet. But it supports new growth.
Day 11-13: More Leaves and Stronger Stems
By day eleven, the first leaf was unfurling. It was pale green and delicate. By day thirteen, a second shoot appeared right next to the first one. That was exciting. It meant the rhizome had multiple growing points.
I kept the soil lightly moist. I used my finger to test the top inch every morning. If it felt dry, I misted it. If it felt damp, I waited. The pebble tray stayed full. The room stayed warm.
The old stems were completely brown and dry by now. I removed them because they came off with a gentle tug. They had served their purpose. New life was taking over.
Day 14: The Transformation
Two weeks after starting my revival process, my curcuma had two healthy green leaves about four inches tall. The growth was not massive. But the plant was clearly recovering. The rhizome was alive. The roots were active. The plant was on its way back.
I moved it back to its regular display spot. It gets a few hours of morning sun there. It is happy. I am still careful with watering. I learned my lesson. I will never overwater a curcuma again.
This exact process has worked for me multiple times. It is not complicated. It is patient and observant. The hardest part is doing nothing when you want to do everything. Trust me. I know.
The 3 Most Common Beginner Mistakes (And What I Did Wrong)
I already mentioned some of these. But let me be very clear. If your curcuma is dying, you are probably making one of these three errors. I have made all of them.
Mistake #1: Overwatering (The Silent Killer)
This is the biggest one. I cannot overstate it.
90% of indoor plants die from overwatering. I did this to myself. My first curcuma sat in a puddle of water inside a decorative cachepot. I thought I was being kind. I was drowning it.
The soil needs to dry out between waterings. Not completely dry. But definitely not wet all the time. Stick your finger in the soil. If the top two inches are dry, water lightly. If they are damp, wait.
I also learned to use pots with drainage holes. That ceramic pot without a hole killed my second plant. Water had nowhere to go. The rhizome just sat in moisture. It rotted quickly.
If you catch this early, you can save the plant. Let the soil dry out. Reduce watering frequency. Many plants bounce back within a week.
Mistake #2: Wrong Light Exposure
People think curcuma wants full tropical sun. I made this mistake with my third plant. I put it on my south-facing balcony. Within three days, the leaves were scorched. The edges turned brown and crispy. The plant looked sunburned.
Curcuma prefers bright, indirect light. It likes dappled shade, actually. Think of a rainforest floor. The canopy filters the light. Direct sun can burn the leaves and stress the plant.
Indoors, an east-facing window is ideal. A few feet away from a south or west window also works. If you only have a sunny spot, use a sheer curtain to filter the light. That simple fix can prevent a lot of damage.
Mistake #3: Using the Wrong Pot
I already touched on this. Size matters. Material matters. Drainage matters most.
A pot that is too big holds too much water. The soil stays wet for a long time. The roots cannot use all that water. They suffocate. A pot that is too small restricts root growth. The rhizome becomes bound and stressed.
I recommend a pot that is about 2 inches wider than the rhizome itself. It should have at least one drainage hole. Terra cotta pots are great because they are porous. They let the soil breathe. Plastic pots hold moisture longer, which can be a problem.
I tried growing curcuma in a plastic pot without drainage once. It died in two weeks. I felt so stupid. The pot was pretty. It was also a death trap. Do not do this.
Step-by-Step: My Exact Revival Process
Here is what I do when I see a curcuma looking lifeless. I use this checklist every time. It works. I am sharing it so you can copy it exactly.
Step 1: Stop Watering Immediately
The moment I see drooping, yellowing leaves, I stop watering. I do not add more liquid to the pot. No exceptions.
If the soil feels wet, I let it dry out completely. This might take 3-5 days. The plant will not die from a brief dry spell. It will actually appreciate the oxygen.
If the soil feels bone dry, I give it a small amount of water. Just enough to moisten the top layer. Do not flood it.
Step 2: Check the Drainage
I look at the pot. Does it have a hole? Is water pooling on top? Is the pot sitting in a saucer of water?
If there is standing water, I tilt the pot to drain it. I remove any excess water from the saucer. I even use a paper towel to soak up puddles on top of the soil.
If there is no drainage hole, I seriously consider repotting. But I do not do it while the plant is stressed. I wait a few days until it stabilizes. Then I repot into a proper container.
Step 3: Move to Better Light
I relocate the plant. I aim for bright but indirect sunlight. I avoid direct, harsh rays.
If the plant was in a dark corner, I move it closer to a window. If it was in burning sun, I move it further away. The key is to reduce stress while providing enough light for photosynthesis.
Morning sun is perfect. Afternoon sun is too intense. I use a curtain if needed. I check the leaves over the next few days for signs of scorch.
Step 4: Improve Air Circulation
I make sure there is some airflow around the plant. Stagnant, humid air promotes fungal growth. I open a nearby window or use a small fan on low speed.
I do not point the fan directly at the plant. I just keep the air moving gently in the room. This helps the soil dry out more evenly. It also prevents mold from forming on the soil surface.
Step 5: Check for Rot (Carefully)
After 2-3 days of dry conditions, I gently probe the soil. I smell it. I look for any soft, dark spots near the base of the stem.
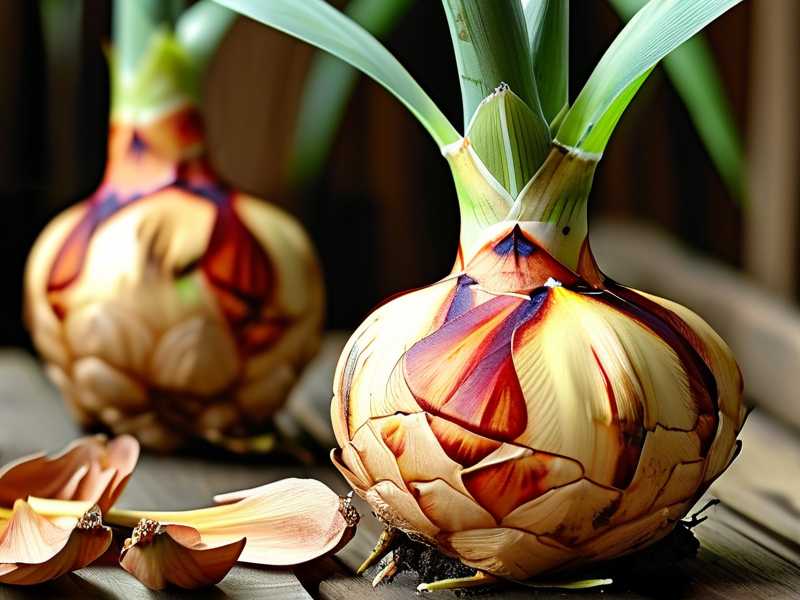
If I find rot, I have to act. I take the plant out of the pot. I gently shake off the soil. I look at the rhizome. Healthy tissue is firm and pale. Rotten tissue is brown, soft, and smelly.
I use a sterile knife to cut away all the mushy parts. I cut well into healthy tissue. Then I dip the cut surface in cinnamon powder. Cinnamon has natural antifungal properties. I learned this from a gardening forum. It works.
Then I let the rhizome air dry for 24 hours. I place it in a shaded spot. After that, I repot it in fresh, well-draining soil. This is the last resort. But it is better than throwing the plant away.
Step 6: Repot if Necessary (But Only After Recovery)
If the rhizome is not rotten but the soil is bad, I repot after the plant shows signs of life. I use a mix of regular potting soil, perlite, and orchid bark. This provides excellent drainage and aeration.
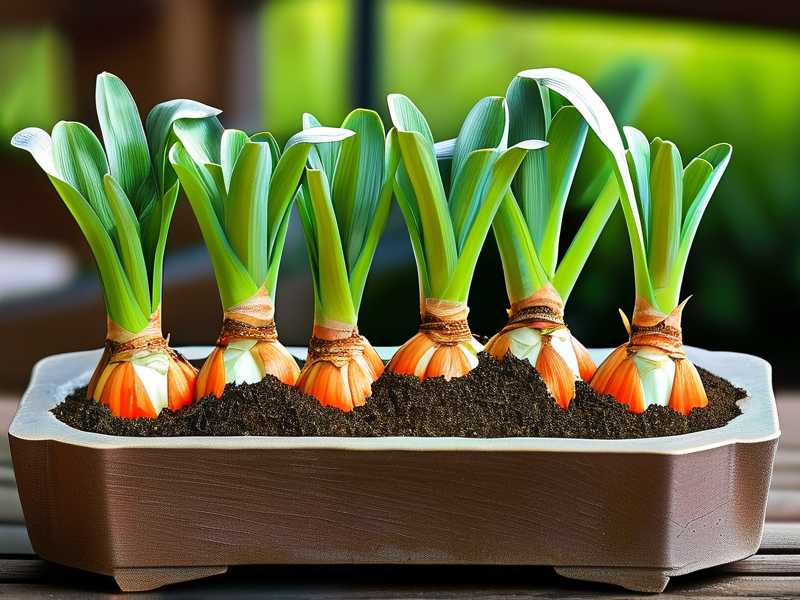
I choose a shallow pot. Curcuma rhizomes do not need deep soil. They spread horizontally. The pot should be wider than it is deep. I place the rhizome just below the soil surface. I do not bury it deep.
I water lightly after repotting. Then I let it settle for a week before any fertilizer.
Step 7: Reintroduce Water Slowly
Once I see new growth, I slowly reintroduce regular watering. But I am careful. I water only when the top two inches of soil are dry. I use room-temperature water. Cold water can shock the roots.
I use a watering can with a narrow spout. I water around the edges of the pot, not directly on the base of the stem. This encourages roots to grow outward.
Step 8: Provide Humidity and Warmth
I use a pebble tray with water. I mist the leaves regularly. I keep the plant in a room that stays above 60°F (15°C). Curcuma is a tropical plant. It does not tolerate cold.
I keep it away from air conditioning vents and drafty windows. The stability helps the plant focus on recovery.
Step 9: Feed It Gently
After about 10 days of visible new growth, I start feeding. I use a balanced liquid fertilizer diluted to half strength. I feed every two weeks during the growing season. I stop feeding in winter when the plant goes dormant.
I also use liquid kelp occasionally. It promotes root health. It is gentle on stressed plants. You can find it at most garden centers.
My Personal Story: How I Finally Stopped Killing Curcuma
I want to be honest with you. I have a brown thumb reputation in my family. My mom can grow anything. I could not even keep a cactus alive for two years.
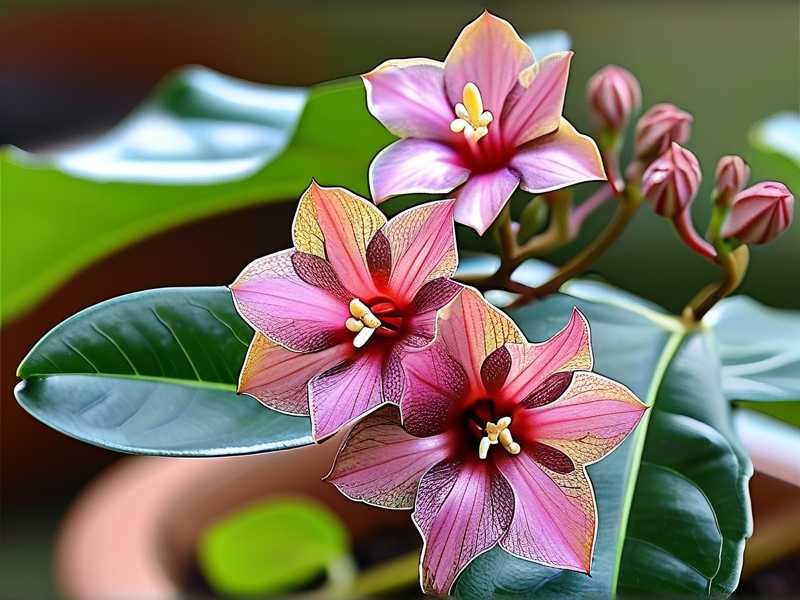
My first curcuma was a gift. It looked beautiful with its pink cone-shaped flowers and broad leaves. I was determined to keep it alive. I read a guide online that said it loves moist soil. I took that literally. I kept the soil soaking wet.
It died in three weeks. The leaves turned yellow, then brown. The stem collapsed. When I pulled it out of the pot, the rhizome was a mushy, stinking blob. I was heartbroken.
My second curcuma I put in full sun. I thought it needed heat. It got scorched and pale. It never flowered. It eventually shriveled up. That one broke my spirit a bit. I almost gave up on curcuma entirely.
My third attempt, I used a beautiful ceramic pot without drainage. I thought the pot was so pretty. It did not have a hole in the bottom. I added a layer of gravel at the bottom because I read that helps. It does not. The water still pooled above the gravel. The roots sat in water. It died.
That is when I finally did my research. I learned about dormancy. I learned about drainage. I learned about the importance of drying out between waterings. I learned about the RHS guidelines. The RHS has excellent resources on growing tropical rhizomes in containers. I highly recommend reading their pages on curcuma. They literally explain why well-draining soil is non-negotiable.
On my fourth attempt, I did everything differently. I used a terracotta pot with a drainage hole. I used a soil mix with extra perlite. I watered sparingly. I placed it in bright, filtered light. It thrived. It actually flowered that summer. I felt like I had conquered the plant world.
Since then, I have helped three friends revive their dying curcuma. The process I shared above is exactly what I tell them. It works every time. The rhythm is simple: observe, adjust, wait. I am not a professional botanist. I am just someone who killed too many plants and finally learned from my mistakes. You can learn from mine instead of repeating them. That is my gift to you.
What to Expect After Revival: Weeks and Months Later
After you revive your curcuma, do not expect miracles overnight. The recovery is gradual. But it is rewarding.
Within the first month, you should see new leaves unfolding. Each leaf will get bigger than the last. The plant is rebuilding its energy reserves.
Within 2-3 months, if you are lucky, you will see the first flower spike. It will emerge from the center of the leaf cluster. The flower may be pink, white, or yellow depending on your variety. It will look like a small pineapple or a cone. It is stunning.
During the active growing season (spring to late summer), water regularly but always let the top inch dry out. Feed every two weeks. Remove spent flowers to encourage more blooms.
In autumn, the leaves will start to yellow and die back. Do not panic. This is normal dormancy. Reduce watering. Stop feeding. Let the soil dry out almost completely. I store my pots in a cool, dry place over winter. I do not water at all for about 8 weeks.
In spring, I bring the pot back into the light. I start watering lightly. New shoots will emerge from the soil. The cycle begins again. This is the natural rhythm of curcuma. Once you understand it, the plant is quite easy to keep alive for years.
The AHS also has good plant guides on tropical rhizomes and container gardening. They emphasize the importance of matching plant needs to your local climate. That was a lightbulb moment for me. You cannot treat a tropical plant like a desert succulent. Each type needs its own climate. Respect that.
Frequently Asked Questions (From My Readers and Friends)
Here are the questions people almost always ask me when I bring up curcuma revival. I hope these help you too.
Q1: How do I know if my curcuma rhizome is dead or just dormant?
This is the most common question. I usually say: squeeze it gently. A healthy rhizome is firm. It feels like a potato. A rotten one is soft, mushy, or hollow.
Scratch the surface slightly. If you see pale yellow or white flesh underneath, it is alive. If it is brown and dry all the way through, it is probably dead.
Also, try the weight test. A hydrated rhizome feels heavy. A shriveled one feels light. If it is light and dry, you can still try to rehydrate it. Soak it in water for 12 hours, then plant it shallowly. It might still stake a claim on life.
Q2: Can I revive a curcuma with no leaves at all?
Yes. Actually, that is the normal state for most of the year. Leaves are temporary. The rhizome is permanent. As long as the rhizome is firm, there is hope.
I have revived curcuma rhizomes that have sat in a garage for six months. They look like dried ginger roots. I soaked them, planted them, and they sprouted within weeks. The key is patience and the right conditions. When in doubt, give it two months. If nothing happens by then, it might be truly dead.
Q3: Should I use rooting hormone when repotting a stressed curcuma?
I rarely do. Curcuma rhizomes are pretty tough. They do not need chemical coaxing. What they need is the right environment: good soil, proper light, and controlled water.
I have tried rooting hormone on one stressed plant. It did not hurt. But I saw no obvious difference compared to another plant that did not get it. The biggest factor was the soil condition and my restraint with watering. Save your money on hormone. Invest in good perlite instead.
Final Thoughts (Please Read This)
Reviving a dying curcuma is not rocket science. It is mostly about stopping your own well-meaning interference. I killed my first three because I cared too much. I watered too often. I gave too much sun. I used pretty but fatal pots. I had to unlearn those habits.
When you see a plant struggling, your instinct is to act. I get it. But the wise action is often to pause and observe. Check the soil. Check the pot. Check the light. Identify the actual problem. Then make one small change at a time.
I have been growing curcuma for years now. I still mess up sometimes. Last winter, I left a pot outside during a cold snap. I lost that one. It was my fault. But I learned the temperature limit. Now I always check the forecast before moving my plants.
You do not need to be perfect. You just need to be attentive. Your plant will tell you what it needs. Yellow leaves often mean overwatering or poor drainage. Brown crispy edges often mean too much sun or low humidity. Drooping stems often mean either too much water or too little. Check the soil first. That is always the answer.
I am confident you can save your curcuma. If a chronic plant killer like me can do it, you definitely can. Trust the process. Trust the rhizome. Give it time and the right conditions. Your plant will reward you with gorgeous foliage and beautiful flowers.
Now go check your soil. And put down the watering can.