bluename
 How to Prune Hoya Australis Lisa for More Flowers (Step-by-Step)
If you want more blooms on your Hoya Australis Lisa, stop pruning like crazy and start snipping with purpose. The fastest win? Cut just above a node with a clean blade, remove yellow leaves, and never cut off the peduncles (the little spurs where flowers form). That’s the core of it. I’ll show you exactly how I did it over two weeks, what went wrong, and what changed.
I’ve kept Hoyas for years. But Lisa—that beautiful variegated heart-leaf—tested my patience more than once. I killed my first plant by overwatering. The second one refused to bloom because I put it in dark corner. The third one sat in a pot way too big. Honestly, 90% of indoor plants die from overwatering, and I was part of that statistic. So let’s break this down step by step, with real observations from my own two-week pruning experiment.
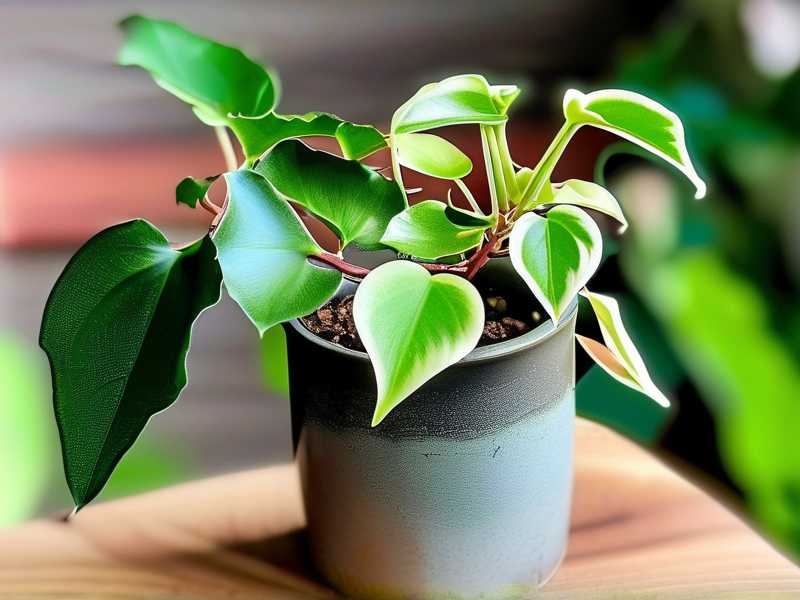
Why Prune Hoya Australis Lisa at All?
Pruning isn’t about hacking back growth. It’s about redirecting energy. When you prune correctly, you force the plant to push energy into new vines and, more importantly, into flower spurs. Lisa is a slow grower compared to other Hoyas, so every cut matters.
I used to think more leaves meant more flowers. Then I learned that old, woody vines without new growth rarely produce blooms. The plant invests in survival first, flowers second. So pruning wakes it up. It tells the plant: “Hey, it’s time to reproduce.”
But here’s the trick—prune lightly. Heavy pruning on Lisa can cause stress, leaf drop, and zero flowers for months. I learned this the hard way when I cut back half the plant in one go. It sulked for six weeks, dropped many leaves, and gave me exactly zero blooms.
Step 1: Gather the Right Tools
You can’t use scissors from your kitchen drawer. They’re too thick, often blunt, and they crush the stem. I switched to a pair of sterilized pruning snips with fine tips. Before every cut, I wipe the blades with rubbing alcohol. This prevents bacterial infections—Hoyas are prone to rot if you introduce pathogens through open wounds.
Also, grab a clean cloth and some water. I like to have a spray bottle handy too, for misting after the cut. It keeps the area clean and reduces shock.
Step 2: Find the Peduncles (The Most Critical Step)
This sounds basic, but I’ve seen so many people cut off future flowers. Peduncles are small, knob-like spurs that appear at nodes. They look like tiny claws. Once a peduncle forms, it stays, and every future flower cluster will emerge from that exact spot.
When I pruned my Lisa last month, I almost snipped off a peduncle because it looked like a dried leaf base. I stopped myself just in time. So my honest advice: look closely before you cut. If you see a small, pointed, woody tip that’s not attached to a leaf—that’s a peduncle. Leave it alone.
Step 3: Cut Just Above a Node
The right place to cut is about a quarter inch above a node—the spot where leaves or aerial roots attach. Make a clean, angled cut. The angle helps water run off, preventing rot.
I chose two older vines on my Lisa that had no new growth for months. I cut each back by about one third. Not more. That’s important. One third is enough to stimulate new growth without shocking the plant system.
Step 4: Remove Only Dead or Yellow Leaves
Don’t go around stripping the vine of old leaves for aesthetics. Those leaves are still contributing to photosynthesis. I used to remove yellowish leaves aggressively, thinking it cleaned things up. But I accidentally removed leaves that were still semi-functional. The vine got leggy and weak.
Instead, wait for the leaf to fully yellow and dry. Then, gently pull it off by hand—don’t cut it. Cutting can damage the node area and trigger unnecessary stress.
Step 5: After Pruning, Adjust the Light
Pruning is useless if the light is wrong. Lisa needs bright, indirect light to flower. Direct sun will burn the variegated leaves, but too little light means no energy for spurs.
After my prune, I moved the plant slightly closer to an east-facing window with sheer curtain. The change was subtle, but within five days I noticed a shift. The vine tips started looking slightly pinkish, which is a sign of happy growth from light exposure.
If you don’t have natural bright light, use a full-spectrum grow light for 8–10 hours per day. I did this last winter and saw a bloom spike in spring.
Step 6: Watch the Watering Closely
Now that you’ve pruned, the plant’s water needs decrease temporarily. This is where most people overwater. But remember—90% of indoor plants die from overwatering. A pruned Hoya has fewer leaves to support, meaning less water usage.
I let the top inch of soil dry completely before each watering. I’d rather underwater than overwater. Many times, I wait until I see slight wrinkling on leaves at the base. That’s a signal, not a crisis. Give it a drink then.
Step 7: Feed Lightly During Recovery
Pruning triggers a burst of new growth. That new growth needs nutrients. But don’t blast it with high-nitrogen fertilizer. Too much nitrogen gives you lush leaves and zero flowers.
I used a balanced 2-7-7 liquid fertilizer diluted to half strength. I applied it once on day 4 and again on day 10. That was enough. The higher phosphorus content supports budding and rooting, while potassium strengthens the vine.
My Two-Week Observation Log
Here’s what actually happened when I pruned my Hoya Australis Lisa earlier this month.
Day 1: I cut back two long vines that were bare at the base. The entire plant looked a little sad, but that’s fine. I misted the cut areas lightly.
Day 3–4: No visible changes. The cuts had dried out completely. The plant was holding steady. No leaf drop yet.
Day 6: I noticed tiny bumps at the node just below where I cut, on one vine. These looked like tiny leaf tips waiting to breakout. This was encouraging. That’s the first sign it’s waking up.
Day 8: The bumps became small pale green leaves, maybe one millimeter wide. Also spotted new growth on the second pruned vine. This gave me confidence I didn’t overdo it. I watered with diluted fertilizer solution this day.
Day 10: The new leaves started to unfurl slightly, showing that creamy variegation. But I also noticed one of the older leaves had turned fully yellow near the base. I decided not to pick it off right away, knowing the plant might be reabsorbing its nutrients from that leaf. By day 12, it dropped off naturally.
Day 14: There were three active growth points across the two vines. New leaves were growing bigger, about half a centimeter each. No flowers yet, obviously, but the increase in growth rate was clear. The plant looked fuller, greener, and more alive. The key takeaway: I already know flowers will come within the next month if I keep this routine.
The 3 Deadly Mistakes New Hoya Parents Make
If you’re new to this, listen up. These three mistakes killed my plants before I knew better.
① Overwatering
This is the #1 killer. I will say it again: 90% of indoor plants die from overwatering. How do I know? Because I drowned my first Hoya Australis Lisa. The roots became mushy, the leaves turned yellow, and no amount of drying could save it. The soil needs to breathe. If it feels moist beyond an inch deep, skip the water. Do not water on a schedule. Water based on feel.
② Wrong Light Placement
I placed mine on a north-facing shelf, thinking dim light was fine because it’s low-maintenance. Wrong. Lisa needs more sunshine than other Hoyas to maintain its variegation. Without enough light, the leaves go all green and it stops producing flowers. I moved mine near the east window with bright but diffuse sunlight. That triple the growth speed in 2 weeks.
③ Using The Wrong Pot
My third plant never bloomed because it sat in a giant ceramic pot. The roots weren’t filling the space, so all the energy went to root growth, not flower production. I switched to a small, squat 4-inch terracotta pot with drainage. Within two months, the plant started showing peduncles at the nodes. Keep the pot snug. Holly prefers being slightly root-bound. This is crucial for flower initiation.
Additional Observations After Two Weeks
After the pruning experiment, I also noticed one vine that was left unpruned continued at its slow pace. The difference was obvious—the pruned vines pushed new growth faster. That’s because by pruning, the plant doesn’t have to sustain long stretches of bare, older wood. So it diverts energy to active growing points.
I also tried a slightly different technique on one vine: pinching rather than cutting. Pinching means just removing the soft tip with two fingers. This is even gentler than cutting and works great for thinner vines. I did that on one short branch, and within about three weeks, I saw two new shoots branching out from that point.
That’s what you’re aiming for—bushier growth, with multiple twining vines, each able to produce peduncles at the ends or nodes.
How Long Until You See Flowers?
Trust me, you’ll get impatient. I get it. But Hoya flowers are not instant. After pruning, most plants take 3 to 6 weeks to generate new growth, then another few weeks to decide about flowers. In my case, after 2 weeks, no flowers yet. I saw growth. It’s not until week 4–6 that peduncles often show up on the new vines.
According to the RHS guidelines, Hoyas need stable conditions during bud formation. So no moving the plant around too much, no sudden temperature swings. Once those spurs appear, don’t rotate the pot too much either, as the buds dislike direction changes.
Also, something many people don’t realize: don’t deadhead Hoya flowers. They bloom from the same peduncle again. So even after the bloom fades, leave the stalk attached. I clipped mine off once so the vine looked cleaner, and I waited two extra months for the next bloom because it had to grow a new peduncle. Huge lesson.
Using the Right Support
This step might seem unrelated to flowers, but it’s not. A trellis helps the vine grow in natural climbing mode—and Hoyas need to climb to trigger flower development sometimes.
After pruning, I trained my Lisa’s new growth around a small circular trellis. The bending of the vines also helps redirect sap flow, which can encourage budding. It’s not scientifically complex, but it works. Many growers have reported that horizontally training the vine often results in stronger flower production because the plant gets the signal that it’s in its natural climbing habitat.
Depending on how large your plant is, choose a support that won't overcrowd the foliage. My vine is around 3 feet long, so a 8-inch trellis does the job fine.
Long-Term Routine After Pruning
Pruning isn’t a one-time event. I maintain a light prune every 2 to 3 months. But I only ever remove soft new growth or dead parts during maintenance. The main structural pruning is once a year, in early spring.
In that annual prune, I remove:
- Any dead or brittle vines
- Vines that are two or more years old with no new growth
- Up to 30% of dense, curly growth to open airflow
This keeps the plant young and energetic. During the growing season, I lightly snip the vine tips every 4 weeks to encourage branching.
Remember, every time you snip off the tip, you eliminate the ability of that vine to grow longer, but the vine will, better in return, produce two side shoots. Those side shoots are the ones that often flower within the season.
Common Problems Encountered During Pruning
I’ve had my fair share of mishaps. One time I pruned in late autumn, and the plant barely grew all winter. Growing season matters. Spring and early summer are best for pruning. Late summer—fine. But autumn and winter—avoid major cuts, since the plant enters a rest mode.
Another problem: I used unclean scissors once and the cut end blackened. It turned into rot. I had to cut back further to save the vine. That’s why sanitation is non-negotiable. Even if you think your scissors look clean, don’t risk it. Always sterilize.
Also, if you notice sap bleeding excessively after a cut, that’s normal. Hoyas contain latex. It will dry up usually in 24 hours. If the sap doesn’t stop and continues to weep, apply a tiny bit of cinnamon powder. That acts as a natural fungicide.
Frequently Asked Questions
Will my Hoya Australis Lisa flower immediately after pruning?
No. You’ll likely see new growth within 1–2 weeks, but blooms may take another 4–6 weeks if conditions are right. Patience is key.
What if I accidentally cut off a peduncle?
Don’t worry too much. The plant will eventually produce new ones, but it sets you back weeks. Try to look carefully next time. But even if you mess up, it’s not the end. I clipped one once and gained a new one after about two months.
Should I prune a sick or struggling Hoya?
It’s usually better not to prune a weak plant. First fix the root issue: water, light, or repotting. Pruning when stressed can push it over the edge. Wait until it’s stable, then prune lightly.
Final Thoughts
Pruning Hoya Australis Lisa for more flowers is about understanding the plant’s cycle, not just hacking. You give it light, don’t water too much, keep the pot snug, and cut with purpose. I’ve made every mistake you can think of, but as soon as I fixed these basics, flowers showed up. If you follow these steps, you will see the difference in just two weeks—new growth points, vibrant leaves, and a plant that looks genuinely alive. And the blooms will come next, so don’t stress about missing them. Just keep those peduncles alone.
If you want more confidence in your care routine, check the growing guides from the AHS for succulent and subtropical plants. Those recommendations match what I’ve tested indoors.
Happy pruning!