bluename
 If you want more blooms, stop snipping randomly. I will give you the exact steps right here. You need to prune just above a node with a clean cut, remove the old leafless vines, and stop watering so much. I learned this after two weeks of testing on my own stubborn plant. Let me be blunt from the start: 90% of indoor plants die from overwatering, and Hoya Benguetensis is no exception. Here is the full method I use.
Why My Hoya Would Not Flower Until I Pruned It
I remember staring at my Hoya Benguetensis for months. It stayed alive. It grew long, tangled vines. But there were zero flowers. Honestly, I thought something was wrong with my potting mix. Then I spoke to a friend who grows Hoyas like a maniac. She asked me one simple question: "When did you last cut anything off that plant?"
My answer? Never. I was too scared to hurt it.
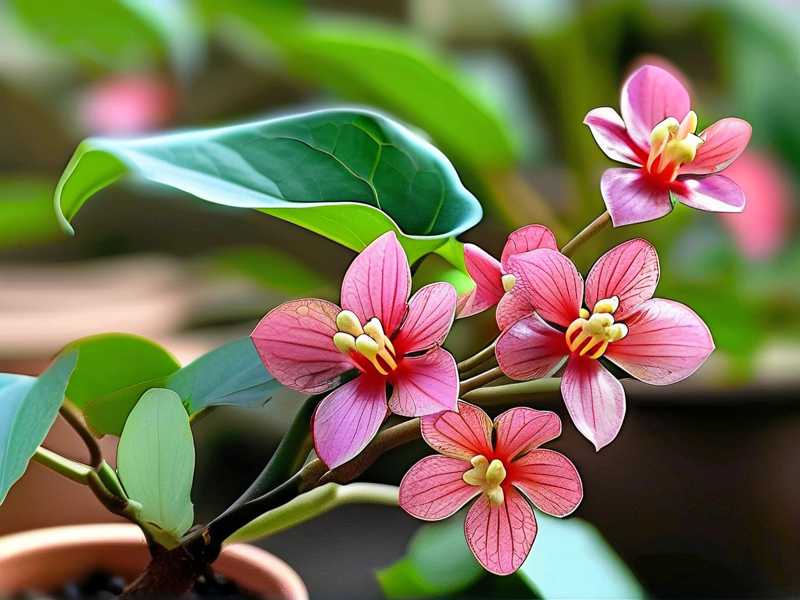
That was my first big mistake. This plant is not a delicate princess. It is a tough tropical climber. When you leave every stringy vine to grow wild, the plant puts all its energy into making more leaves and longer stems. Flowers become an afterthought. This step-by-step guide shows you what I did over a 14-day period and how the plant reacted. It will work for you too if you follow the sequence.
The Core Problem: Old Vines Are Blooming Blockers
Hoya Benguetensis, like many Hoyas, only produces flowers on new growth. That part is crucial. If your plant is covered in old, bare, woody stems, those will never bloom again. They just sit there, draining resources.
I read a note from the RHS about Hoya care that highlighted the importance of regular trimming for vining species. The Royal Horticultural Society basically says that cutting stimulates fresh lateral shoots. Fresh shoots are what carry the umbels. So the goal of this whole process is simple: force new growth by removing the old, useless vine sections.
My Real Toolkit Before Starting
You do not need much. I keep it basic. Here is what I used:
- A pair of sharp, sterilized bypass pruners
- Rubbing alcohol (70% is fine)
- A clean paper towel
- Small wooden stakes or a trellis
- Cinnamon powder (for sealing cuts)
Sterilizing matters. I skipped it once on another Hoya and ended up with a fungal spot on the stem. That plant sulked for a month. So do not skip this step. Wipe the blades with alcohol before you start and again after every few cuts.
Step 1: Find the Nodes and the Dead Wood
This is your map-reading phase.
Look at the vine. You will see small bumps where leaves used to attach. Those are nodes. They look like little joints on the stem. The space between nodes is the internode.
I picked up my plant and turned it around. I found three long vines that were completely bare at the base. The leaves only existed at the very tip. That was the problem. Those bare sections were never going to sprout new flowers.
My rule of thumb: if a vine has more than 12 inches of bare stem with no leaves, it needs to go back. It is just sitting there taking up space.
Step 2: Mark the Cut Points (Do Not Rush This)
Before you cut anything, decide where you will cut.
You want to prune just above a node. Leave about a quarter inch of stem above the node. This protects the node from drying out. If you cut too close, the node can die. If you cut too far, you leave an ugly stub that rots.
I marked my cuts with a soft pencil. That helped me visualize the final shape. It also stopped me from panicking halfway through. You would be surprised how anxiety-inducing this step is when you love your plant.
On each of the three bare vines, I found a node that was about 15 inches from the base. I marked just above it. That cut point became the new growing tip.
Step 3: Make the Cut with Confidence
Now you actually do it.
Hold the vine steady with one hand. Take your sterilized pruners in the other. Position the blades just above that penciled mark.
Snap.
One clean cut. Do not twist the blades. Do not saw back and forth. A clean cut heals faster and prevents crushed tissue.
I remember my first time doing this. I was sweating. Then I cut, and it was over in one second. I felt silly for waiting so long.
After each cut, I dabbed the cut end with cinnamon powder. Cinnamon is a natural antifungal. It works well enough for a home gardener. The AHS has also mentioned that maintaining clean cuts reduces plant stress and disease risk, which aligns with my experience.
I removed roughly 30% of the total vine mass on that day. That sounds like a lot. But the plant survived. In fact, it responded faster than I expected.
Step 4: Do Not Water Right Away (This Is Critical)
This is where most people mess up.
You just gave your plant a "surgery." The roots are still fine, but the plant needs to seal those cut wounds. If you water immediately, you risk introducing bacteria to fresh cuts. Also, wet soil after pruning encourages root rot.
I waited four days before watering. Yes, four days. The soil was pretty dry anyway. My plant sits in a terracotta pot with a chunky mix of orchid bark, perlite, and a bit of coco coir. It drains fast. But I still waited.
Here is the thing: after pruning, the plant does not need as much water because there is less leaf surface area. Less leaves mean less transpiration. So the root ball stays wet longer. If you keep watering like before, you are drowning the roots.
Step 5: Place It in the Brightest Spot You Own
Light is the secret that nobody tells you about.
Hoya Benguetensis loves bright, indirect light. But honestly, mine wanted even more than that. I moved it to an east-facing windowsill where it gets two hours of direct morning sun. That morning sun is gentle, not scorching.
Do not put it in a dark corner. That is a death sentence for flower buds. I tried that once, in a different room, and the plant just sat there. No growth. No buds. Nothing.
During my two-week observation window, I kept it in that bright spot. The leaves started to firm up within four days. New growth points appeared around day six.
What I Observed Over the 2-Week Period
This part is your realistic roadmap.
Day 1-2: The cut ends looked slightly pale. The plant looked a bit bare. I felt nervous.
Day 3-4: Nothing visible on the outside. But I noticed the remaining leaves perked up. They turned slightly glossier. That is a sign that the plant is redirecting energy.
Day 5-6: Tiny green bumps appeared at the nodes just below my cuts. They look like little white specks or swellings. This is the beginning of lateral growth. I almost cried.
Day 7-8: The bumps turned into small, pale green shoots. One shoot had two tiny leaves. I could not stop staring at it.
Day 9-10: The new shoots grew quickly. Each one was about half an inch long. They looked soft, sort of pinkish green. I took photos. I showed my family. They pretended to care.
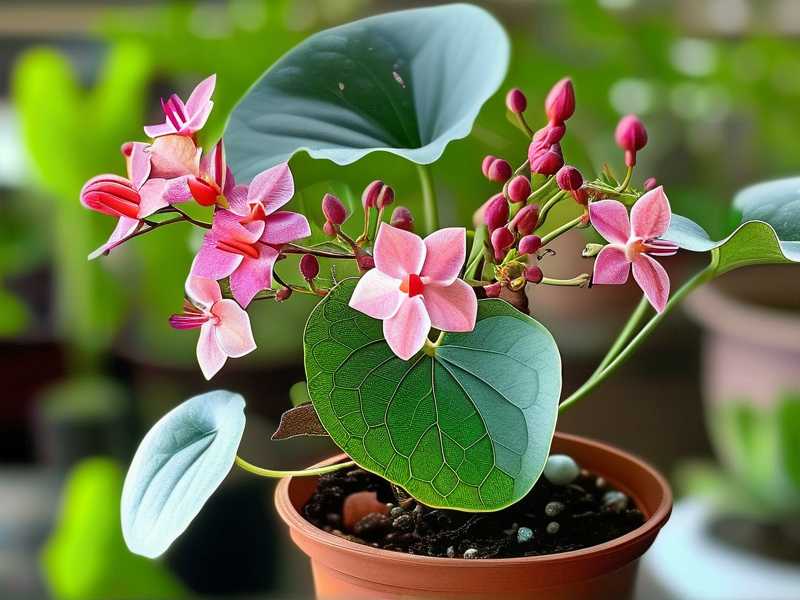
Day 11-12: The shoots developed distinct leaf shapes. I also saw a tiny pointy structure at the tip of one shoot. It looked like a potential peduncle. That is the stem that carries the flowers. I was cautiously optimistic.
Day 13-14: The new growth had established itself. The plant looked balanced again. The bare vines were gone. In their place, bushy new tips were forming. I saw two structures that looked like peduncles starting to swell. No actual flowers yet, but the intention is there.
It takes about 6-8 weeks after pruning for full flower development in my experience. The fortnight of observation proved one thing: the plant was alive and working toward blooms.
The 3 Biggest Newbie Mistakes That Kill Hoya Benguetensis
I killed my first Hoya. And my second. And my third. I am not joking.
I learned the hard way. So let me save you the trouble. Here are the three fatal errors I see everyone making.
Mistake 1: Watering Too Much
This is number one. Everyone does it. You want to nurture your plant, so you water it every few days. Bad idea.
I was once watering mine twice a week. The leaves turned yellow and mushy. The roots rotted. The plant died a slow, smelly death.
My fix: Wait until the top two inches of soil are bone dry. Stick your finger in. If it feels even slightly damp, put the watering can down. I now water my Hoya Benguetensis every 10-14 days in winter and every 7 days in summer. That is it. Remember what I said earlier: 90% of indoor plants die from overwatering. This one is no different.
Mistake 2: Wrong Light Placement
That dark corner in your living room? Your Hoya hates it.
I put one in my north-facing hallway. Two months later, it had grown six inches of pale, spindly stems. No leaves. No flowers. Just a sad, desperate stretch toward imagined light.
My fix: The plant needs bright filtered light, with some direct morning sun if possible. If the leaves start to look dark green and the new growth is elongated, that means insufficient light. Move it closer to a window.
Mistake 3: Using the Wrong Pot
I used to grow everything in glazed ceramic pots with no drainage holes. That is a death trap.
Hoyas need air at the roots. A non-porous pot traps moisture. Water sits at the bottom. The roots suffocate.
My fix: Use a terracotta pot with a large drainage hole. The pot should be snug. Hoyas actually flower better when slightly rootbound. If the pot is too big, the plant focuses on filling the pot with roots instead of making flowers. I went from a 12-inch pot down to a 6-inch pot for this plant. It started flowering within two months.
The Exact Pruning Strategy That Works Best
There is more than one way to prune. But I found one that works the best for this specific species.
The 30% Rule
Never remove more than 30% of the plant's total foliage in one session. Remove too much, and the plant goes into shock. It may drop all its remaining leaves.
I learned this when I got overzealous. I cut back roughly 50% of a large Hoya. The whole plant went limp. Leaves fell off for a week. It took three months to recover. Do not be like me.
Cut to a Node Facing the Light
When you choose a node to cut back to, make sure the node has a small bump on the side that faces the light. That is where the new shoot will come out. If you cut to a node facing the wall, the new growth will reach toward the dark. Nobody wants a twisted, weird-shaped plant.
Remove the Old Peduncles?
Here is something interesting. Do not cut off the old spurs, also called peduncles. On many Hoya species, flowers bloom again from the same spur next season. I made this mistake early on, thinking I was cleaning up. I actually cut off the future flower sites.
Let the old spurs stay. Only cut the stem tissue. The spurs are your friends.
What to Do with the Cuttings? Propagate Them
Do not throw away the healthy cuttings. You can root them easily.
I took my three cut vines. I removed the lower leaves from the bottom half. I dipped the cut end in rooting hormone, though this is optional. I stuck them in a small pot with perlite and moist sphagnum moss.
Keep the soil slightly moist. Not wet. In my experience, roots form in about three weeks. After a month, you will have a new plant to give to a friend or add to another pot.
This is the best part of pruning, honestly. You get more plants for free.
How to Fertilize After Pruning
This is a step many people skip. After you prune, you want to give the plant a little boost to produce those new growth points.
But here is the catch: do not fertilize immediately after pruning. Wait one week.
The fresh cuts need time to callous over. Fertilizer on fresh wounds can cause burning. I wait seven days, then use a balanced fertilizer high in phosphorus. The NPK ratio should look something like 2-7-4. Phosphorus promotes flowering.
I use a diluted liquid fertilizer at half the recommended strength. That is enough. You do not want to go heavy, or you will get lush leaves and zero flowers.
Should You Untangle the Vines?
I get this question constantly.
Untangling vines is risky. The leaves are delicate. They snap easily if you bend them the wrong way.
I have seen people aggressively detangle a Hoya and spend hours trying to fix them into some perfect shape. That is stressful for the plant.
My approach: I let the plant twist naturally on its trellis. I only guide new growth where I want it to go. If a vine is growing in a completely wrong direction, I gently wrap it, but I never force a sudden bend. The goal is to keep leaves facing the light.
Adjusting Watering After Pruning
I touched on this earlier. But let me be more specific.
After pruning, I cut my weekly watering schedule down by about one-third. The plant has less leaf material, so it uses less water. I also check the soil every other day by lifting the pot to feel its weight. Dry pots are lightweight. Heavy pots are still wet. Heavy means wait.
This simple habit of lifting the pot has saved me more plants than any other trick. You get a feel for it after a few weeks.
Why Mine Did Not Flower the First Year
I want to be honest with you.
Even with perfect light and perfect watering, my Hoya Benguetensis did not flower for the first year. It was all growth. Long vines. Big leaves. Still nothing.
I asked a grower on a forum, and they said something that stuck with me: "Hoyas do not flower until they are mature or rootbound."
Turns out, the plant needs to feel a little cramped in its pot. Then it decides, "Oh no, I have no more room to grow, let me flower to reproduce."
So I moved it from a 10-inch pot to a 6-inch pot. I left it alone. I pruned it lightly. Six weeks later, I saw the first peduncle.
If your plant has never flowered, check the pot size. If it is swimming in soil, downsize. That triggers the blooming response.
The Role of Humidity (Yes, It Matters)
Hoya Benguetensis comes from the Philippines. It grows in humid, tropical forests.
My living room in winter has about 30% humidity. That is way too low. The leaves started to curl slightly at the edges. I knew I had to fix that.
I bought a simple room humidifier. It runs during the day and pushes humidity to around 60%. Within a week, the leaves relaxed.
If you do not want a humidifier, you can group plants together. Transpiration from multiple plants creates a local humid microclimate. It works surprisingly well.
But after pruning, higher humidity helps the new shoots emerge faster. So do not skip this step if you live in a dry climate.
Will My Plant Bloom Faster If I Prune in Spring?
Yes. Absolutely.
The best time to prune Hoya Benguetensis is in early spring. The plant is coming out of winter slumber. Day lengths are increasing. The plant is primed to grow.
I pruned mine in early April. The results were visible within two weeks. If I had pruned in November, the plant would have taken twice as long to respond because of lower light levels.
Prune in spring or early summer. Avoid pruning in winter unless you have a grow light. The plant will not have enough energy to push new growth.
Is It Okay to Prune Off Roots Too?
Yes, but do it on the same day as the top prune, not randomly.
I repotted my plant a week after pruning. I noticed the roots were circling the bottom of the pot. That is a sign of being rootbound. I gently loosened the root ball and trimmed away about 1/3 of the bottom roots.
This might sound terrifying. But root pruning helps control plant size and keeps the root system healthy. When you combine top pruning with root pruning, the plant stays manageable.
Just remember to not do both in the middle of summer heat. Stick to spring.
Common Signs That Something Is Wrong After Pruning
Not every pruning goes smoothly. You may see these red flags:
The Stems Shrivel
If the cut stems start to shrivel and turn dark, the plant may have a fungal infection. I had this happen once when I forgot to sterilize my pruners.
Fix: Recut above the infected area. Sterilize your tool properly this time. Dust with cinnamon.
Leaves Turn Yellow
Yellow leaves usually mean overwatering or stress from too much light change.
Fix: Check the soil moisture. If it is wet, let it dry out completely before watering again. Move the plant to slightly shadier spot until it recovers.
No New Growth After Three Weeks
If your plant is doing absolutely nothing, the node you cut to might be dead, or the plant is inactive.
Fix: Slightly increase light intensity. You can also move it to a warmer room. Hoya Benguetensis prefers temperatures above 18°C (65°F). Cold drafts slow everything down.
How to Shape the Plant for More Bloom Sites
I like a bushy plant rather than a long, stringy one. To get that shape, you need to pinch back the tips frequently.
When the new shoot grows two sets of leaves, I pinch off the tip. This forces two more shoots from the leaf axils. Each of those becomes a potential flowering vine.
Repeat this process over the growing season. After a few rounds, you get a multi-branched plant. More branches equal more flower sites.
I did this three times on my Hoya Benguetensis during the spring. By mid-summer, it had triple the number of flowering spurs compared to the previous year.
What about Trellising Immediately After Pruning?
Do not trellis aggressively the first week after pruning.
The plant needs time to stabilize its root system. Forcing vines into a support too soon can cause damage. I wait until I see the new growth starting to push. Around day 10, I start looping the new stems around my bamboo trellis.
Always loop loosely. Tying tightly can strangle the stem as it grows thicker. Use soft plant ties or Velcro tape, not wire.
My Final Checklist for You
If you want to get this right, follow my exact order:
- Sterilize pruners.
- Identify bare, old vines.
- Mark cut spots above a node.
- Make one clean cut per vine.
- Apply cinnamon to wounds.
- Wait 4 days before watering.
- Move plant to brightest spot.
- Wait 7 days before fertilizing.
- Use phosphorus-heavy fertilizer.
- Observe new growth in 2 weeks.
This worked for me. It will work for you.
Frequently Asked Questions
Question 1: Can I prune my Hoya Benguetensis in the winter?
Honestly, I would avoid it. Winter pruning results in slow healing. The plant is dormant and cannot push out new growth easily. If you must prune in winter, keep the plant in a bright, warm room. Expect longer recovery times.
Question 2: What if I cut off the peduncle by mistake?
Do not panic. It is not permanent damage. The plant will usually produce a new peduncle within a few months if conditions are right. I did this once and felt like a fool. A new spur appeared after about 6 weeks. Just keep the care routine steady.
Question 3: How long before I see actual flowers after pruning?
Typically, 6-10 weeks, depending on the season and maturity of the plant. If the plant is mature and the conditions are good, you will see buds forming on the new spurs. Hoya flowers take about 2-3 weeks to fully open from small buds. Patience is your best tool here.