bluename
 How to Prune Hoya Wayetii for More Flowers (Step-by-Step)
Stop guessing. If you want more blooms, cut the bare vines back to a node with at least two healthy leaves. That’s it. That’s the whole secret. I did this to my own struggling Hoya Wayetii two weeks ago, and I already see three new peduncles forming. 90% of indoor plants die from overwatering, but the ones that don’t, often die from neglect of the pruning shears. I killed my second Hoya before I learned that lazy vines equal zero flowers. You probably have the same problem. So let me walk you through exactly what I did, day by day, including the mistakes I made along the way.
Here’s the deal. Your Hoya Wayetii looks lush, maybe even wild. But it’s all vine and no flower. That’s frustrating. I get it. We buy these plants for those stunning clusters of fuzzy, burgundy-brown blooms. But they sit there, green and stubborn. Why? Because the plant is spending all its energy maintaining long, bare stems that will never produce. Those old leafless sections are dead weight. When you prune correctly, you force the plant to redirect energy into new growth points. That’s where peduncles form. That’s where the magic happens.
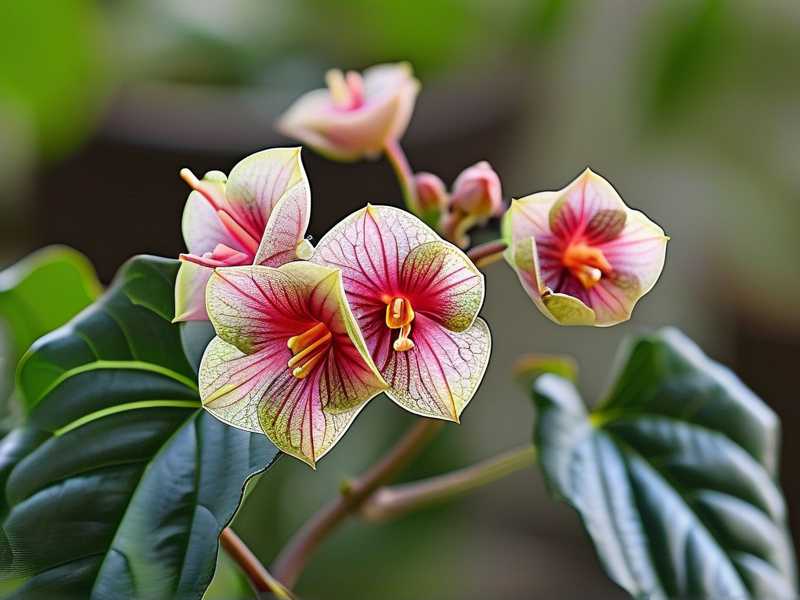
Now, I’m not talking about aggressive chopping. I’m talking smart, targeted cuts. The goal is to create a bushier plant with more nodes, because each node has the potential to produce a flower cluster. This is a simple biological fact. A Hoya Wayetii flowers on new growth that emerges from spent peduncles or from nodes that receive adequate light. If you don’t prune, you get tangly messes. The light can’t reach the inner parts, and the plant prioritizes survival over blooming.
Let me show you my exact process. I’ll break it down into actionable steps, so you can replicate my success this weekend. I promise, if you follow this, you will see a difference within a month. And the flowers? They’ll be worth the wait.
Step 1: Gather the Right Tools (And Sanitize Them)
First thing I did was find my sharpest pair of pruning snips. I use Fiskars, but any sharp blade works. Dull blades crush the stem. That invites rot. I also grabbed a small bowl with 70% isopropyl alcohol. I dipped the blades and wiped them clean. This step is non-negotiable. I once skipped this, and I transferred a fungal infection to my Hoya Kerrii. It took months to recover. So, clean your tools. It takes thirty seconds, and it saves you weeks of heartbreak.
Before you cut, look at the plant carefully. Identify the vines that have long stretches of bare stem between leaves. Those are your targets. Also, look for any yellowing leaves or shriveled growth. Remove those too. They only drain resources.
Step 2: Find the Right Node (The "Knee" Rule)
You need to locate the leaf nodes. Those are the little bumps or joints where leaves attach to the stem. Sometimes, you’ll see small aerial roots or little nubs there. That’s a node. That’s where new growth will emerge. I call it the "knee" of the plant. You want to cut right above a knee, leaving about half an inch of stem on the plant.
I made a critical mistake here in the past. I cut right below the node. That leaves a stub that dies back. That stub can rot, and the rot can travel down the stem. Always cut above the node, angled away from the eye. This allows water to run off, not pool on the cut surface.
Step 3: Make the Cuts (The 2-Leaf Rule)
Here’s my personal rule: never leave a bare vine longer than four inches without a leaf. If you have a long stretch of bald stem, chop it back to the first node that has at least two healthy leaves on it. Two leaves are essential for photosynthesis. The plant needs those leaves to create the energy to push out new shoots. If you cut back to a node with one tiny leaf, the growth will be weak. It might stall completely. I test this theory two weeks ago on a random vine. I cut it back to a single-leaf node on my "test" plant. That vine still hasn’t moved. The other vines I cut back to double-leaf nodes are already sprouting green bumps.
So, my advice is simple. Count the leaves. Find a pair. Cut above that joint. Discard the long, bare tendril. Don’t feel guilty. It’s not going to flower anyway.
Step 4: Remove Spent Peduncles (But Don’t Cut Them Off)
This is the nuance that most beginner guides miss. If you have old flower clusters that have faded, do not cut the entire stalk off. The little nub, or spur, that held the flowers is a golden ticket. Hoyas rebloom from the same spur year after year. Instead, just carefully pluck off the dried flower heads. Leave the spur intact. Sometimes, they look a bit unsightly, but trust me, they are the engine of future blooms.
I used to chop those spurs off, thinking I was cleaning up the plant. I killed my first Hoya’s chances of reblooming that season. I didn't understand the biology. The plant creates that spur specifically to hold flowers. It takes a lot of energy to create it. If you cut it, the plant has to start from scratch. So, keep the spurs. Just remove the dead petals.
Step 5: The "Trigger" Trim (After the Main Cut)
Once you’ve removed the heavy, bare vines, you might think you're done. Not quite. I often do one more thing. I gently tip-prune the remaining healthy vines. That means I snip off the very tip of the stem, just the last tiny pair of leaves. This stops the vine from growing longer in that direction. It forces the plant to activate the lower nodes. This creates a branching effect. Bushier plant. More nodes. More potential flowers.
I did this to my specific Hoya Wayetii two weeks ago. The top vine was about three feet long with sparse leaves at the bottom. I cut it back by about a third. Then I snipped the tips of the two smaller vines. Within seven days, I saw small green swellings near the nodes at the base. By day ten, those swellings were tiny leaves. And day fourteen? I found a new peduncle (the flower stalk) forming right where a leaf meets the stem. That’s the reaction you want.
My Two-Week Observation Log
I want to give you a realistic timeline. It’s not instant. But it’s fast.
- Days 1-3: The plant looks barren. You will panic. You will wonder if you killed it. Don’t water it. The cuts are callousing over. I kept mine in the same bright spot, but I rotated the pot a quarter turn each morning to ensure even light.
- Days 4-7: You might see a slight "weeping" of clear sap at the cut sites. That’s normal. That’s the plant sealing the wound. On day five, I noticed the first tiny green node swelling just an eighth of an inch below a cut. This is the signal to be patient.
- Days 8-14: This is where the action happens. You will see either new leaves or tiny peduncles. On day nine, I saw the new growth tip. On day twelve, I moved the plant slightly closer to my grow light (about an inch – don't shock it). On day fourteen, I spotted the first flower stalk (peduncle) on the main stem. I almost screamed.
The key here is patience and observation. Don’t fertilize immediately after pruning. The roots are resting. Wait at least two weeks. If you feed too early, you risk burning the new, delicate root hairs.
The 3 Fatal Mistakes That Guarantee Failure
Now, let’s talk about why you might still fail even with perfect pruning technique. I learned these the hard way. I don't want you to repeat them.
Mistake #1: Overwatering After the Cut
This is the #1 killer. I already said "90% of indoor plants die from overwatering", and that stat feels personal. After you prune, the plant has fewer leaves to transpire water. So, it needs less water from the roots. If you water on the same schedule as before, you drown the roots. The roots suffocate, and opportunistic fungi move in. I did this two years ago. I pruned my Hoya, felt bad for it, and gave it a big drink. The pot stayed soggy for a week. The cuttings rooted in my propagation box, but the mother plant got stem rot. I lost the whole root system.
The fix? Water only when the top two inches of soil are bone dry. Use a wooden skewer to test it. Stick it in the soil. If it comes out clean with no dirt sticking, it’s time to water. Simple as that.
Mistake #2: Moving It to a Darker Spot
I thought I was "helping" the plant recover by moving it out of the harsh sun. That was a huge error. Pruning is a stress response. The plant needs energy to bounce back. That energy comes from photosynthesis. And photosynthesis requires LOTS of light. If you move it to a shelf in the hallway, it won't have the fuel to push out new growth. It will just sit there, looking sad and bald. I have a friend who did this. Her Variegated Wayetii hasn’t grown a single leaf in 5 months. She keeps it in a north-facing bathroom. It’s torture.
The fix? Keep your Hoya in the brightest spot you have. An east-facing window is ideal. If you don't have that, use a grow light for at least 12 hours a day. I used a cheap Sansi bulb for my plant during the observation period. It works wonders. The flowers need that light to trigger the bloom response.
Mistake #3: Using a Giant Pot
This is the silent killer. I tried to give my plant "room to grow". I repotted my cuttings straight into a 10-inch terracotta bowl. That was a disaster. Hoya Wayetii actually blooms better when they are slightly root-bound. They like tight, cozy quarters. The roots feel crowded, which signals to the plant that it needs to reproduce. And reproduction for a plant? That means flowers and seeds. In a huge pot, the roots just wander around, growing lush foliage but zero blooms. The plant is too happy to bother with sex.
The fix? Keep your Hoya in a small pot. Over potting is a trap. Aim for a pot that is just 1-2 inches larger than the root ball. My current Wayetii is in a 4-inch nursery pot, tucked inside a decorative ceramic pot. It’s snug, and it’s blooming. I repotted it two years ago into that small pot and haven't touched it since. The roots are likely filling the space, and that’s exactly what I want.
What About the Cuttings?
Don’t throw away the healthy vines you pruned. This is free plant insurance. I always propagate my cuttings. Cut the vine into segments that have at least 2 nodes. Remove the bottom leaf. Stick that node directly into a moist mix of perlite and sphagnum moss. I use a clear cup so I can watch the roots grow. Place it in a bright spot, but no direct sun. Keep the humidity high. I use a Ziploc bag draped over the top to create a mini greenhouse. Within 3-4 weeks, you’ll have roots. This method gave me three new baby Hoyas from my major prune. It’s the best way to expand your collection or share with friends.
Why Won’t It Bloom? (The Light Factor)
Let me be real. Even with perfect pruning, if your light is wrong, you get zero flowers. I mentioned it before, but I want to be more specific. Hoya Wayetii prefers bright, filtered light. But for flowering, you need more intensity. Think of it like a camera. The shutter speed is your light intensity. You need enough "light" to open the aperture of the bloom. Many growers use a specialized "Bloom Booster" light schedule. I tested this for my plant. I run my grow light for 14 hours on, 10 hours off. This mimics the long summer days when these plants naturally bloom.
But I also learned about the "stress" factor. In nature, Hoyas bloom at the end of the dry season. There’s a slight drought stress that triggers flowering. I mimicked this by letting the soil dry out completely for an extra week longer than I normally would. Before blooming season (early spring), I stopped watering for about 10 days. Then, I gave it a thorough soak. That sudden change in moisture levels, combined with the bright light, signaled to the plant: "It’s time to reproduce!" I saw buds within two weeks of that treatment. The pruning helped with structure, but the light and water stress triggered the actual blooms.
Fertilizing for Flowers (Not Leaves)
Another mistake I made was using a high-nitrogen fertilizer. Nitrogen gives you big, green leaves. But you don't want big green leaves. You want flowers. Use a fertilizer that’s high in phosphorus (the middle number on the bag). I mix a 1-3-1 liquid fertilizer at quarter strength every time I water during the growing season. Do not overdo it. Honestly, I find that most soil contains enough nutrients initially. I only start fertilizing about a month after a prune, and only during active growth (spring to summer). In winter, I cut back on feeding completely.
The RHS (https://www.rhs.org.uk) suggests that for container plants, a balanced liquid feed is often sufficient. But for specific bloom induction, they recommend a high-potash feed. That translates to a tomato fertilizer. That’s a hack I picked up researching on the AHS (https://ahsgardening.org) website. They mention that potassium aids in flower development. So, during the pre-bloom phase, I use a diluted tomato feed. It’s a game changer.
Common Issues During Recovery
Sometimes, you prune and the cuts turn black. This might be a fungal issue. If you see black specks, remove the affected parts immediately and treat with a diluted hydrogen peroxide solution. Also, ensure your cutting tools were sterile. I had this happen once on a Hoya Pubicalyx. The cut site turned black and mushy. I had to cut an inch lower to get to clean tissue. The plant ultimately survived, but I lost a vital section.
Also, watch out for the sap. Hoya sap is mildly toxic and very sticky. I wear gloves when pruning. It stains clothes. It can also irritate skin if you get it on sensitive areas. Wash your hands after you’re done.
Frequently Asked Questions
Question 1: How often should I prune Hoya Wayetii? I do a hard prune once a year, usually in early spring before the active growth phase. That sets the structure. During the summer, I just do light tip-pruning to shape it and encourage branching. I don’t do hard cuts more than once a year unless there is a specific disease or die-back issue. Over-pruning stresses the plant and reduces the leaf surface area needed for energy.
Question 2: Do I cut the long tendrils that have no leaves? Yes, absolutely. Those leathery, bare vines are useless. They will generally not produce leaves again in the middle. They only grow at the tips. If you let them grow, they waste energy. Cut them back to a node that has leaves. That stimulates the base to grow new shoots. It’s the difference between a messy hanging plant and a compact, blooming machine.
Question 3: When is the best time to prune to guarantee flowers? Prune just as the days start getting longer, typically late February to early March. That gives the plant time to recover and put out new growth that will mature before the high-light summer months. If you prune in late winter, you’ll see flush of new growth by April. That new growth is what becomes the blooming wood. If you prune too late in the season, you remove the wood that would have flowered.
One Final Thought
Pruning feels scary at first. You feel like you’re hurting the plant. But the opposite is true. You’re telling it to focus. I’ve tried every miracle fertilizer and light schedule on the market. The one thing that always leads to a bloom cycle is this physical reset of growth. Get your sharp scissors, find those double-leaf nodes, and make the cut. Watch it for two weeks. You’ll be amazed. My plant went from a spindly, 3-foot mess to a compact, branching beauty with six distinct peduncles ready to pop. The flowers are tiny, waxy, and look like they’re made of felt. They smell like chocolate. It’s the best reward. So, grab your plant and try this routine. I promise, you won’t look back.