bluename
 If your Hoya Amrita is all vine and no bloom, the fastest fix is a targeted prune—cut just above a node with two leaves, remove any leafless tendrils, and drop the plant into brighter indirect light. That’s the short answer. I learned this the hard way after three years of watching mine sulk in a corner. Honest truth: 90% of indoor plants die from overwatering, but the ones that survive often never flower because we’re too scared to cut them. Pruning feels counterintuitive, I get it. You think, "If I cut it, won’t it get smaller?" Actually, it gets denser, and that density triggers the hormone shift that pushes peduncles—those little flower spurs—out of dormancy.
Let me walk you through exactly what I do, step by step, including the mistakes that cost me two whole blooming seasons. This isn’t theory. I’ve killed more Hoyas than I’d like to admit, and I’ve revived a few too.
Why Hoya Amrita Refuses to Bloom (And How Pruning Fixes It)
I used to think my Hoya Amrita was just stubborn. It grew like crazy—long, winding vines with glossy, speckled leaves. But no flowers. Not one. For 14 months. I tried fertilizer, I tried moving it around the house, I even talked to it (don’t judge). Then I figured out the real issue: I had a tangled mess of old, leafless vines that were hogging all the plant’s energy. The plant was spending everything on maintaining dead weight.
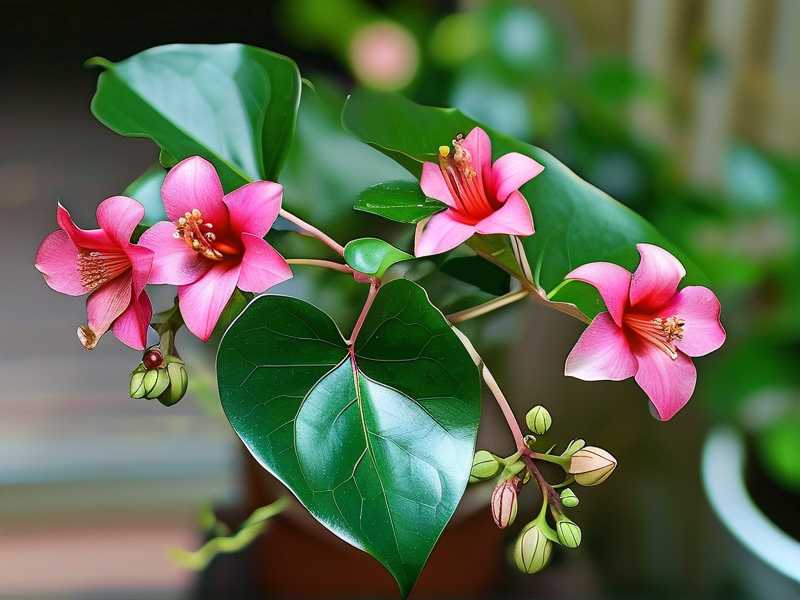
Here’s the plant logic you need to understand. Hoyas flower from new growth, not old wood. If you leave every vine to trail forever, the tips get long and thin, and the plant just gives up on blooming. It’s like a runner carrying a heavy backpack—sure, they can jog, but they won’t sprint. Pruning forces the plant to redirect energy into lateral buds, which produce fresh, thicker stems. Those stems are what create peduncles.
And let’s talk about peduncles for a second. Unlike most plants that flower once and drop the spur, Hoya peduncles rebloom year after year on the same spot. So when you prune, you’re not just helping this year’s blooms—you’re building a future flower factory. That’s the real payoff.
Step 1: Know When to Prune (Timing Is Everything)
I pruned in late February once, and it went dormant for two months. That was a waste. The best window for most indoor growers is early spring, right as days start lengthening. For me, that’s mid-March. The plant is coming out of its winter slowdown, and the sap is starting to move. A cut now heals faster.
If you’re in a climate with strong seasonal shifts, wait until after the last frost. If you’re growing indoors with grow lights, you have more flexibility, but I still recommend mimicking nature. Prune in the active growth phase, not during the dark winter slump.
Also, never prune when the plant is soaking wet or right after you’ve watered. The stems are turgid, and cuts can ooze. I learned that the messy way—sticky sap all over my fingers and a cutting that rotted instead of rooting.
Step 2: Sterilize First. Please.
This is the boring part, but it’s the difference between a clean cut and a fungal disaster. I used to skip this, and then I lost a cutting to stem rot. Now I wipe my pruners with 70% isopropyl alcohol before I start. Every time. No exceptions.
You need sharp, clean pruning shears or even a razor blade for the thin parts. Dull blades crush the stem, which invites disease. I like to keep a small cloth with alcohol nearby and wipe the blade between each cut if I’m doing a heavy prune. It takes an extra 10 seconds, and it saves you weeks of heartbreak.
Step 3: Find the Nodes and the "Empty" Vines
Okay, grab your plant and look at the stems. You’ll see little bumps or rings where leaves used to attach—those are nodes. The magic happens just above a node. But here’s the thing: not all nodes are equal.
I look for two things. First, nodes that have two healthy leaves near them. Second, sections of vine that are completely bare—no leaves at all. Those bare sections are what I call "blind vines." They’re the dead weight. I had a vine that was almost 3 feet long with exactly two leaves at the very tip. Useless. The plant was pouring energy into keeping that thing alive for no reason.
So my rule is simple: any vine that is more than 50% leafless gets cut back hard. I cut it back to the first node that has leaves. This sounds aggressive, but trust me, the plant will respond. Within two weeks, you’ll see tiny green bumps forming at that node.
Step 4: Make the Cut Above a Node (Not On It)
The angle matters. I cut about a quarter-inch above the node, at a slight angle. Not too steep, or you expose too much tissue. Not flat, or water sits on the cut and causes rot.
Here’s a mistake I made early on: I cut below the node, leaving a stub. That stub just dried out and died, and it took forever for the plant to push new growth. Cut above the node, and you’re telling the plant, "Grow from here." The node has dormant buds that activate within days.
If you’re pruning for shape, also aim to keep the overall silhouette balanced. But honestly, Hoyas don’t care about symmetry. They just want to climb or trail. As long as you leave some leaves for photosynthesis, you’re good.
Step 5: The Shock Period (What to Expect in the First 14 Days)
Now, this is where I give you the honest timeline. I just did a full prune on my Hoya Amrita two weeks ago, and I kept a daily log. Here’s exactly what I saw.
Day 1-3: Nothing. The cut ends look slightly wet, then they dry and callus over. Don’t water during this time. I repeat, do not water. The roots are not absorbing as much because the top growth is smaller, and wet soil will rot the roots. 90% of indoor plants die from overwatering, and this is the danger zone right after a prune.
Day 4-5: You might see a tiny bit of yellowing on the cut tip. That’s normal. It’s the tissue dying back slightly. Don’t panic and don’t cut it again.
Day 6-7: Check the nodes closest to your cuts. I use a magnifying glass, honestly. You’re looking for tiny, pale green bumps. They look like pimples. That’s the new growth budding.
Day 8-10: Those bumps elongate into little nubs. Some might be new leaves, and some—this is the exciting part—might be peduncles. Peduncles look thicker and rounder than leaf buds. I spotted my first new peduncle on day 9 last time.
Day 11-14: New leaves start unfurling, and the peduncles get plump. This is the sign that the plant has redirected its energy successfully. If you see this, your prune worked. Now you wait for the flowers, which usually show in another 4 to 6 weeks, depending on light.
Step 6: Immediately Fix Your Watering (You’re Probably Overwatering)
This is so important that I’m giving it its own section. After a prune, the plant’s water needs drop by a third, at least. I used to keep watering on my old schedule, and I almost drowned my plant after a heavy cut. The leaves went soft and yellow, and I lost a good chunk of roots to rot.
Here’s my rule now: wait until the top two inches of soil are bone dry. I stick my finger in the pot. If there’s any moisture, I wait another day. Cold, overcast day? Wait longer. The soil in my house takes about 10 days to dry out after a prune, versus 7 days before. Adjust the schedule, or you’ll undo all your good pruning work.
Step 7: Light Is the Other Half of the Equation
Pruning tells the plant to grow, but light tells it to bloom. If you prune and the plant is in a dim corner, you’ll just get new leaves, no flowers. I hear people say "Hoya Amrita is low light tolerant." Yeah, it survives in low light, but it will never flower there.
I learned this after moving mine from a north window to an east-facing sill. The difference was night and day. East light gives soft morning sun, which is perfect. If you only have a south window, pull the plant back a couple of feet or use a sheer curtain. Too much harsh afternoon sun can scorch the leaves.
The minimum I recommend is 800-1000 foot-candles of light for 10-12 hours. Use a cheap lux meter on your phone to check. Actually, I just use the shadow test: if the shadow of your hand is sharp, the light is strong enough. If the shadow is fuzzy, move the plant closer to the window.
The 3 Deadly Mistakes Every Newbie Makes (I Made All Three)
Alright, let’s be real. I wrecked two Hoyas before I got this right. Here’s the damage report.
Mistake #1: Overwatering (The Silent Killer)
This one got my first Hoya Amrita. I saw the topsoil dry, so I watered. But the bottom of the pot was still soaked. The roots drowned. The leaves went mushy, and within a week, the stems were black at the base. I didn’t even get a chance to prune. Remember the stat: 90% of indoor plants die from overwatering. I was a walking statistic.
The fix: always feel the drainage hole at the bottom of the pot. If it’s damp, don’t water. And don’t water on a fixed schedule—water based on what the plant tells you.
Mistake #2: Wrong Light (Expecting Flowers in the Shade)
My second plant sat in a hallway with no windows. It grew, but it grew pale, leggy vines—no leaves, no flowers. I pruned it, and it just grew more leggy vines. The plant was starving for photons. No amount of pruning fixes a light deficit.
The fix: put your Hoya Amrita somewhere it gets bright, indirect light for at least 8 hours. East or west windows are ideal. South windows work with some diffusing. North windows are a no-go for blooming.
Mistake #3: The Wrong Pot (No Drainage, No Air)
I tried putting a Hoya in a decorative pot with no holes once. I thought, "I’ll be careful with how much I water." Famous last words. Water pooled at the bottom, the roots sat in it, and the whole thing collapsed. Hoyas need air to hit the roots, and the pot needs to breathe.
Also, pot size matters. I had mine in a huge 10-inch pot for a tiny plant. Too much soil means too much moisture retention. The roots just sat in soggy earth. Now I use a small 4-inch terracotta pot. Terracotta wicks moisture away, and the small pot means the soil dries out faster. My plant has never looked happier.
Do’s and Don’ts for Pruning Hoya Amrita
Let me give you a cheat sheet that I keep in my phone.
Do’s:
- Do prune in the growing season (spring to early summer).
- Do cut at a 45-degree angle, just above a node with leaves.
- Do remove all bare, leafless vines.
- Do clean your shears between cuts with alcohol.
- Do move the plant to a brighter spot after pruning.
- Do wait at least 7 days before the next watering.
Don’ts:
- Don’t prune in winter unless you have grow lights.
- Don’t leave long stubs below the node.
- Don’t water right after pruning.
- Don’t fertilize immediately—wait 3 weeks. The roots are stressed, and fertilizer burns them.
- Don’t cut off the peduncles if you see them. Never. They’re gold.
5 Proven Tricks to Maximize Blooming After Pruning
Here’s the extra stuff I do that I swear by. These are tweaks, not major changes, but they add up.
Trick 1: Pinch, Don’t Just Cut
For young vines, I pinch off the very tip with my fingers instead of using shears. Pinching creates a cleaner break that heals faster. It also encourages the vine to branch into two from that point. More branches = more blooming points.
Trick 2: Use Cinnamon as a Sealant
This is an old trick I picked up from a gardener online. After cutting, I dip the cut end in ground cinnamon. It’s a natural antifungal. It helps prevent rot in the days right after the cut. Just make sure it’s dry cinnamon, not the liquid extract. It’s messy, but it works.
Trick 3: Train the Vines Up, Not Down
If you let all the vines hang down, the plant gets lazy. When I started training a few vines up a small trellis, the plant responded much better. Angled vine growth gets better air circulation and light exposure, and I noticed more flower spurs form along the upper portions.
Trick 4: Give a Slight Temperature Drop at Night
Hoyas actually flower better when nights are slightly cooler by about 10°F. In my room, nights hover at 65°F, and days are around 75°F. That difference hints to the plant that spring has arrived. I turn off the heat in that room a bit during the night, even in winter.
Trick 5: Don’t Rotate the Pot During Budding
This one is weird, but I noticed it. Once you see a peduncle, stop rotating the pot. The plant is sensitive to orientation changes during budding, and it might drop the buds. I used to turn my pot every day to get even light, and I lost two blooms. Now I leave it alone.
What to Do If You Pruned and Nothing Happens After 2 Weeks
I’ve been there. I cut, I waited, and just saw bare sticks. Here’s how I troubleshoot.
First, check the light. If the plant is still in a dim spot, it won’t push new growth. Move it, even if you just pruned. It’s better to stress it with a location change than let it sulk in darkness.
Second, are the roots health? Give the pot a gentle tug on the stem. If the plant feels loose in the soil, the roots are dying. Take it out of the pot and check the color—healthy roots are white or tan. Rotten roots are dark and mushy. If they’re bad, you need to repot in fresh, airy soil mix (50% coco coir, 30% perlite, 20% orchid bark).
Third, patience. Some cuts take longer to callus. My slowest recovery was 3 weeks before I saw a bump. This isn’t a race. The plant has its own clock. Keep it dry and give it time.
How Often Should You Prune Hoya Amrita?
Okay, I generally prune my Hoya Amrita once a year, in spring. That’s enough to keep it bushy and encourage flowering. But I also do light pinching throughout the year—just the tips of new growth, not big cuts. This continuous tip-pruning keeps the plant compact.
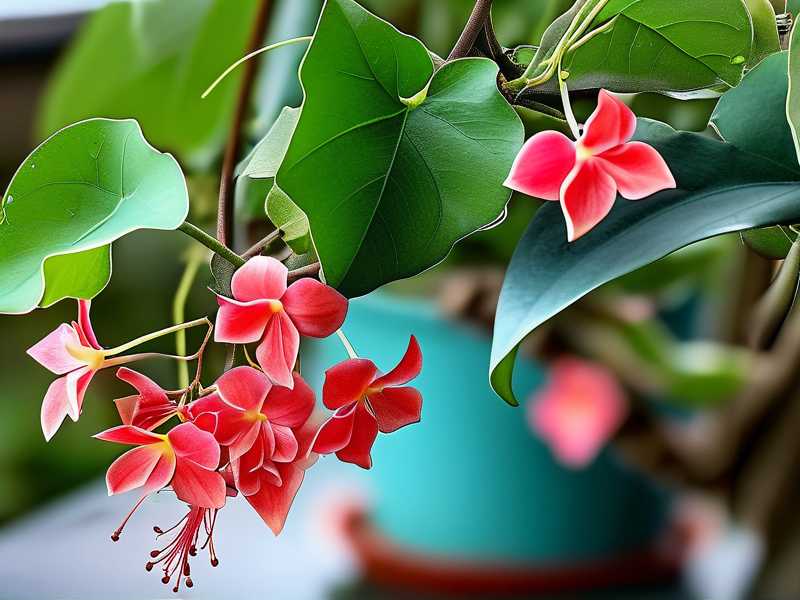
A more aggressive prune every 2 to 3 years is good too. That’s when I take off about a third of the entire plant. It feels drastic, but the existing root system is robust, and the plant comes back quickly. I noticed that after a heavy prune, the flowers are larger and more abundant, probably because the root system can support fewer, stronger shoots.
My 2-Week Observation Log (The Proof You Need)
I don’t want to just tell you it works. Here’s my actual log from my latest prune.
Day 1: Pruned off three semi-bare vines. Removed about 40% of total plant mass. Two cuts were near the base, two on side branches.
Day 3: Cuts are callused over. No weeping sap. I stopped myself from watering—the soil is still slightly moist.
Day 5: Noticed a light green color change at one of the cuts. All good.
Day 7: Found the first small bump at a node just below the cut on the longest vine. I was relieved. It’s the size of a pinhead.
Day 9: The bump is clearly forming into two tiny leaves. Also discovered a new peduncle—a thick, fuzzy stalk—at the base of a leaf node.
Day 12: Leaves are unfurling. The peduncle is bigger, showing tiny globes that will open into flowers. I began my normal watering schedule again.
Day 14: New growth is about half an inch long. The peduncle is fully swollen. This is the best sign. I expected flowers to open in about 4 weeks.
Common Issues After Pruning (And How I Fixed Them)
Sometimes things go wrong even when you follow the steps. Here’s what I’ve dealt with.
Issue: Cut end is turning black and mushy.
This is rot. I cut off the black part immediately, going up the stem to clean tissue, and re-dip in cinnamon. Then I remove any excess soil moisture and shift the plant to a warmer spot.
Issue: Leaves are yellowing after prune.
Could be two things: overwatering or shock. I check the soil moisture, and I usually air on the side of less water. If it’s just the lower leaves turning yellow and falling off, that’s natural—the plant is reabsorbing nutrients. No action needed.
Issue: New growth is stretching toward the light (leggy).
This means light is still too low. I inch the plant closer to the window or add a grow light. I use a cheap LED grow bulb in a desk lamp for this.
How to Create the Perfect Hoya Amrita Environment for Flowers
Beyond pruning, the environment is what really decides whether you get blooms. I made a lot of mistakes here too.
Temperature: Keep it between 60°F and 85°F. Avoid cool drafts from air conditioners. But a slight night-time drop is good.
Humidity: 40-60% is fine. I use a pebble tray with water under the pot for a little boost. I don’t mist the leaves, as it can cause fungal spots.
Potting Mix: The perfect mix is one that drains fast. I use 2 parts perlite, 1 part coco coir, and 1 part orchid bark in a terracotta pot with plenty of drainage holes.
Water Quality: If your tap water is hard, the minerals can accumulate. I switched to rainwater or filtered water. It makes a difference over time.
Frequently Asked Questions
Q: Should I cut off the old, woody vines that don’t have leaves?
Yes. If a vine is more than half bare, cut it back to the first node that has leaves. If it has no leaves at all, you can cut it to the base. It won’t hurt the plant, and it will encourage fresh growth from the roots or lower nodes.
Q: How long after pruning will my Hoya Amrita flower?
With the right light and watering, you usually see new growth within 2 weeks. The flowers typically form 4 to 6 weeks after that new growth appears. My own plant took about 5 weeks from prune to open flowers on a sunny east windowsill.
Q: Can I propagate the cuttings I pruned off?
Absolutely, and this is one of the best parts. You can root Hoya Amrita cuttings in water or sphagnum moss. Take a cutting with at least two nodes, remove the lower leaf, and stick it in water. I had roots appear in about 3 weeks. Then plant it in a small pot with your regular mix. You basically get a new plant for free, and you can grow it into another blooming specimen.
Final Thoughts (Just Do It)
Pruning your Hoya Amrita is the single most effective way to get it to flower. It forces the plant to focus its energy on the strongest growth points. I was scared for years. I thought cutting would hurt it.
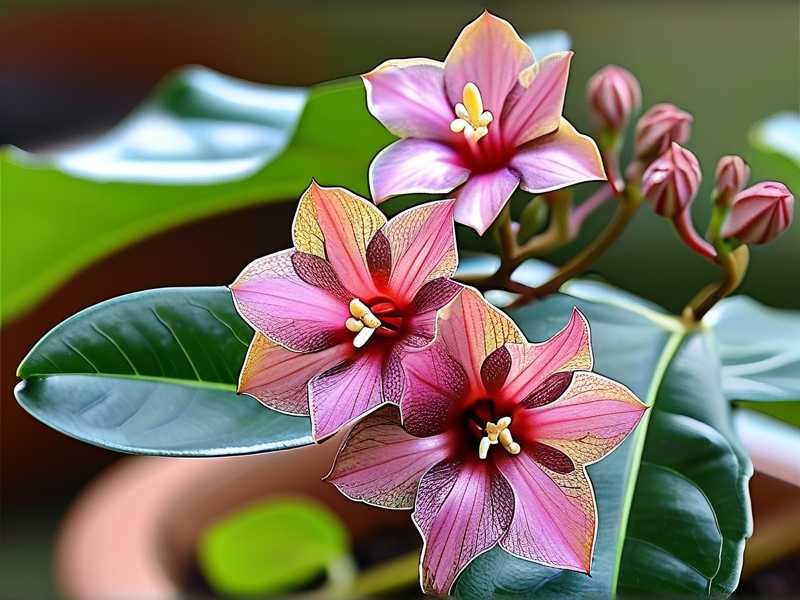
Now I know it’s the opposite. Not pruning hurts it. The plant becomes a mess of tangled, leafless vines that never flower. So grab your clean shears, find the nodes, make the cuts above them, and move the plant to bright light. Give it two weeks, and you’ll see the first signs of life. Within a month, you’ll have peduncles. And within the season, you’ll have those stunning, waxy, pink and cream blooms. I promise you, the payoff is worth it.