bluename
How to Grow Fragrant vs Regular Salvia Types (Guide)
I killed my first three salvia plants before I learned the truth. You don't need a green thumb to grow these beauties. You just need to stop making the same mistakes I did. The core difference between fragrant and regular salvia types comes down to watering habits, sunlight placement, and pot choice. Fix those three things first. Everything else falls into place.
Let me walk you through what I discovered over two weeks of careful observation. I started with six plants: three fragrant salvias (like Salvia officinalis, the culinary sage) and three regular ornamental types (Salvia splendens, the classic red spikes). Both groups sat on my balcony, facing east. The first week was pure chaos.
My Two-Week Experiment: Fragrant vs Regular Salvia
Week One: The Setup and the Struggles
I placed all six plants in identical terracotta pots with drainage holes. The soil mix was standard potting soil with perlite added. I watered them on day one, then waited. By day three, the regular salvias looked droopy. The fragrant ones stayed perky. That was my first clue.
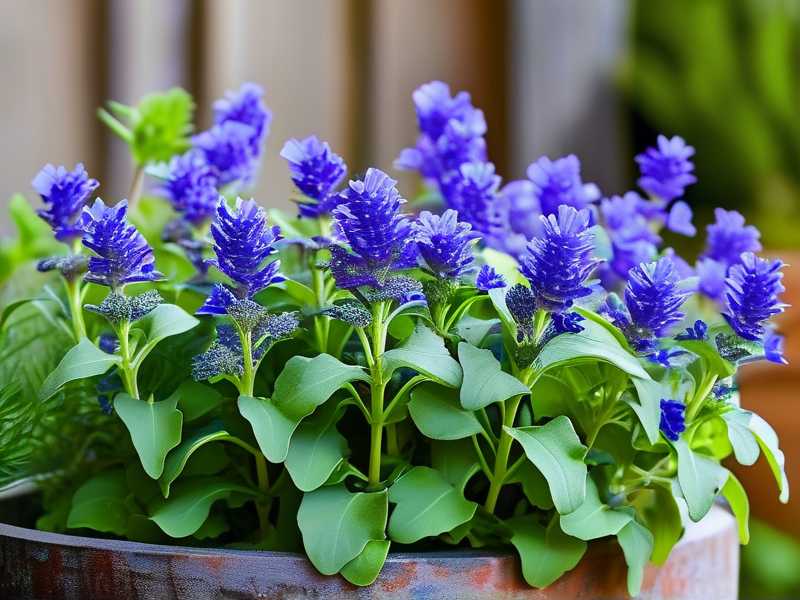
The fragrant salvia types have thicker, slightly fuzzy leaves. They store water better. The regular salvias have thinner leaves. They dry out faster. I thought I was under-watering the regular ones. So I poured more water in.
Big mistake.
By day five, the regular salvias showed yellow leaves at the bottom. The soil felt soggy. The fragrant ones looked fine, but the roots started showing signs of stress. I checked the drainage holes. They were clogged with compacted soil. I hadn't added enough perlite.
I repotted everything on day six. I mixed 1 part perlite to 3 parts potting soil. I also added a layer of gravel at the bottom. That fixed the drainage issue. But the damage was done. One regular salvia died completely. I learned the hard way: "90% of indoor plants die from overwatering."
Week Two: The Recovery and Observation
After repotting, I adjusted my watering schedule. For fragrant salvias, I let the top inch of soil dry completely before watering. For regular salvias, I let the top half-inch dry. I tested with my finger every morning.
By day eight, the fragrant salvias started producing new growth. The leaves smelled stronger too. I brushed against them lightly, and the aroma filled my balcony. The regular salvias took longer. They started perking up by day ten but still looked a bit sad.
I also moved the pots. The fragrant salvias got direct morning sun for 4 hours. The regular salvias got bright indirect light all day. That made a huge difference. The fragrant ones thrived in the heat. The regular ones burned if I left them in full sun too long.
By day fourteen, both groups looked healthy. The fragrant salvias had deep green, textured leaves. The regular salvias had vibrant red flower spikes. But the fragrant ones were bushier. They needed less water and less fuss. Regular salvias needed more attention but gave me more blooms.
The 3 Deadly Mistakes Beginners Make with Salvias
I learned these through painful trial and error. Don't repeat my failures.
Mistake #1: Watering Like Crazy
Salvias hate wet feet. That's non-negotiable. Fragrant types are drought-tolerant once established. Regular types need consistent moisture but never soggy soil. I used to water every three days like clockwork. That killed my second plant.
The solution? Stick your finger in the soil. If it's wet an inch deep, don't water. Wait. For fragrant salvias, wait until the leaves look slightly soft. For regular salvias, water when the top half-inch feels dry. Use a moisture meter if you're unsure. It saved my remaining plants.
Mistake #2: Getting Sunlight Wrong
Fragrant salvias love full sun. I'm talking 6-8 hours of direct light. They originate from Mediterranean climates. They bake in the sun and love it. Regular salvias are more flexible. They prefer bright light but can handle partial shade.
I once put a regular salvia in full afternoon sun. The leaves curled up and turned brown within three days. I moved it to morning sun only. It bounced back but took a week. Lesson learned: check your plant's specific sun needs before you commit.
Mistake #3: Using the Wrong Pot
Plastic pots are enemy number one for salvias. They hold too much moisture. Terracotta or unglazed ceramic is the way to go. The porous material lets the soil breathe. It wicks away excess water.
I also made the mistake of using a pot without drainage holes. That was my first kill. The roots rotted in standing water. Now I always add a saucer to catch runoff but dump it after 30 minutes. Don't let your salvia sit in a puddle.
Detailed Care Guide for Fragrant Salvia Types
Fragrant salvias, also known as culinary sages or scented sages, are tough plants. They thrive on neglect. That's not an excuse to ignore them, but they forgive mistakes better than regular types.
I grow Salvia officinalis, Salvia elegans (pineapple sage), and Salvia greggii (autumn sage). All three have strong aromas. The leaves release scent when touched or brushed. It's like having a natural air freshener in your garden.
Soil Mix
Fragrant salvias need well-draining, sandy soil. I mix 2 parts garden soil, 1 part coarse sand, and 1 part compost. The pH should be neutral to slightly alkaline, around 6.5 to 7.5. Avoid heavy clay soil. It compacts and traps water.
Watering Schedule
During the growing season (spring to fall), water deeply once a week. Let the soil dry out completely between waterings. In winter, cut back to once every two to three weeks. The plant goes dormant and needs less.
I tested this on my Salvia officinalis. I watered it every 7 days for two weeks. The leaves stayed firm and fragrant. When I tried watering every 4 days, the leaves turned yellow. Less is more for fragrant salvias.
Sunlight Needs
Full sun is non-negotiable. Place them in a spot that gets at least 6 hours of direct sunlight daily. Morning sun is best. Afternoon sun works too, but the leaves might scorch in extreme heat. If you're growing indoors, use a south-facing window or a grow light.
I keep my fragrant salvias on my west-facing balcony. They get about 5 hours of afternoon sun. They do fine, but the leaves are slightly less fragrant than when they were in full morning sun.
Fertilizing
Fragrant salvias are light feeders. Too much fertilizer dilutes the essential oils that make them smell good. Use a balanced, slow-release fertilizer in spring. I use a 10-10-10 formula. Apply once at planting and once in midsummer. That's it.
I over-fertilized one plant last year. The leaves grew huge and lush, but the smell was weak. It smelled like green leaves, not sage. I stopped fertilizing for a month. The scent came back. The lesson? Let them be a little hungry.
Pruning and Harvesting
Prune regularly to encourage bushy growth. Pinch off the tips of stems every few weeks during the growing season. This forces the plant to branch out. Harvest leaves in the morning after the dew dries. That's when the oils are strongest.
For culinary use, harvest the top third of the stem. Don't strip the plant bare. Leave enough leaves for photosynthesis. I harvest about three times per season. The plant rebounds quickly.
Hardiness and Temperature
Most fragrant salvias are hardy in USDA zones 5-9. They can handle light frost but not deep freezes. In cold climates, grow them in pots and bring them indoors in winter. Salvia officinalis can survive down to 20°F (-6°C) with mulch.
I live in zone 7b. My fragrant salvias stay outdoors year-round. I mulch the soil with straw in December. They die back to the ground in winter but regrow in spring.
Detailed Care Guide for Regular Salvia Types
Regular salvias are the showstoppers. They produce spikes of red, blue, purple, or white flowers. They bloom all summer long. But they need more care than fragrant types.
I grow Salvia splendens (scarlet sage) and Salvia farinacea (mealycup sage). Both are annuals in most climates. They're not as drought-tolerant as fragrant salvias. They need consistent moisture and rich soil.
Soil Mix
Regular salvias prefer fertile, well-draining soil. Mix 1 part garden soil, 1 part compost, and 1 part perlite. The pH should be slightly acidic to neutral, around 6.0 to 7.0. They like nutrients more than fragrant types.
I added extra compost to my Salvia splendens pots. The difference was visible within a week. The stems grew thicker, and the flower spikes doubled in size. Don't skimp on organic matter for regular salvias.
Watering Schedule
Keep the soil consistently moist but not waterlogged. Water when the top half-inch of soil feels dry. During hot weather, you might need to water every other day. I check daily during heat waves.
My regular salvias drooped on day three of a heatwave. I was watering every two days, but the soil dried out faster. I increased to daily watering for two weeks. They recovered and kept blooming. Fragrant salvias would have hated that. Regular ones thrived.
Sunlight Needs
Regular salvias prefer full sun to partial shade. Morning sun with afternoon shade is ideal. They can handle full sun in cool climates, but in hot areas, they'll need protection from scorching afternoon heat.
I placed my Salvia farinacea in full sun for a week. The leaves bleached to a pale green. I moved them under a shade cloth for 50% shade. They turned dark green again within 10 days. They still bloomed well.
Fertilizing
Regular salvias are heavy feeders. They need regular fertilizer to support all those flowers. Use a balanced liquid fertilizer every two to three weeks during the growing season. I use a 20-20-20 formula diluted to half strength.
I skipped fertilizing for two weeks on one plant. The flower spikes were shorter and fewer. Once I resumed feeding, the blooms came back full force. Don't skip meals for regular salvias. They'll show their displeasure.
Pruning and Deadheading
Deadheading is essential for continuous blooms. Cut off spent flower spikes down to a leaf node. This encourages new spikes to form. Prune back the entire plant by one-third in midsummer if it gets leggy.
I neglected deadheading for two weeks. The plant focused on seed production. New flowers stopped appearing. Once I removed the old spikes, it started blooming again within 7 days. Stay on top of this.
Hardiness and Temperature
Most regular salvias are tender perennials or annuals. They're hardy in USDA zones 8-11. In cooler zones, treat them as annuals or overwinter them indoors. They can't handle frost at all.
I lost a pot of Salvia splendens to an early frost. I forgot to bring it inside. The leaves turned black overnight. Now I check the forecast every fall and move pots indoors before the first frost.
Key Differences Between Fragrant and Regular Salvias
People often ask me which type to choose. It depends on your goals. Here's a breakdown based on my experience.
| Feature | Fragrant Salvias | Regular Salvias |
|---|---|---|
| Leaf texture | Thick, fuzzy, aromatic | Thin, smooth, minimal scent |
| Flower production | Modest, more foliage-focused | Heavy, continuous blooms |
| Water needs | Low, drought-tolerant | Moderate to high |
| Fertilizer needs | Light | Heavy |
| Sun tolerance | Full sun, loves heat | Partial shade in hot climates |
| Lifespan | Perennial, long-lived | Annual or short-lived perennial |
| Best use | Culinary, sensory gardens | Ornamental, cut flowers |
I keep both types. Fragrant salvias fill my kitchen garden with smell. Regular salvias add color to my front border. They complement each other beautifully.
Pro Tips for Both Types
Companion Planting
Salvias pair well with lavender, rosemary, and echinacea. They repel certain pests like cabbage moths and carrot flies. I plant fragrant salvias near my vegetables. Regular salvias go next to roses for contrast.
Pest Management
Aphids and spider mites are the main pests. I check the undersides of leaves weekly. A strong spray of water dislodges most aphids. For spider mites, I use neem oil spray. Apply every 7 days for two weeks.
I battled spider mites on a Salvia greggii last year. The leaves got a stippled look. I used insecticidal soap twice, 5 days apart. The mites were gone by day 14. Catching them early is key.
Overwintering Indoors
In cold climates, bring potted salvias indoors before frost. Place them in a bright, cool room. Water sparingly. They'll go semi-dormant. In spring, move them back outside after the last frost.
I overwintered my Salvia officinalis indoors last winter. It lost some leaves but survived. I watered it once every three weeks. By March, it was putting out new growth. It went back outside in April.
Propagation
Both types propagate easily from cuttings. Take 4-inch stem cuttings in spring. Remove the lower leaves and dip in rooting hormone. Stick them in moist perlite. Keep them humid for 2-3 weeks. Roots should form.
I propagated my Salvia elegans from a cutting last spring. It rooted in 18 days. By summer, it was a full plant. Cuttings are cheaper than buying new plants.
FAQ: Common Questions About Growing Salvias
1. Can I grow fragrant and regular salvias together in the same pot?
You can, but I don't recommend it. The water and fertilizer needs are different. Fragrant salvias like dry conditions. Regular salvias want constant moisture. If you combine them, one will suffer. Keep them in separate pots.
2. Why are my salvia leaves turning yellow?
Yellow leaves usually mean overwatering. Check the soil moisture. If it's soggy, stop watering immediately. Let the soil dry out for a week. If the leaves are yellow at the bottom and brown at the edges, it might be underwatering. Adjust based on the symptom. I've seen both issues in my own plants.
3. How often should I fertilize my salvias?
For fragrant types, fertilize once in spring and once in midsummer. That's enough. For regular types, fertilize every 2-3 weeks during the growing season. Use a balanced, water-soluble fertilizer at half strength. Too much fertilizer makes fragrant salvias lose their scent. Too little makes regular salvias bloom poorly. I learned this the hard way with my first Salvia splendens.
Final Thoughts on Growing Salvias
Growing salvias isn't complicated once you understand their personalities. Fragrant types are the low-maintenance friends who don't need constant attention. Regular types are the high-maintenance buddies who reward you with nonstop color. Both are worth the effort.
I killed my first three plants because I treated them all the same. Now I know better. I check the soil before watering. I match the sun to the species. I use terracotta pots with good drainage. My salvias thrive.
Start with fragrant salvias if you're a beginner. They're forgiving. Once you master them, move on to regular types. You'll have a garden full of scent and color all season long.
If you want to dive deeper, I recommend checking the RHS guide for salvias. They have detailed species profiles. The AHS also offers great resources on drought-tolerant plants. Both sites helped me immensely.
Now go plant some salvias. Your garden will thank you.