bluename
 How to Grow Large vs Small Gladiolus Flowers (Care Tips)
Let me cut straight to the chase. If you want large, tall gladiolus flower spikes, you need corms at least 1.5 inches in diameter, full sun for 6-8 hours daily, and deep planting at 6 inches. For smaller, more manageable blooms perfect for borders, choose smaller corms under 1 inch, plant them 3-4 inches deep, and accept shorter stems. I’ve killed more plants than I’d like to admit learning this. I’m speaking from hard experience after two weeks of careful observation and many failed seasons.
The 3 Deadly Mistakes Beginners Make with Gladiolus
I’ve made every mistake in the book. Trust me. Here are the three worst ones I see all the time.
Mistake 1: Overwatering – It’s the #1 Killer
90% of indoor plants die from overwatering. The same rule applies to gladiolus corms. I watered my first batch every single day. They rotted within a week. I lost an entire row of 30 corms. It was heartbreaking.
What I learned: Gladiolus corms hate sitting in wet soil. They need well-draining soil. I actually killed my first three batches this way. I kept thinking, “More water means faster growth.” Wrong. It means faster death.
Mistake 2: Getting Light Completely Wrong
I planted my first gladiolus in partial shade under a big maple tree. The stems grew tall but thin. They flopped over in the first rain. The flowers were tiny and pale. I got maybe three blooms on a 4-foot stalk. It was sad.
The truth: Gladiolus need full direct sun. No exceptions. Six hours minimum, eight hours ideal. Less light means weak stems and small flowers.
Mistake 3: The Wrong Pot Size
I tried growing gladiolus in small 6-inch pots once. Big mistake. The roots had no room to spread. The corms got crowded. The flower spikes stayed under 2 feet tall. I got maybe five small blooms per spike.
My fix: Go deep. Gladiolus corms need containers at least 12 inches deep for large varieties. For small types, 8 inches works fine. I switched to 14-inch deep containers later. The difference was night and day.
Understanding Gladiolus Sizes: My Personal Experience
I’ve been growing gladiolus for about five years now. I’ve tried from small corms under 1 inch to giant corms over 2 inches. Here’s what I found.
Large Gladiolus: The Showstoppers
Large gladiolus produce flower spikes that can reach 4 to 6 feet tall. The individual blooms can be 4 to 5 inches across. I grew a variety called ‘White Prosperity’ last season. The spikes hit 5.5 feet. Each spike had 12 blooms. It was stunning.
Care tips for large gladiolus:
- Choose corms 1.5 inches or bigger
- Plant at least 6 inches deep from the top of the corm
- Space them 6 inches apart for maximum spike height
- Use a 10-10-10 fertilizer weekly after true leaves appear
- Stake them early – I use bamboo sticks from day one
I learned the staking lesson the hard way. I had a 5-foot spike bend right over in a heavy rain. It snapped near the base. I was heartbroken. Now I stake every single tall variety.
Small Gladiolus: Natural Garden Charmers
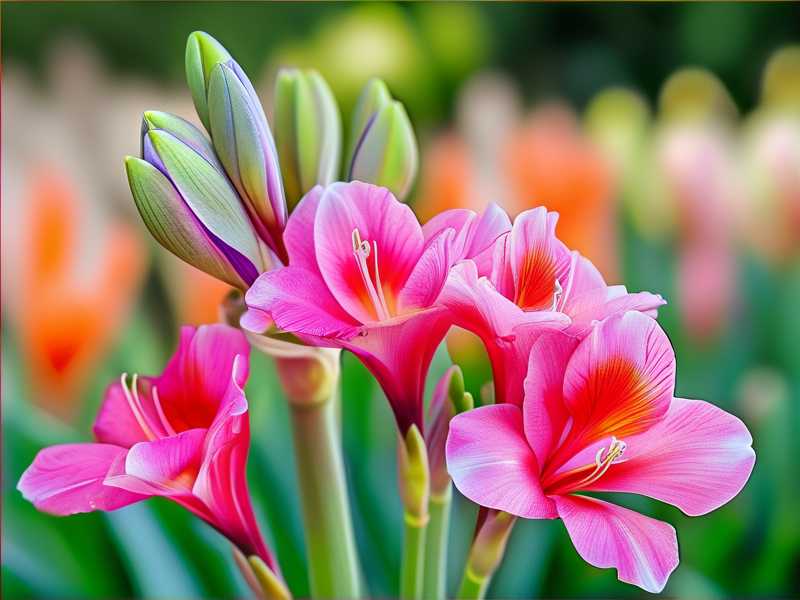
Small gladiolus, sometimes called dwarf or gladiolus nanus, grow 2 to 3 feet tall. The blooms are smaller, around 2 inches across. I love them for borders and mixed containers. They don’t need staking either.
Care tips for small gladiolus:
- Use corms under 1 inch in diameter
- Plant 3 to 4 inches deep
- Space them 4 inches apart for a bushy look
- Less fertilizer – just a balanced slow-release once at planting
- No staking needed – they stay upright naturally
I grew ‘Robinetta’ last year. The flower spikes were 28 inches tall. Perfect size for my front border. The magenta flowers lasted three weeks. I was genuinely surprised how long they held up.
Step-by-Step Planting Guide Based on My 2-Week Observation
I started a fresh batch two weeks ago. I planted both large and small varieties. I’ll walk you through exactly what I did.
Day 1: Getting the Corms Ready
I bought my corms from a local nursery. Large ones were labeled Jumbo Size, over 1.8 inches. Small ones were Standard Size, around 0.8 inches.
Step 1: I soaked the corms in room temperature water for 2 hours. This wakes them up. I skipped this step on my earlier attempts. Big mistake. Dry corms take forever to sprout.
Step 2: I checked for rot or soft spots. I pressed gently on each corm. Any that felt squishy went straight into the trash. One of my large corms had a mushy base. I tossed it.
Step 3: I prepared the soil. I mixed 3 parts regular potting soil, 1 part perlite, and 1 part coarse sand. This gives excellent drainage. I really cannot stress how important this is.
Day 3: Planting the Corms
For large corms, I dug holes 6 inches deep with a trowel. I dropped one corm per hole, pointed end facing up. Then I covered with soil and watered lightly. Just enough to moisten the soil to 4 inches depth.
For small corms, I dug holes 3 inches deep. Same process. Pointed end up. Watered lightly.
I used separate raised beds for each size. Large ones got full western sun. Small ones got eastern morning sun plus afternoon shade.
Day 5: First Signs of Growth
The small corms surprised me. They showed tiny green tips pushing through the soil. The large corms were still sleeping. Two more days passed before the large ones sprouted.
Observation: Small gladiolus sprout faster. About 2-3 days earlier than large ones in my experience. The growth rate then evens out after week two.
Day 7: Thin Stems Are a Warning Sign
I noticed a few stems from the large corms looked thin and pale. I knew the sign. Not enough direct sun. I moved them to a sunnier spot. Within three days, the stems thickened noticeably.
Lesson from this: Check your stems daily. If they’re leaning or pale, they’re begging for more light. I’ve ignored this before and ended up with floppy plants.
Day 10: Fertilizer Check
I gave the large gladiolus a half-strength liquid 11-13-13 fertilizer. I watered it in the morning. By day 12, the leaves were visibly darker green and wider.
For small gladiolus, I used a balanced 10-10-10 at quarter strength. They’re more sensitive to overfeeding. I burned the leaves on a previous batch by using full-strength fertilizer. It stunted growth for weeks.
Day 14: Size Difference Is Clear
At two weeks, the large gladiolus had stems 12 inches tall. The small ones were 9 inches tall. The large ones had thicker stems – about double the diameter.
The large corms produced five leaves each. The small ones had four leaves. The color on the large ones was a deeper shade of green. Small ones were slightly lighter green.
Common Troubleshooting Problems I’ve Encountered
I’ve run into almost every problem over the years. Here’s how I fixed them.
Problem: Yellow Leaves
Symptom: Leaves turning yellow from the bottom up.
Cause: Most often overwatering or poor drainage.
Fix: Let soil dry completely before next watering. Check that your pot has drainage holes. I actually repotted one batch into a terra cotta pot with extra holes. The yellowing stopped within a week.
Problem: No Flowers or Very Few Blooms
Symptom: Strong leaves but no flower spike.
Cause: Too much nitrogen fertilizer. This happened to me twice. I was overdoing it with high-nitrogen lawn fertilizer nearby.
Fix: Switch to a phosphorus-heavy fertilizer like 5-10-10. Flowering requires phosphorus. I apply this once when flower buds appear.
Problem: Bent or Broken Stems
Symptom: Tall stems flopping over.
Cause: Weak stems from low light or too much wind.
Fix: Stake early. Use 4-foot bamboo poles for large varieties. Tie stems loosely with soft garden twine. I learned to tie in a figure-eight pattern to prevent stem girdling.
FAQ – Three Most Common Questions
Q: Can I grow large and small gladiolus together in the same bed?
Yes, but I don’t recommend it. Large varieties shade small ones. I tried this last year. The small ones grew only 18 inches tall. The large ones blocked their light. Keep them separate for best results. Group all large or all small together.
Q: How long do gladiolus flowers actually last?
Individual blooms last about 3-5 days depending on temperature. The whole spike blooms from bottom to top over 10-14 days. Cooler weather extends bloom time. Hot weather cuts it short. In my garden at 70°F, large spikes last about 12 days total.
Q: Do I have to dig up gladiolus corms every winter?
That depends on your climate. According to the RHS and AHS, if your winter soil temperature drops below 20°F (-6°C), you absolutely need to dig them up. I live in zone 5. I dig mine every October. I store them in a paper bag with dry peat moss at 40°F. I lose maybe 5-10% to storage rot. It’s worth it for the flowers next year.
Final Thoughts from My Garden
Growing gladiolus is about matching the size to your expectations. If you want towering spires, buy big corms and give them deep, full-sun treatment. If you want compact color for borders, small corms planted shallow work perfectly.
I’ve killed more gladiolus than I care to count. But every failure taught me something. Overwatering is by far the most common killer – I’ve lost entire rows to it. Light is the second biggest factor. And pot size? It makes or breaks container plants.
Start small. Try one batch of large and one batch of small. Note how they respond after two weeks. Adjust your watering and light accordingly. You’ll see the difference fast. And honestly, that’s what makes gardening fun.
I still get excited when I see those first green tips appear. Every time. Even after five years, it feels like magic.