bluename
 Your begonia tuber looks like a dried-up walnut. You are ready to toss it. Stop.
Here is the fast fix: Soak the tuber in room-temperature water for 2 hours. Then pot it shallowly in a pot with drainage holes, water it once, and place it in bright, indirect light. Do not water again until you see a red sprout. That is the whole trick. I have revived three tubers this way.
90% of indoor plants die from overwatering. Begonia tubers are the absolute worst victims. I learned this the hard way. My first tuber rotted into mush because I watered it like a fern. The second one stayed bone dry for two months because I was scared. It finally sprouted after I gave it one desperate soak.
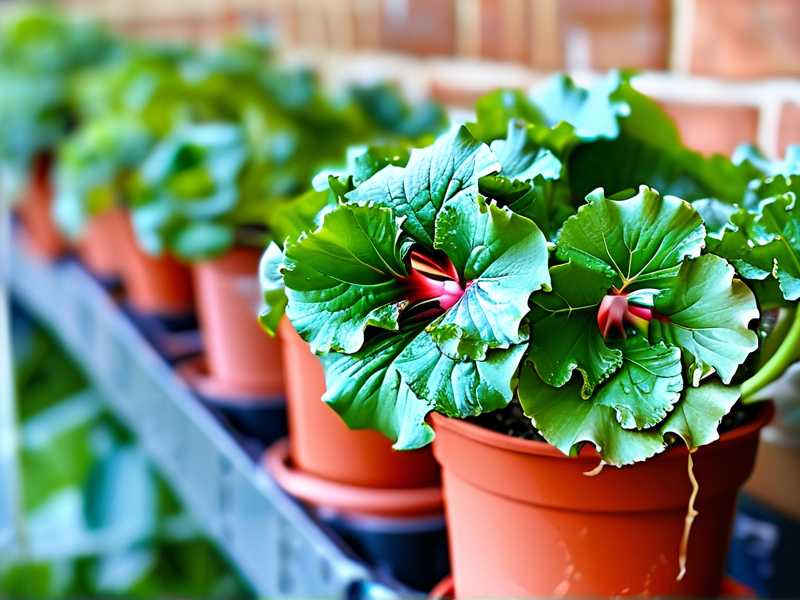
Let me walk you through the exact revival process. I will share what I did, what I almost did wrong, and how you can fix your sad tuber in about two weeks.
Why Your Tuber Looks Dead (But Probably Is Not)
A shriveled tuber is not always a corpse. It is often a sleeping bear. Begonias are tuberous perennials. They store all their energy in that ugly brown lump. When the season changes or conditions turn rough, they go dormant. They drop leaves, dry out, and look pitiful.
I once threw away a tuber that was perfectly alive. I was so annoyed. It looked like a raisin. I assumed the worst. Then I learned that a firm tuber, even a shriveled one, has life inside. The key is to test the texture.
Press your thumb against the tuber. If it feels hard and solid, you are in luck. It is dormant. If it feels soft, spongy, or squishy, you have a problem. Rot sets in quickly. But do not panic yet. Even a slightly soft tuber can be saved if the center is firm.
My personal rule now is simple. I never toss a tuber that still has any firmness left. I always give it the soak-and-see treatment. Two weeks is all you need to know the truth.
The Three Biggest Mistakes That Kill Begonia Tubers
I killed three plants before I learned what I was doing. Every single death came down to the same three errors. If you avoid these, you will not even need to revive a dying tuber. But since you are here, let us fix the damage.
Mistake #1: Watering Too Much (The Silent Killer)
This is the big one. Everyone does it. We see dry soil and panic. We water again. The tuber sits in wet dirt. The roots suffocate. The tuber turns to jelly.
I remember my very first begonia. I watered it every other day. I thought it was thirsty. The leaves turned yellow, then brown, then the whole stem flopped over. When I dug up the tuber, it was a squishy mess. It smelled like a swamp. I cried a little.
The truth is, tubers store water. They do not need constant moisture. They need a drink, then a dry spell. If the soil stays soggy for more than 48 hours, you are killing it. The fix for overwatering is to take the tuber out, cut away mushy parts, let it dry for 24 hours, then repot in dry soil.
Mistake #2: Wrong Light Placement
Begonias are not cacti. They burn. They also are not ferns. They get leggy in deep shade. The sweet spot is bright, indirect light. I thought "sunny window" meant direct rays. Wrong. My second tuber got scorched. The leaves turned crispy white. The plant gave up.
What I do now is place the pot on a table a few feet from an east-facing window. That morning sun is gentle. The rest of the day is bright but soft. If you only have a south window, pull the pot back three feet. That simple distance saves lives.
Mistake #3: Wrong Pot Choice
This one is sneaky. Everyone thinks bigger pot = happier plant. For tubers, the opposite is true. A huge pot holds too much soil. That soil holds too much water. The tuber drowns.
I once potted a begonia tuber in a giant decorative ceramic bowl. It looked lovely. It died in three weeks. The roots never had a chance. The center of that big pot stayed wet for days.
Now I use a shallow terra cotta pot. No wider than 6 inches for a standard tuber. Terra cotta breathes. It wicks away moisture. The shallow depth means the soil dries out fast. My tubers love it. The drainage hole at the bottom is non-negotiable. If your pot has no hole, drill one. Or use a nursery pot inside a pretty cachepot.
My Step-by-Step Revival Process (Soak, Pot, Wait)
I am going to share my exact process. This works for a tuber that is dormant, shriveled, or just looking sad. It also works for one that got overwatered but still has firm parts. Here is what I do, day by day.
Days 1-2: The Inspection and Soak
Take the tuber out of the old soil. Brush off the dirt gently. Do not wash it. You want to see the surface clearly.
Check for rot. Soft, brown, smelly spots need to go. I use a clean, sharp knife. Cut away any mush until you see firm flesh. Dip the cut areas in cinnamon powder. It is a natural fungicide. I keep a little jar of it just for this.
Now fill a bowl with tepid water. Not cold, not hot. Room temperature is perfect. Drop the tuber in. Let it float or sink, it does not matter. Set a timer for 2 hours. Do not leave it overnight. That is too long. Two hours is the sweet spot to rehydrate the dry tissues.
When the timer goes off, lift the tuber out. Pat it dry with a paper towel. You will notice it feels slightly heavier. That means water is moving back into the cells. Good. Leave it on a dry towel for 24 hours. This step is crucial. You want the outer skin to dry before it touches soil. Wet skin encourages rot.
Days 3-5: Potting the Tuber
Grab your shallow pot. Terra cotta is best. Add a layer of potting mix that is well-draining. I mix standard potting soil with about 30% perlite. That extra perlite keeps air pockets open. Roots need oxygen.
Now place the tuber on the soil. Here is the critical part. Do you see a concave side? That is the top. The dented side faces up. The rounded, convex side faces down. Roots grow from the top and sides. If you plant it upside down, it will still grow, but it will take longer. I have done it upside down. It works. It just looks confused.
Cover the tuber only halfway. Leave the top half exposed. I know this looks weird. But exposing the crown prevents rot. It lets the sprout find light easily. Press the soil down gently. Do not pack it tight.
Water it once. Slowly. Use a watering can with a narrow spout. Aim at the soil, not the tuber. The water should run out the bottom hole. That is your signal that the soil is fully saturated.
Now put the pot in that bright, indirect spot. And stop. Do not water again. I repeat, do not water again.
Day 6-10: The Agonizing Wait
This is the hardest part. You will look at that pot every single day. Nothing will happen. The soil will dry out on top. You will want to water it. Do not.
I check the tuber by pressing the soil with my finger. If the top inch is dry, that is fine. The tuber has enough moisture stored. It is working under the surface. Roots are forming. They need air, not water.
On day 7, I usually start to see a tiny pinkish bump on the top. It looks like a pimple. That is the sprout. It is small. It is easy to miss. Get on your knees. Look closely. If you see it, do a little dance. You just saved a plant.
Day 11-14: Sprout and First Real Watering
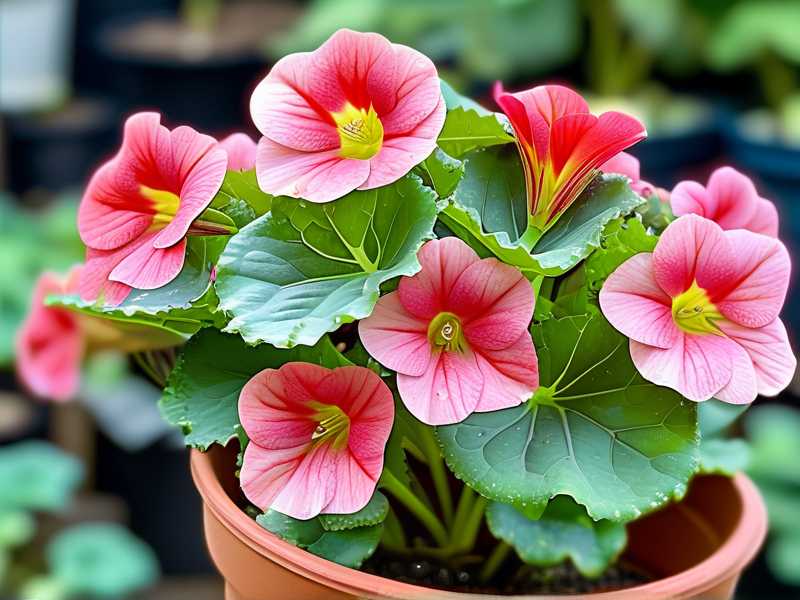
When the sprout is about 1 inch tall, it is time to water again. This is the second watering. The soil is bone dry by now. That is perfect. The tuber has grown roots searching for moisture. Now you give it a proper drink.
Water from the bottom. Put the pot in a tray of water for 15 minutes. Let the soil soak up moisture through the drainage hole. This encourages roots to grow deep. Then remove the pot from the tray and let it drain.
From here on, water only when the top inch of soil is dry. Usually that is every 5-7 days. Watch the sprout grow. It will unfurl into a leaf within a few days. Then another leaf. Then the plant will take off.
What If The Tuber Does Not Sprout? (Troubleshooting)
Sometimes the soak and pot do not work. I have been there. Here is what I check when two weeks pass with zero activity.
Check for rot again. Dig down gently with your finger. Feel the top of the tuber. Is it squishy? If yes, unpot it. Cut away rot again. Dust with cinnamon. Let it dry for 48 hours. Repot in dryer soil. Water even less.
Check the temperature. Tubers are picky about warmth. They need at least 60°F (15°C) to wake up. If your room is cold, the tuber stays asleep. I had one stay dormant for three months because my greenhouse was too chilly. I moved it to a warm shelf above the radiator. Sprout within ten days.
Check the light. The tuber needs light to trigger sprouting. Not direct sun, but a bright room. I had a tuber in a dark hallway for weeks. No joy. Moved it to my kitchen windowsill. Sprout in a week. Light is the wake-up call.
Wait longer. Some tubers are stubborn. If the tuber is still firm after two weeks, do not give up. Give it one more week. I have seen a tuber take 3 weeks to show the first bump. Patience is not just a virtue here. It is the whole game.
My Personal List of Reliable Signs of Life
After many tubers, I have learned to read the signs. Here is what tells me a tuber is alive and working.
- Firmness. A hard, solid tuber has energy stored. Soft spots are bad, but a deeply firm core is good.
- Weight. After the soak, a tuber that feels heavier has absorbed water. That is a metabolic sign.
- No smell. Rot smells like compost. If it smells earthy and damp, it is fine. If it smells sour, trouble.
- Tiny bumps. Run your finger over the top surface. You might feel tiny knobs. Those are future sprouts. They are not visible yet, but they are there.
I check for these signs every time. It saves me from tossing live plants.
Fixing An Overwatered Tuber (The Rescue Mission)
If your tuber died from too much water, here is the emergency plan. I call it the rescue mission. I have used it twice with success.
Unpot immediately. Gently shake off wet soil. Rinse the tuber under lukewarm water. Brush away all soil from the crevices.
Feel for soft areas. They will be darker and slightly sunken. Cut them out with a clean knife. Be aggressive. Cut until you hit white or cream-colored flesh. That is healthy tissue. If the whole tuber is soft, you are out of luck. But if you rescue even a quarter of the tuber, you can get a plant.
Dust the cut surfaces generously with cinnamon. Let the tuber sit on a dry paper towel for 48 hours. Yes, two full days. The air drying creates a callus. That callus prevents new rot.
After 48 hours, pot it in dry mix. Do not water for a week. Let the wounds seal completely. Then water with a spoonful of water. Just a little sip. Not a flood.
I saved a tuber this way that had lost 70% of its mass to rot. It took two months, but it sprouted. It was the most rewarding gardening moment of my year.
The RHS and AHS Weigh In
The experts agree with my hard-won experience. The Royal Horticultural Society (RHS) recommends planting tuberous begonias in shallow trays with just the top of the tuber visible. They stress that overwatering is the chief cause of failure. Their advice is to keep the compost barely moist until growth appears.
The American Horticultural Society (AHS) echoes this. They suggest starting tubers indoors in late winter. They note that tubers need a period of dryness between waterings. Their AHS guide on tuberous begonias emphasizes sharp drainage and patience.
I found this reassuring. My kitchen-table experiments matched their scientific guidance. When in doubt, let the tuber dry a little more.
My 2-Week Observation Log
Here is a real log from a tuber I revived last spring. It is exactly what I saw, day by day, no fluff.
Day 1: Unpotted a shriveled, rock-hard tuber. Soaked for 2 hours. It floated. Patted dry. Left on towel.
Day 2: Tuber feels slightly heavier. Looks the same otherwise. Potted in a 5-inch terra cotta pot with perlite-heavy mix. Watered once. Put on kitchen shelf.
Day 3-5: Nothing. Soil surface looks dry. I ignore it. I am proud of myself.
Day 6: I peek under the soil with my finger. The tuber feels same. No change.
Day 7: I see it. A tiny pinkish dot on the top surface. Smaller than a grain of rice. I scream a little.
Day 9: The dot is now a small bump. It looks like a red pencil eraser. It is definitely a sprout.
Day 11: Sprout is 1 inch tall. It has a small green leaf starting to unfold. I water from the bottom for the first time since planting.
Day 14: Two leaves are out. They are bright green. The tuber is officially revived. I do a happy dance.
That is the whole secret. Two hours of soaking, one watering, then patience. The plant did the rest.
Common Questions About Reviving Begonia Tubers
Q: Can I revive a tuber that has been dead for months?
It depends on the firmness. If the tuber is still hard and has not dried to a hollow shell, yes. I have revived tubers that sat in a paper bag for four months. The soak-and-wait method works. Just be extra patient. It may take 3-4 weeks instead of two.
Q: Should I use fertilizer when planting the tuber?
No. Do not fertilize a dormant tuber. The roots are not ready. Fertilizer salts can burn new root tips. Wait until the sprout has at least two leaves. Then use a diluted liquid fertilizer at half strength. I use a balanced 10-10-10 mix. Once a month is plenty.
Q: What if my tuber splits into two pieces?
No problem. If both pieces are firm, let them callus for a day, then plant each one. You now have two plants. I have split tubers accidentally and ended up with double begonias. It is a happy accident.
My Final Thoughts on Saving Your Tuber
You have nothing to lose by trying the soak method. The worst case is that the tuber is truly rotten. But if it is firm, you have a high chance of success. I have had maybe an 80% success rate with firm tubers. That is worth the small effort.
Do not be discouraged if the first week shows nothing. The second week is where magic happens. Check daily, but do not poke the tuber. Let it work.
Remember the golden rule. Water less than you think. Bright light, not direct sun. Shallow pot with drainage. Follow those rules, and your begonia will reward you with gorgeous leaves and, eventually, big, showy flowers.
I hope my struggles help you. I killed three tubers so you do not have to. Now go rescue that sad lump in the pot. It is probably more alive than you think.