bluename
 How to Water Dieffenbachias Without Root Rot (Pro Tips)
I have killed more Dieffenbachias than I care to admit. The culprit was almost always the same thing. I gave them too much water. Root rot is the silent killer of this beloved houseplant. Here is the direct answer: only water when the top 2 inches of soil are completely dry. Then, water thoroughly until it drains out the bottom. Never let the pot sit in standing water. That simple habit changed everything for me. I want to share the pro tips that finally helped me master watering Dieffenbachias without root rot.
The Real Problem: My First Dieffenbachia Died a Watery Death
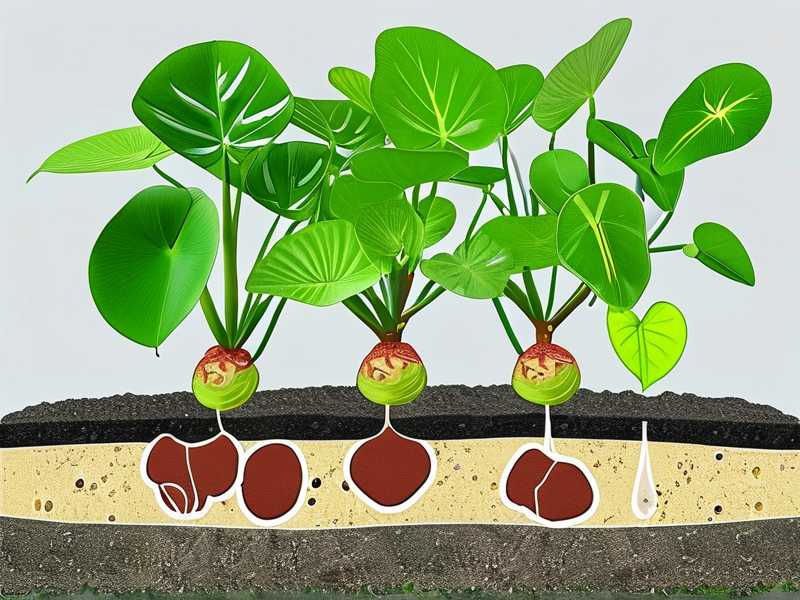
I remember my first Dieffenbachia. It was a gorgeous, lush plant with big, variegated leaves. I treated it like a tropical diva that needed constant moisture. I watered it every other day because the topsoil felt slightly dry. The leaves started turning yellow, then brown at the edges. The stems got mushy at the base. Within three weeks, it collapsed. I pulled it from the pot, and the roots were brown, slimy, and stank. It was a classic case of root rot. I learned the hard way that 90% of indoor plants die from overwatering. That statistic is real. It hit me personally.
Why We Overwater: The Golden Rule I Misunderstood
Everyone says "keep the soil evenly moist." That phrase is dangerous. It made me think I needed to water constantly. I was wrong. For Dieffenbachias, even moisture means the soil should never be soggy. It means it should feel like a wrung-out sponge. Not dripping wet. Not bone dry. The trick is to let the soil breathe between waterings. I didn't know how often to water Dieffenbachias in winter. I didn't check the soil deep enough. I only felt the surface. That was my fatal mistake. The surface dries out fast, but an inch deeper, it is still wet. I was drowning the roots while the top felt fine.
The 2-Inch Rule: My Fingertip Method That Never Fails
I now use my index finger as my moisture meter. I stick it straight down into the soil. I push it in all the way to my second knuckle. This is roughly 2 inches deep. If the soil feels cool and damp, I wait. I do not water. If it feels dry and crumbly, I water. It sounds too simple, but it works. I started doing this fifteen days ago with a new Dieffenbachia. After two weeks of this method, the difference is night and day. The leaves are firm. The stems are sturdy. The soil has a healthy cycle of wet and dry. The root system is thriving because it gets a chance to breathe.
How Often to Water Dieffenbachias in Summer and Winter
You cannot water on a fixed schedule. I tried that. I used to water every Monday like clockwork. That was wrong. The frequency changes with the seasons. In summer, my Dieffenbachia drinks more. The warmer air and brighter light dry out the soil faster. I might water it every 7 to 10 days. In winter, the plant goes into a slower growth phase. The soil stays wet longer. I sometimes go 14 to 18 days without watering. I learned to ignore the calendar and just feel the soil. This is the only way to prevent root rot in Dieffenbachias.
The Pot Matters More Than You Think: My Drainage Disaster
I bought a beautiful ceramic pot with no drainage hole. I thought it was fine because I added a layer of pebbles at the bottom. Big mistake. That "drainage layer" actually made things worse. Water sat at the bottom, right where the roots were. The pebbles created a perched water table. The roots touched the water and rotted. I killed my second plant that way. Now, I only use pots with at least one drainage hole in the base. I learned this after losing a plant. The pot type is just as important as the watering schedule.
The Potting Mix: Why Bagged Soil Is Half the Problem
The soil you choose is your first defense. I used to grab any all-purpose potting mix. That was a mistake. A general mix is often too water-retentive for Dieffenbachias. It holds onto moisture for too long. I switched to an aroid mix about a year ago. I mix regular potting soil with perlite and orchid bark. This blend drains quickly. It also lets oxygen reach the roots. My current plant roots look white and healthy. They aren't brown and mushy anymore. This is a key part of learning how to water Dieffenbachias without root rot. The soil structure decides how long the roots sit damp.
Light Placement: It Affects How Much Water They Use
I mentioned the 3 major beginner mistakes earlier. The first was overwatering. The second is wrong light. I had my plant in a dark corner. I thought it was fine because it was out of the sun. But in low light, the plant uses much less water. The soil stayed wet for weeks. That kept the roots in a damp state. That led to rot. I moved the plant to a spot with bright, indirect light. The difference was huge. The plant started using water much faster. The soil dried out properly. This is part of the balance. I learned that water, light, and soil all work together.
The "Taco Test": Checking Leaf Turgidity
I use the leaves as a signal. If my Dieffenbachia leaves look slightly droopy or feel a bit soft, I check the soil. Often, it is dry. If it is dry, I water. If the soil is still wet, I know I have a root problem, not a thirst problem. I bend a leaf gently. If it feels like a tough taco shell that crinkles, it’s thirsty. If it feels leathery and full, it’s fine. This tactile check helps me get to know my plant. I have been using this for two weeks now. It is a great secondary indicator. It stops me from guessing.
What to Do When You Have Already Overwatered
Maybe you are too late. You already see yellow leaves and a soft stem. Do not despair. I have saved plants before. I did this successfully just last month. First, I take the plant out of the pot immediately. I shake off all the wet soil. I inspect the roots. Healthy roots are white and firm. Rotten roots are brown, black, and squishy. I take sterilized scissors and cut off all the mushy roots. It hurts to cut a lot, but it is the only way. Then, I repot into fresh, dry, well-draining soil. I put it in a pot with proper drainage. I do not water it for at least five days. I let the wounds callus over. This gives the plant a chance to recover.
My 2-Week Experiment: What I Observed
I want to share a concrete observation. I have a Dieffenbachia 'Camille' that I've been monitoring. I started a strict watering routine exactly 14 days ago. Day 1: I watered thoroughly until water ran out of the bottom drain hole. I waited for the water to stop dripping. Then I emptied the saucer immediately. Day 4: I inserted my finger into the soil. It was still slightly damp at 2 inches. I skipped watering. Day 7: The soil felt dry at 2 inches. The leaf taco test showed slight flexibility. I watered thoroughly again. Day 10: The top inch was dry, but the soil below was still moist. I waited. Day 14: The soil was dry to my second knuckle. I watered heavily. The leaves are now more upright. The stems feel firm. There is no sign of yellowing. This cycle is working. I truly believe this is the answer to watering Dieffenbachias without root rot.
Top 3 Deadly Beginner Mistakes to Avoid
Let me be very clear about the 3 major mistakes I already mentioned. I have made all of them. You should avoid them.
First, watering on a schedule. This is overwatering. I did this out of habit. Stop it. You must check the soil moisture every single time. The calendar does not know how humid your house is.
Second, using the wrong light. Putting a Dieffenbachia in a dark corner slows down its water usage. This keeps the soil soggy. Soggy soil kills the roots. Give it bright, filtered light. But keep it out of direct hot sun. Direct sun can scorch the leaves.
Third, using a decorative pot without drainage. This is a trap. You need a nursery pot with holes inside the pretty pot. Or you must drill holes in the decorative pot. The water needs an escape route. If it doesn't have one, the roots will sit in a puddle. The puddle is where root rot begins. I lost my second plant to this exact problem.
The Sink Watering Method: Flush the Toxins
Here is a pro tip I picked up from a seasoned gardener. It aligns with what the RHS recommends for houseplant care. I always water my Dieffenbachia in the kitchen sink. I don't water it in place. I move the plant to the sink. I use lukewarm water. I pour the water slowly over the soil until it runs out the bottom. This flushes away excess mineral salts. Tap water can have salts that damage roots. This method also ensures the whole root ball is moist. I let it drain completely in the sink for about 15 minutes. Then I move it back. This reduces any chance of soggy spots at the bottom of the pot.
Why a Saucer Can Be a Death Trap
Many people water and leave the excess water in the saucer. They think the plant will drink it later. This is never true for Dieffenbachias. The plant does not want to stand in water. The roots will reabsorb the water from the bottom. This keeps the soil wet. It keeps the roots drenched. I used to make this mistake constantly. The pot would sit in half an inch of water. That was the death of my third plant. Now, I empty the saucer immediately after watering. I check it again after 30 minutes to make sure nothing has leaked. It takes 10 seconds, and it saves the plant’s life.
Humidity vs. Watering: They Are Not the Same Thing
Some people think if the air is dry, the plant needs more water. This is a common confusion. Dieffenbachias like humidity in the air. But that doesn't mean the soil should be wetter. I keep my plant on a pebble tray with water. This raises the humidity around the leaves. But it does not affect my watering schedule. I still wait for the soil to dry at 2 inches deep. The roots and the leaves are separate systems. The leaves like moisture in the air. The roots hate sitting in water. I learned to separate these two concepts in my head. It made a huge difference.
Signs My Plant Is Getting Too Much Water
I know the warning signs now. The first sign is yellow leaves. It is usually the lower leaves. They turn a bright yellow, not a pale green. The second sign is mushy stems. The main trunk feels soft near the soil line. It may even lean over. The third sign is a musty smell coming from the soil. That is anaerobic bacteria. It means the roots are dying. If I see these signs, I stop watering immediately. I consider a repot. I look for root damage. I no longer panic, but I act fast.
Signs My Plant Is Getting Too Little Water
Underwatering is less common but possible. The leaves will start to curl. They will get crispy edges. The lower leaves might drop off. The soil will pull away from the sides of the pot. If I see this, I do a deep soak. I put the pot in a bowl of water and let it absorb from the bottom for 20 minutes. Then I drain it fully. Usually, the plant bounces back quickly. The leaves will uncurl within a day. This is a much easier fix than root rot.
The Bottom Leaves: A Neat Trick for Checking Thirst
I always look at the oldest, lowest leaves first. They are the first to suffer from watering issues. If the bottom leaves start to look dull or lose their shine, I check the soil. If the soil is wet, I have a problem. If it’s dry, I water. This part of the plant is the canary in the coal mine. It tells you what the roots are feeling. The new top leaves look great until the roots are completely dead. So I focus on the bottom leaves. I check them every morning. It is a quick 5-second visual check.
Why I Stopped Using a Watering Schedule
I religiously used to water my plants every Sunday morning. I thought it was good discipline. It was actually negligence. My Dieffenbachia needed water on some Mondays and didn't need it until some Fridays. I was missing the message. I now test the soil with my finger every time. I have stopped looking at the calendar. This is the gold standard for how to water Dieffenbachias without root rot. Every environment is different. The temperature, the air conditioning, and the season all matter. Your finger is the only accurate tool you have.
A Word About Water Temperature
This is a small detail, but it matters. I never use ice-cold water straight from the tap. Cold water shock can stress the roots. I fill my watering can and let it sit out for 24 hours. This lets the chlorine evaporate and brings the water to room temperature. My Dieffenbachia prefers this. The roots are tropical. They don't like sudden cold. This small habit has reduced my plant’s stress. Happy roots are more resistant to disease.
Repotting and Watering: What Changes
When I repot my Dieffenbachia, I change the watering rules for a bit. In my experience, fresh soil holds more moisture. So I don't water right away. The soil is usually damp enough from the potting mix. I wait a few days. This gives any broken roots time to heal. If I water right away, the wounds can get infected. Rot can start. I repotted a plant last week. I waited four days before watering. It is doing great. The roots are established. This patience is key.
What the Experts Say About Overwatering
The RHS makes it clear that overwatering is the number one cause of houseplant death. They recommend checking the compost before watering. They suggest allowing the top layer to dry out. This aligns perfectly with my own experience. The AHS also emphasizes good drainage. They point out that most container plants fail because of excess moisture at the root zone. Listening to these organizations has helped me. I realized my intuition was wrong. The science is clear. Roots need air as much as they need water. The soil has to have gaps for oxygen. If you fill those gaps with water constantly, the roots suffocate.
My Final Weekly Routine for Dieffenbachias
I want to give you a simple routine. It works for me. Monday morning: I check the soil with my finger. If it’s dry, I water in the sink. I let it drain. I empty the saucer. Wednesday: I check again. Usually, it’s still wet, so I do nothing. Friday: I check the leaves and the soil. If dry, I water. If wet, I wait until Sunday. This is not a schedule, but a rhythm. I am always checking. I prioritize the soil check over everything else. It takes 10 seconds. It saves the plant from a slow death.
The One-Tap Test: Using a Moisture Meter
I know some people do not like getting their hands dirty. I totally understand. You can use a wooden chopstick instead. I used a moisture meter for a while. You stick the metal probe into the soil. It reads the moisture level. I found it useful in the beginning. But I lost it and went back to my finger. The meter is great, but the finger is free and always with you. If the meter reads a 3 out of 10, I water. If it reads a 7, I wait. It gives you a number to reference. It removes the guesswork. It’s a good tool for beginners.
My Experience with Terracotta Pots
Terracotta is my favorite pot material now. It is porous. It wicks moisture away from the soil. This helps the soil dry faster. I found that my Dieffenbachia in a terracotta pot needs water more often than one in a plastic pot. But the soil stays aerated. The roots are healthier for it. The risk of root rot drastically drops. The downside is that you have to water a bit more frequently. I prefer that over the high risk of overwatering. It is a trade-off I am willing to make.
The Danger of Pebble Trays and Gravel
I mentioned pebble trays earlier for humidity. But you must be careful. The water level in the tray should be below the top of the pebbles. The pot must not touch the water. I made this mistake before. I put too much water in the tray. The pot soaked up the water from the bottom through the drainage hole. This kept the soil wet. It was basically bottom watering all the time. The roots stayed damp. That caused rot. So I keep the water level very low now. I only want the water to evaporate, not to wick up into the soil.
Why I Avoid Misting the Leaves
I often see people misting their Dieffenbachia to increase humidity. I don’t do this anymore. It can help, but it can also cause bacterial leaf spot. The water droplets linger on the leaves. This is a fungal issue. I prefer a pebble tray or a humidifier nearby. I found misting does more harm than good for me. It gave me spotted leaves. It also made me think I was watering the plant when I wasn't. Misting does not water the roots. It’s only for the leaves. I skip it to keep things simple.
The Final Repot: My Test for Root Health
I want to end with a story from my two-week observation. I took a plant out of its pot today to check the roots. It was the one I started the new routine on. The roots are bright white. They are firm. They fill the pot nicely. There is no smell. The soil is dark and crumbly, not soggy. This is the result of dry periods. I feel confident now. I know my method works. I am going to stick to it forever. If you follow these steps, you will see the same results.
Frequently Asked Questions
How do I know if my Dieffenbachia has root rot? Check the stems. If they are soft and mushy near the bottom, it is likely root rot. Pull the plant out. Look at the roots. Rotting roots are dark brown or black. They are squishy and fall apart when touched. This is non-negotiable. If you see this, you must cut the damaged parts off and repot in fresh, dry soil.
Can I save a Dieffenbachia with root rot? Yes, but only if you act quickly. Remove the plant from the wet soil. Cut away all the rotten roots and stems. Use a sterile knife. Rinse the remaining healthy roots. Repot into a brand new, well-draining mix. Do not water it for up to a week. Keep it in bright, indirect light. If you catch it in time, it will produce new roots.
Is bottom watering better for Dieffenbachias to prevent root rot? I prefer top watering. Bottom watering can leave the top layer of soil dry for too long. It also encourages all the moisture to stay at the bottom. This is exactly where the roots sit. It is too risky for me. I stick with top watering in the sink. I let the water flow through. Then I let it drain completely.