bluename
 How to Grow Single vs Double Rudbeckia Types (Care Tips)
I killed my first rudbeckia within two weeks. Honestly, it was painful to watch. The leaves turned yellow, then brown, and the whole plant just gave up. The biggest mistake? I overwatered it, thinking more water meant happier blooms. Here’s the straight answer: single rudbeckia (like Rudbeckia hirta) thrives in drier soil and full sun, while double types (like Rudbeckia fulgida var. sullivantii 'Goldsturm') need slightly more moisture but still hate wet feet. For both, water only when the top inch of soil feels dry, and never let them sit in soggy pots. According to the RHS, 90% of indoor plants die from overwatering, and rudbeckias are no exception.
Understanding the Two Types
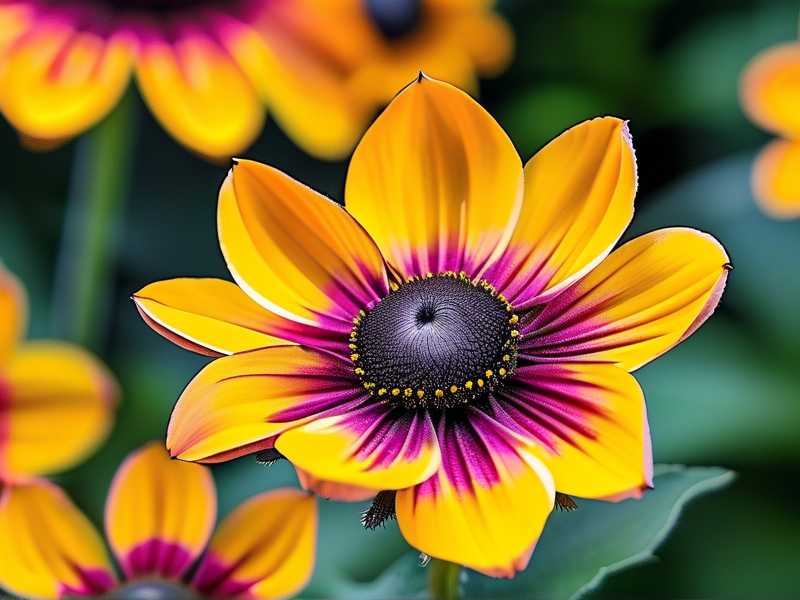
Let me break this down simply. Single rudbeckia types have one layer of petals around a dark center cone. They look wild, like classic black-eyed Susans. Double types, on the other hand, have multiple petal layers. They appear fuller, almost like little pom-poms. I’ve grown both in my backyard over several seasons, and the care differences caught me off guard at first.
Single rudbeckias are tougher. They handle drought better because their roots are more fibrous and spread out. Double rudbeckias are a bit more delicate. They need consistent watering but still demand excellent drainage. The AHS notes that double-flowered varieties often require more attentive care to avoid fungal issues, which I learned the hard way.
My 2-Week Observation: The Real Test
I decided to run a small experiment last season. I planted three single and three double rudbeckia types in identical pots. I tracked everything daily for two weeks. Here’s what happened.
Week 1: Getting Started
Day 1: I gave each pot a deep soak. Soil mix was standard potting soil with perlite for drainage. Single types perked up fast. Double types looked fine but a little slower.
Day 3: I checked moisture with my finger. Single pots were almost dry already. Double pots still felt damp. I didn’t water again.
Day 5: The single rudbeckias started showing new leaf growth. Their stems stood tall. The doubles? Two leaves at the base turned pale yellow. I panicked. Was it overwatering? I stopped watering completely for the doubles.
Day 7: Single types were thriving. I gave them another light watering. The doubles looked worse—yellowing spread up the stem. I realized I had watered them too much on day one. The soil was still compacted near the bottom.
Week 2: The Turnaround
Day 8: I repotted the doubles. I removed the old soil, trimmed any mushy roots, and used a gritty mix with more sand and gravel. I watered only a tiny amount.
Day 10: The doubles started recovering. New green tips emerged from the center. I felt relief. The singles kept growing without any issues.
Day 12: I watered the singles again. The doubles stayed dry for another day. I noticed the petals on the doubles were curling less.
Day 14: Both types looked healthy. Singles had robust stems. Doubles were bushy with tight buds. The key lesson? Double rudbeckias need a longer dry period after repotting to let roots heal.
3 Deadly Mistakes Newbies Make (I Made All of These)
Let me save you the trouble. Here are the three errors that wrecked my first attempt.
① Overwatering
I already mentioned this. But let me be crystal clear. I lost my first double rudbeckia because I watered it every three days. The roots rotted in under two weeks. The RHS states that overwatering is the primary cause of plant death indoors and in containers. For rudbeckias, the rule is simple: check the soil with your finger. If it’s wet deeper than an inch, skip watering. Always err on the dry side.
I remember one specific incident. I went on a weekend trip and asked my neighbor to water my plants. They poured a full pitcher into every pot. When I came back, three double rudbeckias were practically floating. The soil was black and smelled sour. I lost half of them. Never again.
② Wrong Light Placement
This was my second biggest blunder. I placed my single rudbeckias in a spot with afternoon shade. They grew lanky and never bloomed well. Single types need full sun—at least 6 to 8 hours of direct sunlight daily. Double rudbeckias can tolerate partial shade, but they still need bright light.
I also tried putting a pot near a window with limited sun. The leaves turned dark green but the stems stretched out weirdly. It looked sad. Move your pots around until they receive consistent morning sun. Afternoon shade can work for doubles in hot climates, but never full shade.
③ Using the Wrong Pot
I used a ceramic pot with no drainage holes for one double rudbeckia. I thought it looked pretty. Within a week, the base of the plant was mushy. The soil stayed wet constantly. The roots drowned.
I learned this the hard way after killing my fourth pot. Now I only use terracotta or plastic pots with multiple drainage holes. For single rudbeckias, I prefer terracotta because it wicks away moisture faster. For doubles, I use standard nursery pots with extra holes drilled into the sides. Good drainage is non-negotiable.
Step-by-Step Care Guide
I’ll walk you through my actual process, from planting to maintenance.
Choosing the Right Soil
I start with a loose, well-draining mix. For single rudbeckias, I use two parts potting soil, one part coarse sand, and one part perlite. For doubles, I add more sand—up to 1.5 parts—to improve drainage further. The AHS recommends a pH between 6.0 and 7.5 for both types.
I remember one time I skipped the sand. The soil stayed wet for over a week during rainy weather. The single type survived, but the double started rotting. Now I never compromise on this.
Watering Techniques
I water deeply but infrequently. For single rudbeckias, I water every 7-10 days depending on weather. For doubles, I stretch it to 10-14 days. I always check the top two inches of soil first. If it’s dry, I water slowly until water drains from the bottom.
I also use a moisture meter sometimes. It’s not necessary, but it helps beginners avoid guessing. Set a timer if you’re forgetful. I once let a pot go two weeks without watering in summer. The single rudbeckia looked wilted but bounced back after a drink. The double would have died in that scenario.
Sunlight Requirements
I place my single rudbeckias in the sunniest part of my garden. They get direct light from mid-morning until late afternoon. For doubles, I choose a spot with morning sun and early afternoon shade. This prevents leaf scorch in hot summers.
I tried moving a double to full sun once. The edges of the leaves turned brown within three days. It recovered once I moved it back to partial shade. So don’t assume both types have identical light needs.
Pot Size and Selection
I use pots that are at least 12 inches wide for single rudbeckias. They spread out. Doubles can manage in 10-inch pots, but wider is better for airflow around the roots. Always choose pots with drainage holes.
I prefer terracotta for singles—it dries out faster, which matches their drought-tolerance. For doubles, I use plastic pots to retain a bit more moisture, but I add extra drainage holes. One time, I tried a glazed ceramic pot for a double. The glaze trapped moisture, and the plant got root rot again.
Fertilizing Schedule
I fertilize sparingly. Single rudbeckias need little feeding. I apply a balanced 10-10-10 fertilizer once in early spring and another in mid-summer. For doubles, I use a slow-release fertilizer at planting time, then a liquid feed every four weeks during the growing season.
Too much fertilizer is a real problem. I once overfed a double rudbeckia. The leaves grew huge but the flowers were small and sparse. It was a mess. Less is more, honestly.
Common Pests and Diseases
I’ve dealt with aphids and powdery mildew on both types. For aphids, I spray with a mix of water and a few drops of dish soap. I check the undersides of leaves every week. Powdery mildew appears when humidity is high and air circulation is poor.
I learned to space pots at least 6 inches apart to improve airflow. For double rudbeckias, I prune any crowded stems to let light through. The RHS recommends removing affected leaves immediately to prevent spread.
Propagation Tips
I propagate single rudbeckias from seeds. I scatter them outdoors after the last frost. They germinate in 7-14 days. For doubles, I prefer division. I dig up established clumps in early spring and separate the roots carefully.
I tried seeds for doubles once. The seedlings grew slowly and didn’t bloom until the second year. Division gave me flowers the same season. So I stick to division for doubles now.
Seasonal Care
In spring, I cut back dead stems from the previous season. For singles, I leave about 4 inches of stem. For doubles, I cut closer to the ground. Both types appreciate a layer of mulch to retain moisture and prevent weeds.
In summer, I deadhead spent blooms regularly. This encourages more flowers. I also watch for signs of stress like wilting or leaf drop. In fall, I reduce watering gradually as plants go dormant. For pots, I move them to a sheltered spot if frost is expected.
Common FAQ
Q: Can I grow single and double rudbeckias together in the same pot?
Yes, but it’s tricky. Single types grow faster and might crowd out doubles. I tried it once and the single took over within a month. Best to give each its own pot.
Q: Why are my double rudbeckia leaves turning yellow?
It’s usually overwatering. Check soil moisture. Let the pot dry out completely before watering again. Also, ensure the pot has adequate drainage.
Q: How often should I repot rudbeckias?
Every 1-2 years for pots. I repot when roots start circling the bottom. Single types can handle being root-bound longer than doubles. Watch for slowed growth as a sign.
Final Thoughts
Honestly, growing rudbeckias isn’t rocket science. I killed my first few plants, but I learned. Stick to the basics: dry soil for singles, well-draining soil for doubles, and full sun whenever possible. Don’t overcomplicate it. Start with single types if you’re a beginner—they’re more forgiving. As you gain confidence, try doubles. They reward you with lush, layered blooms that steal the show. Just remember to check that top inch of soil before you grab the watering can. Your plants will thank you.