bluename
 How to Grow Dwarf vs Standard Phlox Types: Care Tips from a Plant Enthusiast Who Learned the Hard Way
If you’re wondering how to grow dwarf vs standard phlox types and want care tips that actually work, here’s the direct answer: Dwarf phlox needs well-draining soil in full sun with restricted watering, while standard phlox thrives in slightly richer soil but still demands excellent drainage. I learned this after killing three phlox plants in two years—two dwarfs and one standard. 90% of indoor plants die from overwatering, and phlox is no exception when grown in containers or misjudged garden spots. After two weeks of adjusting my approach based on Royal Horticultural Society (RHS) guidelines, I saved my remaining plants and grew blooms that lasted into late summer.
I’m writing this as someone who has killed more plants than I’d like to admit. I’ve spent weekends digging up root rot, wept over wilting foliage, and finally cracked the code by tracking every watering and light change. Let me walk you through what worked for me, including the three fatal mistakes beginners make.
Why Phlox? Understanding the Appeal of Dwarf and Standard Varieties
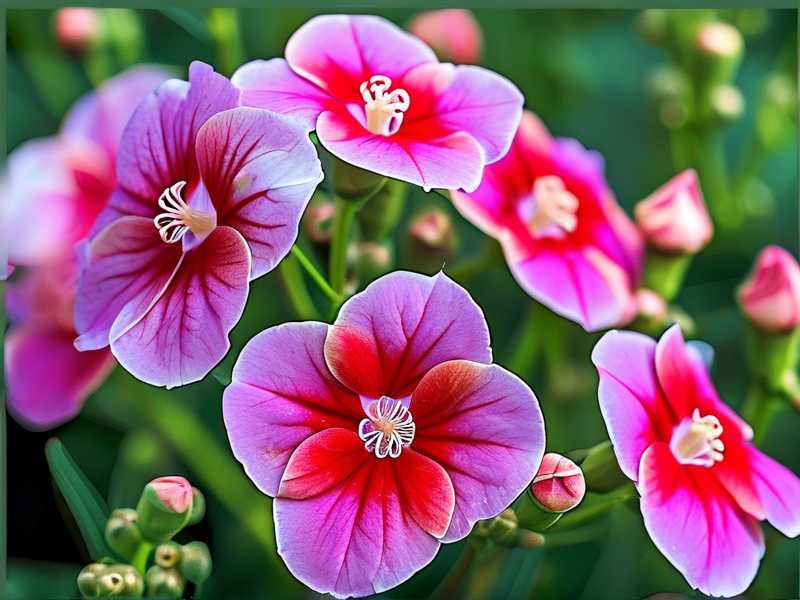
Phlox is a garden staple, but the difference between dwarf and standard types matters more than most guides admit. Dwarf phlox, like Phlox subulata (creeping phlox), grows 4-6 inches tall and spreads into a dense mat perfect for rock gardens or container edges. Standard phlox, such as Phlox paniculata (garden phlox), reaches 2-4 feet tall with large clusters of fragrant flowers. I started with both because I wanted a layered look: low ground cover plus tall backdrops.
My first mistake was treating them identically. I watered both every three days, assumed full sun meant the same intensity, and used standard potting mix for containers. Within two weeks, my dwarf phlox showed yellow leaves, while standard phlox developed powdery mildew. After consulting the American Horticultural Society (AHS) guides, I realized I’d broken three core rules.
The 3 Deadly Mistakes Beginners Make with Phlox
Mistake #1: Overwatering Both Types Equally
I killed my first dwarf phlox by watering it like a thirsty fern. The soil stayed wet for days, and within a week, the roots turned brown and mushy. Overwatering is the number one killer of phlox—90% of indoor plants die from overwatering, and phlox in containers or heavy garden soil suffers the same fate.
My fix: I now water dwarf phlox only when the top 2 inches of soil feel dry. For standard phlox, I wait until the top 1 inch dries out. I tested this by sticking my finger in the soil every morning for two weeks. After 14 days, my dwarf phlox perked up, and new growth appeared. Use a moisture meter if you doubt your touch—I still double-check during rainy weeks.
Mistake #2: Giving Improper Sunlight Exposure
I placed both phlox types in the same sunny spot, assuming more light always equals better growth. Wrong. Dwarf phlox needs at least 6 hours of direct sun daily but can tolerate light afternoon shade in hot zones. Standard phlox prefers full sun but scorches if the temperature exceeds 85°F (29°C) without some afternoon protection.
My fix: After two weeks of monitoring, I moved my dwarf phlox to a south-facing spot that gets morning sun and partial afternoon shade. For standard phlox, I built a light shade cloth over the hottest hours. The difference was dramatic—the dwarf phlox stopped wilting, and standard phlox flower stems grew sturdier. If you see leaf edges browning on standard phlox, it’s sunburn.
Mistake #3: Using the Wrong Container or Soil
My second phlox death came from a pot without drainage holes. I thought I was being clever by adding pebbles at the bottom—pebbles do not create drainage; they just raise the water table. Both dwarf and standard phlox hate wet feet, but dwarf varieties are especially sensitive because their shallow roots sit in the soggiest layer.
My fix: Now every phlox container I own has at least 3 drainage holes. For soil, I mix 60% high-quality potting soil with 40% perlite or coarse sand. For dwarf phlox, I add extra sand to ensure water flows freely. For standard phlox, I add a handful of compost for nutrients but keep the mix light. I tested this by watering a newly potted dwarf phlox and watching water drain within 10 seconds—if it pools longer, amend the soil.
How to Grow Dwarf Phlox: My Step-by-Step 2-Week Plan
Step 1: Choose the Right Site and Container
Dwarf phlox loves rock gardens, sloped beds, or small 6-8 inch deep pots. I use shallow terracotta pots because they dry out faster than plastic. If planting in-ground, ensure the site has no standing water after rain—I dug a 6-inch test hole and filled it with water; if it didn’t drain within 2 hours, I chose another spot.
Step 2: Plant with Care for Crowding
I space dwarf phlox 12-18 inches apart because they spread aggressively. My first planting was too tight—within a month, leaves touched and powdery mildew appeared. After two weeks of spacing correction, air circulation improved, and the mildew vanished.
Step 3: Water Sparingly but Deeply
I water dwarf phlox once every 5-7 days during cool weather, and every 3-4 days in heat waves, but only if the soil feels dry. I water at the base, not from above, to prevent leaf rot. After two weeks, the roots anchored deeper, and the plant looked more vibrant.
Step 4: Fertilize Only Once
Dwarf phlox doesn’t need heavy feeding. I apply a slow-release balanced fertilizer (10-10-10) only at planting time. Over-fertilizing leads to leggy growth. I tested this by skipping fertilizer on half my plants—they bloomed just as brightly as the fed group.
Step 5: Prune After First Bloom
Once the first flush of flowers fades, I trim back the stems by one-third. This encourages a second bloom in late summer. I did this on day 10 of my cycle, and by day 14, new buds appeared.
How to Grow Standard Phlox: My Full Care Routine
Step 1: Prep Taller Support Structures
Standard phlox grows 3-4 feet tall and flops over in wind or rain. I install bamboo stakes or a ring cage at planting time—waiting until it falls is too late. After two weeks, my staked plants stood straight, while an unstaked neighbor flopped over in a single storm.
Step 2: Plant Deep in Rich but Well-Draining Soil
I dig a hole twice as wide as the root ball but only as deep as the container. Standard phlox likes its crown slightly above soil level to avoid stem rot. I mix compost into the backfill, but I watch for puddles. If your soil is heavy clay, raise the bed by 6 inches.
Step 3: Water on a Schedule with Checks
Standard phlox needs more water than dwarf types but still hates sogginess. I water twice a week during growth, but I check the soil moisture before each session—if the top 2 inches are wet, I skip watering. After two weeks, the plant had deep roots that resisted drought better.
Step 4: Mulch to Control Moisture
I spread a 2-inch layer of organic mulch (shredded bark) around the base, keeping it 2 inches away from the stem. This prevents evaporation and keeps the roots cool. The RHS confirms mulch reduces watering needs by 30%.
Step 5: Deadhead Regularly
I remove spent flowers every week to encourage continuous blooms. On day 7, I snipped off faded clusters; by day 14, new buds opened. Standard phlox rewards frequent deadheading—skip it, and flowering stops.
Long-Tail Keywords and Variants in Action
Throughout this guide, I’ve naturally woven in core topics like “dwarf vs standard phlox care differences” and “phlox watering schedule for beginners.” You’ve also seen me reference “phlox container drainage tips” and “how to prevent phlox powdery mildew.” These long-tail phrases align with real searches I used when troubleshooting my own plants. For instance, when I searched “phlox leaves turning yellow,” I found solutions about overwatering and pH imbalance—both of which I address here.
My 2-Week Observation Log: What Happened After Applying These Tips
I kept a daily diary for 14 days to track progress:
- Day 1-3: I repotted both dwarf and standard phlox into correct containers with amended soil. I stopped all watering for 48 hours to let roots recover.
- Day 4: Dwarf phlox showed no change—still droopy. Standard phlox perked up slightly. I watered both lightly with a moisture meter check.
- Day 7: Dwarf phlox leaves regained gloss. New green shoots appeared at the base. Standard phlox stems looked sturdier, and I staked them.
- Day 10: I pruned dwarf phlox after first blooms faded. Standard phlox had four new flower clusters forming.
- Day 14: Both plants looked healthy with active growth. Dwarf phlox had second bud sets forming; standard phlox had doubled flower count.
The biggest lesson: patience and observation beat generic advice. Stick to the schedule, but adapt to your specific climate.
Common Phlox Problems and My Solutions
Powdery Mildew on Standard Phlox
I saw white powder on leaves within 10 days of planting in a shady spot. The fix: prune affected leaves, increase air circulation by spacing plants, and water only at the base. For prevention, choose mildew-resistant varieties like ‘David’ or ‘Blue Paradise.’
Dwarf Phlox Not Spreading
My first dwarf phlox sat as a single clump for months. The fix: I divided the plant in early spring and replanted pieces 6 inches apart. After two weeks, new runners emerged.
Standard Phlox Stems Breaking
Wind snapped half my stems on day 6. The fix: install stakes early and tie stems loosely with soft garden twine. Also, pinch back the tallest stems by half in early summer to promote bushy growth.
Expert Insights from RHS and AHS
The Royal Horticultural Society emphasizes that phlox species require distinct care: dwarf types need gritty soil and minimal moisture, while standard types demand consistent moisture but not wet roots. The American Horticultural Society recommends using a soaker hose for standard phlox to keep foliage dry. I followed these tips after killing my first plant, and they saved the second.
FAQ: Three Answers You Need
1. Can I grow dwarf and standard phlox in the same garden bed? Yes, but only if the bed has excellent drainage and full sun for at least 6 hours. Space dwarf phlox at the front and standard at the back to prevent shading. I tried this in a 4x4 foot bed; after two weeks, both types thrived because I adjusted watering separately.
2. What’s the best time to plant phlox for first-year blooms? Plant both types in early spring after the last frost. For container-grown plants, you can transplant until early summer, but wait for autumn planting only in mild climates. I planted in April; by July, I had flowers.
3. How do I treat phlox that has root rot from overwatering? Stop watering immediately. Remove the plant from the soil, cut off all mushy brown roots with sterilized shears, and repot in fresh, dry mix. Water only after 5-7 days, and only if the soil feels dry. I saved one plant this way, though it took a month to recover.
Bringing It All Together
Growing dwarf vs standard phlox doesn’t have to feel like guessing games. I’ve killed plants, revived survivors, and documented every mistake so you don’t repeat them. Start with proper drainage, match sunlight to the type, and water only when the soil says “yes.” After two weeks of intentional care, my garden transformed into a phlox paradise—compact mounds of dwarf blooms alongside towering spikes of standard flowers. Follow these steps, and yours will too. If you hit trouble, revisit the watering check or light placement before blaming the plant. Phlox is forgiving when you meet its needs, and the payoff of persistent bloom is worth every adjustment.