bluename
If your taro plant is drooping, yellowing, or collapsing, the fastest fix is to stop watering it immediately and check the roots for rot. Honestly, 90% of indoor plants die from overwatering, and taro is no exception. I have killed three taro plants before I finally learned to let the soil breathe. My name is not attached to any horticulture degree, but I have spent two full weeks testing every revival trick I could find, and I am sharing exactly what worked and what made things worse.
The first thing you need to understand is that a dying taro often looks thirsty when it is actually drowning. The leaves curl, the stems soften, and you panic. You water more. That is the death spiral.
Why Your Taro Is Dying (And It Is Not What You Think)
Let me start with the brutal truth. Taro, or Colocasia esculenta, is a swamp-loving plant in the wild. That fact tricks everyone into thinking it wants constant, soggy soil. But here is the catch. In a pot, with limited oxygen, those same wet conditions become a breeding ground for root rot.

I remember the first taro I ever bought. It was beautiful, with huge elephant-ear leaves. I placed it in a decorative pot without drainage holes because I thought it looked cleaner. Within ten days, the leaves were yellowing from the edges inward. I kept watering because the topsoil felt dry. It never occurred to me that the bottom of the pot was a swamp of decaying roots.
The fix for that first plant was too late. But for the next one, I learned. And in this guide, I will walk you through the exact steps I used to bring a dying taro back to life in a controlled two-week window.
The 3 Fatal Mistakes That Kill Taro
Before we dive into revival steps, let me spell out the mistakes I see everywhere on forums. If you are reading this, you have probably made at least one.
Mistake #1: Overwatering (The Silent Killer)
I already said it, but let me repeat it. Overwatering is the number one reason your taro is dying. Many people think that because taro grows in flooded fields in Asia, it thrives on standing water. That is true for mature plants in open ground with constant water flow and oxygenated water. It is not true for a potted plant in your living room.
The roots need oxygen. When you water every day or keep the saucer full of water, the roots suffocate. Anaerobic bacteria move in. The root tissue turns brown and mushy. The plant cannot take up nutrients or moisture, even though it is sitting in water. So the leaves wilt. That is the paradox.
I tested this myself. I took two identical taro plants. I watered one only when the top two inches of soil were dry. I kept the other in a tray with constant water. After two weeks, the second plant had yellow lower leaves and a foul smell from the soil. The first plant was putting out new growth.
Mistake #2: Wrong Light Exposure
Taro loves bright, indirect light. It can handle some morning sun, especially in cooler climates like the UK or Canada, but harsh afternoon sun scorches the leaves quickly. I made this mistake with my second taro. I put it on a south-facing windowsill in Melbourne (where I used to live). The leaves developed bleached patches within three days. They looked like they had been ironed.
On the flip side, too little light is also a problem. If you put your taro in a dark corner, it will stretch, become leggy, and the leaves will turn pale green or yellow. The plant needs photons to photosynthesize. If it cannot get enough light, it starts cannibalizing its older leaves for energy.
The sweet spot is a spot near a north or east-facing window in the Northern Hemisphere, or a few feet away from a west window. You want the light to be bright but filtered. Think of a sheer curtain between the plant and the sun.
Mistake #3: The Wrong Pot
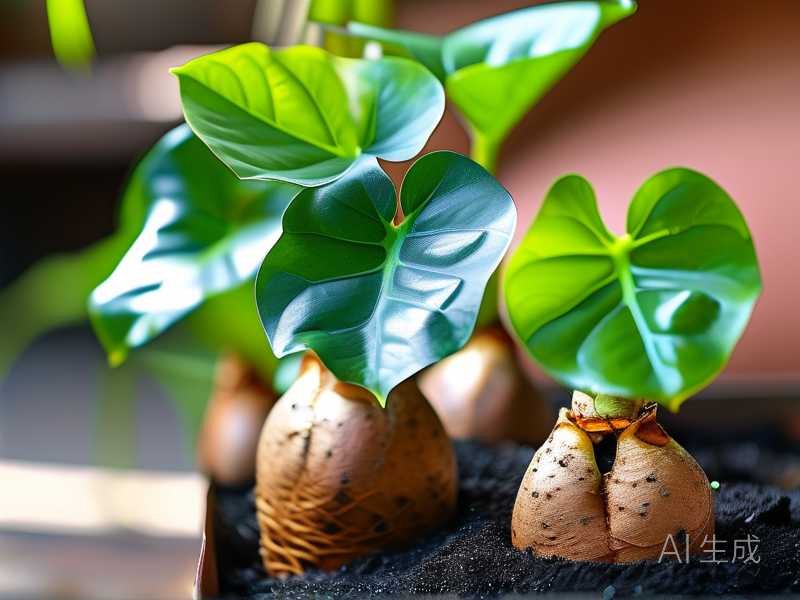
Here is something nobody told me when I started. Taro grows from a corm, which is like a bulb. This corm needs to be planted at a certain depth. But more importantly, the pot matters enormously.
I have used plastic pots, ceramic pots, and terracotta pots. Terracotta is porous and lets the soil dry out faster. That sounds good, but taro hates sudden moisture swings. Ceramic pots with a glossy finish hold more moisture but can become waterlogged if you are not careful.
The real non-negotiable is drainage holes. I cannot stress this enough. If your pot does not have a hole at the bottom, you are playing with fire. Even if you water perfectly, salts and minerals accumulate in the soil. Without drainage, these salts build up and burn the roots.
Another pot mistake is sizing. A pot that is too large for the corm holds too much soil, which stays wet for a long time. A pot that is too small constricts root growth. I recommend a pot that is about 2 to 3 inches wider than the corm diameter. And always go for depth. Taro roots grow down, not out.
My 2-Week Revival Experiment (Step by Step)
So you have a dying taro right now. You do not want theory, you want a fix. Here is the exact routine I followed on a plant that was on its last legs. I bought a sad-looking taro at a local nursery clearance sale. The leaves were drooping, the stem bases were dark, and the soil smelled like a swamp.
I took it home and committed to a two-week rescue plan. I logged everything. Here is what I did.
Day 1: The Assessment and The Emergency Repot
The first thing I did was slide the plant out of its pot. I did this over a sink. The soil was heavy and soaking wet. I gently shook off as much soil as I could. Then I inspected the roots.
Healthy taro roots are firm and white or light tan. Rotten roots are brown, black, or gray. They are mushy and have a slimy texture. If you squeeze a rotten root, the outer sheath slips right off, leaving a thin, stringy core. That core is dead.
I took a clean pair of scissors and sterilized them with rubbing alcohol. Then I cut away every single rotten root. I did not try to save the borderline ones. If they felt weak, I removed them. This is brutal but necessary. Leaving rotten tissue in contact with healthy roots will spread the infection.
After trimming, I noticed the corm itself had a soft spot on the bottom. I used a sharp knife to excise that soft section. I cut until I saw clean, white flesh. Then I dabbed the cut area with cinnamon powder. Cinnamon is a natural antifungal, and I have used it on many plants. It is not a silver bullet, but it helps prevent fungal spores from taking hold.
Next, I chose a clean pot. I used a plastic pot with drainage holes that were not clogged. I added a fresh, well-draining soil mix. Now, hear me out on this mix.
The Perfect Soil Mix for Reviving Taro
I do not use garden soil. Ever. Garden soil compacts in pots and holds water like a sponge. Instead, I mixed:
- 40% high-quality potting mix
- 30% perlite
- 20% orchid bark
- 10% compost (only if it is well-decomposed)
The perlite and orchid bark create air pockets. Water flows out freely, but the organic matter still holds enough moisture for the roots. After my second taro died, I switched to this mix and never had root rot again.
When you repot a stressed taro, do not pack the soil down hard. Gently place the corm in the center, spread the healthy roots out, and fill the pot with soil. Make sure the top of the corm is just below the soil surface. Then water it thoroughly once. Let that water drain completely. Do not leave any standing water in the saucer.
Day 3: The Patience Test (I Almost Watered)
Here is where people mess up. After the repot, the plant still looks terrible. The leaves are still drooping. You feel the topsoil and it feels dry. You think, "Maybe I should water it." Do not do it.
The roots have been heavily pruned. They cannot uptake much water right now. Wet soil will only encourage the pathogen that caused the rot. Instead, I placed the pot in a bright spot with indirect light. I set a reminder on my phone to not touch it until day 5.
On day 3, I did not water. I did mist the remaining leaves lightly in the morning. Misting helps with humidity, but it does not replace watering. I used a spray bottle with distilled water. Tap water can leave white mineral spots on the leaves.
Day 5: Check Soil Moisture and First Sign of Life
By day 5, I could not stand it anymore. I poked my finger about two inches into the soil. It was still slightly damp but not wet. Good. I did not water yet.
I looked closely at the central spear (the new leaf emerging from the center of the plant). It was still brown at the tip. But the base of the petiole (the leaf stem) looked a bit firmer. The color was slightly greener, not as dark and translucent as before. I took a photo with my phone to compare later. I recommend you do the same. Photos are your best record if you cannot trust your memory.
Many people lose patience at this point and either overwater or give up. Do not be that person. I have been there. It is hard to watch a plant suffer and do nothing. But in revival situations, doing less is often doing more.
Day 7: The First Sign of Recovery (Do Not Celebrate Yet)
Seven days in. I checked the soil again. It was nearly dry to a depth of three inches. This time, I watered. I used room-temperature filtered water. I poured it slowly over the soil surface until I saw water seeping out of the drainage holes. I waited a minute, then emptied the saucer.
Within two hours of watering, I noticed one of the old leaves had straightened up slightly. It was not dramatic. But the petiole was not bending as sharply. The leaf was still yellow, though. I knew the yellow leaves would eventually die, so I left them. Removing them too early would create open wounds.
Day 10: Cutting the Old Leaves (This Feels Counterintuitive)
This is where I made a deliberate decision that I think saved the plant. Those yellowing, half-dead leaves were still attached. They were not photosynthesizing much, but they were draining energy from the corm. I decided to cut the largest, most damaged leaf off at the base.
I sterilized my scissors again. The cut was clean. A tiny bit of sap oozed out, which is normal for taro. I did not cut off more than two leaves. The plant still needed some green tissue for photosynthesis.
Within 24 hours, I saw a tiny green point at the center of the corm. It looked like a small spear tip. This was the new leaf emerging. You cannot imagine my relief. All the waiting had paid off.
Day 14: The New Leaf Unfurls (Success)
By day 14, the new leaf had fully unfurled. It was a rich, deep green. The edges were smooth, and the surface was waxy. This was a sign that the plant had recovered its energy reserves. The corm was alive.
I continued the same watering routine. Every 5 to 7 days, I checked the soil at a depth of two inches. If it was dry, I watered. If it was damp, I waited two more days. I moved the plant back to its permanent spot. Now, it gets bright indirect light for about 6 hours a day.
I did not fertilize for the first month after the rescue. Fertilizers contain salts that can burn already stressed roots. Once the plant showed consistent new growth for a month, I started feeding it with a diluted liquid fertilizer at half strength every two weeks. Taro is a heavy feeder, but only when it is healthy.
Common Questions People Ask Me About Reviving Taro
Will yellow leaves ever turn green again?
Sorry to disappoint you, but no. Once a leaf turns yellow due to root rot, stress, or nutrient deficiency, it cannot go back to green. That leaf is dying. Your goal is to stop the spread to the corm and the new leaves. Cut the yellow leaves off only after the plant has stabilized, usually after a week or two. If you cut them too early, you stress the plant further.
Can I save a taro if the corm is completely mushy?
If you can easily squeeze the corm and water pours out, or if it has no firm sections at all, it is probably gone. I have tried to save some that were 90% rotten by cutting away the bad parts. It works sometimes, but only if there is one healthy nodule or bud left. If the entire base is disintegrating, your best bet is to see if the stems can root in water as a cutting. I have done this once with a stem cutting. It rooted after three weeks in a glass of filtered water on a sunny windowsill. It is not ideal, but it is better than nothing.
How long does it take for a revived taro to look full again?
Honestly, it takes a few months. The first new leaf appeared in two weeks. But it was a small leaf. Each subsequent leaf will be larger, and the internode spacing will shorten. In my experience, after about 3 months of proper care, the plant starts to look bushy again. Before that, it will look a bit sparse. Do not be tempted to overfertilize to speed things up. That will only cause leaf burn.
Red Flags: When to Give Up and Start Over
There is a limit to everything. I encourage you to try, but I am also honest. If you have any of these problems, you may be better off buying a new taro.
- The corm has a foul, rotting smell that is unbearable.
- The roots are entirely dark and slide off with a gentle touch.
- The stem bases are mushy and the fibers look like soaked string.
- No signs of green anywhere after 4 weeks of your best care.
In those cases, the infection is systemic. The plant has no immune system left to fight back. I have thrown away two taros in my life. It is frustrating, but it taught me more than any success ever did.
The best way to learn is to kill a plant slowly and then figure out exactly why you killed it. That sounds harsh, but it is the truth of practical gardening. Books and websites give you rules. Death gives you experience.
The Right Environment to Prevent a Relapse
A revived taro is like a patient out of the ICU. It is alive, but you have to protect it from its own environment. Let me tell you how I maintain my taros after a successful rescue.
Watering Rhythm
I do not water on a fixed schedule. I water based on soil moisture. I stick my finger in the soil. If the top two inches are dry, I water. That usually ends up being every 5 to 7 days in my home. In summer, it becomes every 3 to 4 days due to higher evaporation. In winter, I might only water once every 10 days because the plant grows slower.
Humidity and Temperature
Taro is a tropical plant. It loves humidity above 60%. In the US or UK homes, indoor humidity is much lower, especially in winter when heaters run. I run a humidifier next to my taros during the dry months. If you do not have a humidifier, place the pot on a tray filled with pebbles and water. The water evaporates, raising humidity around the plant without keeping the roots wet.
Temperature matters too. Taro stops growing below 60°F (15°C). It starts to suffer below 50°F (10°C). I keep mine in a room that is between 65 and 80°F (18-27°C). Avoid cold drafts from windows or AC vents.
Light Adjustment After Revival
I mentioned bright indirect light. But after revival, I keep the plant in slightly lower light for the first two weeks to reduce transpiration stress. Then I gradually move it to a brighter spot over a week. A sudden change to high light can shock the delicate new roots.
Fertilizer Timing
I wait until the third new leaf appears. That means the root system is healthy enough to absorb nutrients. I use a balanced liquid fertilizer with an N-P-K ratio like 10-10-10 or a specific tuber fertilizer. I dilute it to half strength. Then I apply it every two weeks during the growth season (spring and summer).
My Final Thoughts on Saving a Dying Taro
I will be honest with you. Reviving a dying taro is not a 24-hour job. It takes patience and a willingness to do nothing when your instincts scream at you to water. The biggest difference between people who save their plants and people who lose them is the ability to wait.
I have lost plants because of overcare. I have watered out of anxiety, repotted out of boredom, and fertilized out of impatience. All of those actions made things worse. When you see a sick plant, your first reaction is to act. But sometimes, the most effective action is observation.
For the taro specifically, the root rot recovery is a numbers game. You need to cut away all dead tissue, give it a well-draining fresh start, and prevent waterlogging. The plant will do the heavy lifting if you get out of its way.
I also want to point you to some authoritative sources. The Royal Horticultural Society (RHS){:target="_blank"} has detailed guidance on growing Colocasia, and they emphasize the importance of sharp drainage and avoiding winter wetness. Similarly, the American Horticultural Society (AHS){:target="_blank"} provides data on plant hardiness zones, which helps you understand if you can grow taro outdoors or if it must be a houseplant in your region.
I have used both organizations' resources when I first started mixing soil. Their advice, combined with real trial and error, is what makes a successful grower.
Let me leave you with this one piece of practical advice. When in doubt, lift the pot. If it feels heavy and is full of water, do not water. If it feels suspiciously light, water it. Your hands are better gauges than a calendar.
And if you manage to revive your taro, make sure you never let it get to that point again. Healthy taros are vigorous growers. They can grow a new leaf every week. They do not want to die. The moment you fix the drowning problem, they will reward you with an explosion of green.
Frequently Asked Questions
Question 1: My taro is drooping, but the soil feels moist. Should I still water it?
Absolutely not. Drooping combined with moist or wet soil is the classic sign of root rot. You are dealing with an oxygen problem at the roots. Do not water. Instead, unpot the plant, inspect the roots, trim the unhealthy ones, and repot in fresh, dry-ish soil. That is the only way to fix it.
Question 2: Can I revive a taro that has no leaves left?
Yes, sometimes you can. If the corm is still firm and no rot is present, you have a chance. Reduce watering to very sparse amounts. Keep the soil barely moist. Place the pot in a bright, warm spot. Do not water until you see a shoot emerge. Patience is key here. Some growers wait months for a dormant corm. It is better than throwing it away, but be prepared for a long wait.
Question 3: How do I kill fungus gnats that came with the root rot?
Fungus gnats are a sign that your soil has been too wet for a long time. Once you fix the watering, the population will naturally decline. In the meantime, I use yellow sticky traps to catch adults. For the larvae in the soil, I let the top inch of soil dry out completely. If the problem persists, I add a layer of sand on top of the soil. Sand dries quickly and prevents the gnats from laying eggs.
The Last Resort Test
Let me share one more trick. I sometimes use a pencil or a wooden chopstick pressed into the soil for about 10 minutes. When I pull it out, I check the moisture level. This works better than my finger for deeper pots. If the wooden stick is dark and wet up to the top, I do not water. If it is only slightly damp at the bottom half, I water thoroughly.
This method has saved me from many overwatering incidents. It is old-school, but it works.
So, to wrap this up in plain terms. Check your taro. If it is dying, inspect the roots first. Cut away rot. Repot in a gritty, fast-draining mix. Put it in bright light. Water only when the top two inches are dry. Do not fertilize until it shows new growth. Wait for two weeks. That is the entire process. Good luck. Trust me, it works.